
Manage recording storage and retention
Keep useful video available and plan recording space for your team. Review usage, protect important footage, and check exactly what a cleanup will remove before confirming it.
Before you start
Section titled “Before you start”In the EyesOnIt web UI, open Administration → Recording Storage. Use a system administrator account to change retention or run cleanup. Operators with the appropriate media access can also protect video.
Watch the walkthrough
Section titled “Watch the walkthrough”Follow this captioned EyesOnIt web UI walkthrough, or use the written steps below.
1. Check disk usage
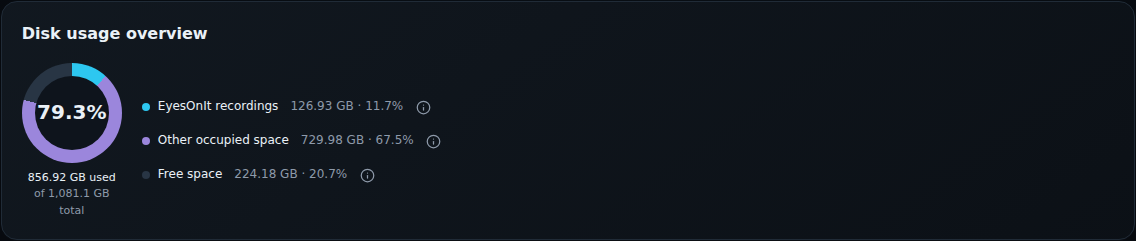
Section titled “1. Check disk usage”Disk usage overview separates EyesOnIt recordings, other occupied space, and free space on the recording disk. Its totals describe the disk; the camera and time filters below apply to the recording list.
2. Find the recordings
Section titled “2. Find the recordings”Under Find recordings, choose Camera scope, Server, Recording type, From, Through, and Protection as needed.
Dates use the displayed time zone. The interval selects whole clips and completed recording segments contained within it. Check the matching totals and recording rows; Usage by camera and recording type provides a breakdown.
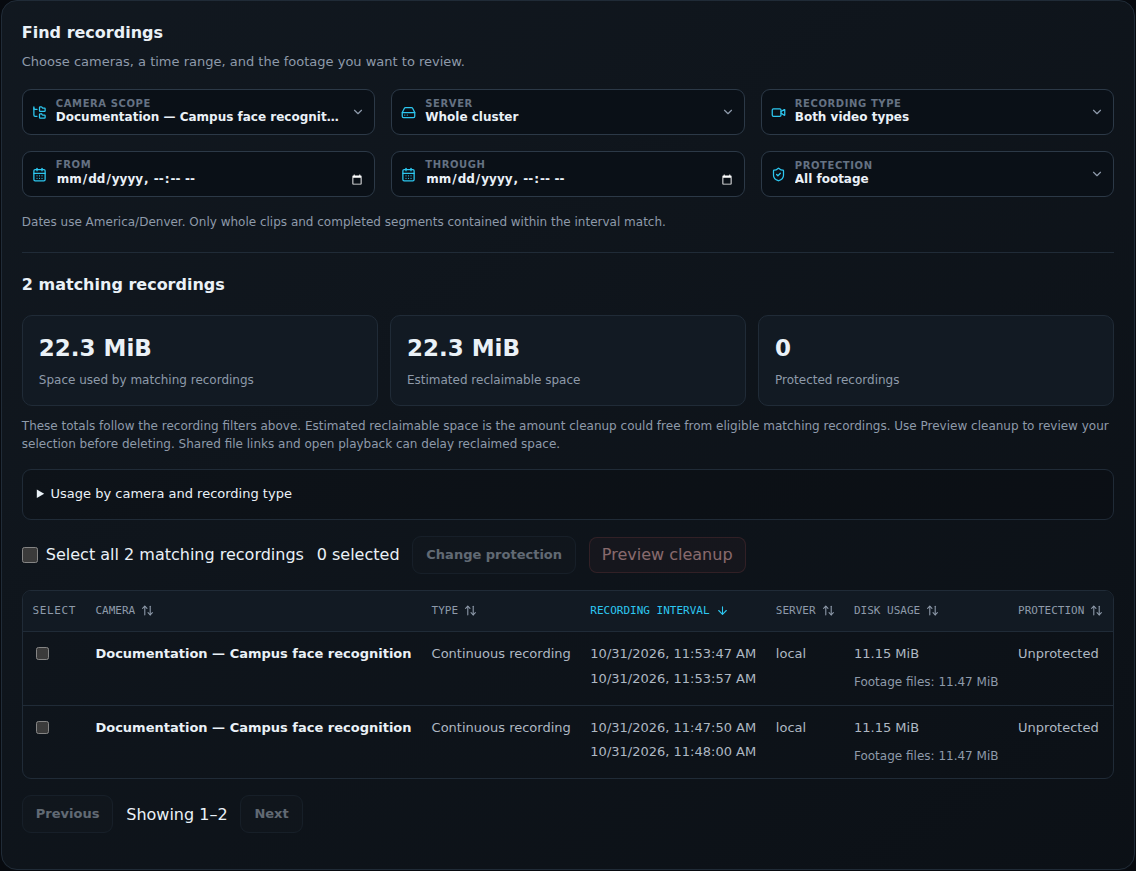
The list separates Continuous recordings, Incident clips, Incident snapshots, and Incident records. Snapshots and incident records are available to system administrators. Use Archive to watch continuous recordings and Incidents to review saved event evidence.
3. Set retention for each kind of data
Section titled “3. Set retention for each kind of data”Open Storage settings → Retention settings.
| Setting | What it keeps |
|---|---|
| Continuous recordings — site limit | The maximum continuous-video and searchable-archive history. A camera’s effective continuous retention is the smaller of this limit and its own recording setting. |
| Incident clips | Saved event video clips. |
| Incident snapshots | Saved incident images. |
| Incident records | The incident, notes, and review history. Removing the incident also removes its snapshot; saved clips retain their separate policy. |
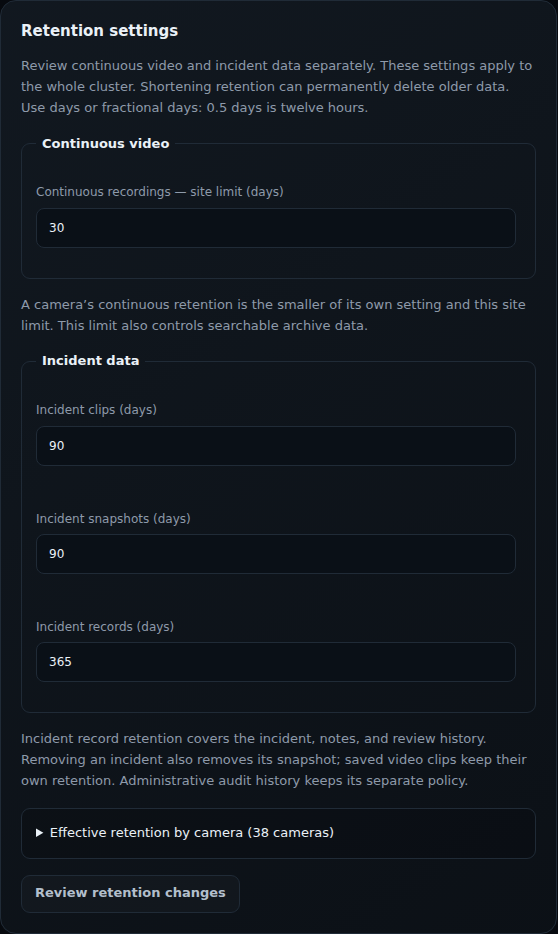
Enter the required days, then choose Review retention changes. Review affected items and protected footage before confirming Save retention and delete older items. Choose Cancel to keep the current policy.
Retention settings apply to the whole cluster, regardless of the recording filters. Deleting older data is permanent. Effective retention by camera shows the saved limits. Administrative audit history has its own retention setting under System.
4. Protect important footage
Section titled “4. Protect important footage”- Select the required video rows and choose Change protection.
- Choose Retain for days after recording or Protect until a date and time.
- Check the resulting expiration for each recording. The days option counts from the recording’s end time.
- Choose Apply protection change when the dates are correct.
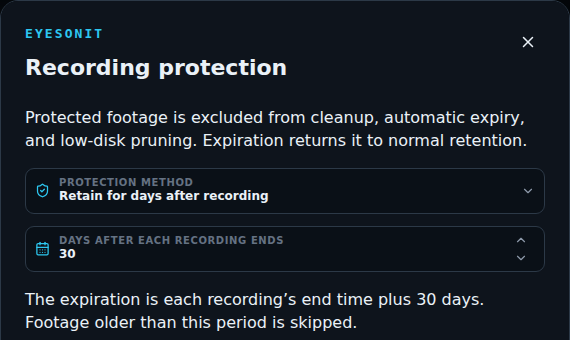
Protected footage stays out of automatic expiry, low-disk pruning, and ordinary cleanup until its protection expires. System administrators can also remove protection or explicitly include protected footage in a reviewed cleanup.
5. Preview a cleanup
Section titled “5. Preview a cleanup”Select individual rows or Select all … matching recordings, then choose Preview cleanup. Check the items, exclusions, and estimated reclaimed space. Keep footage closes the preview without deleting anything.
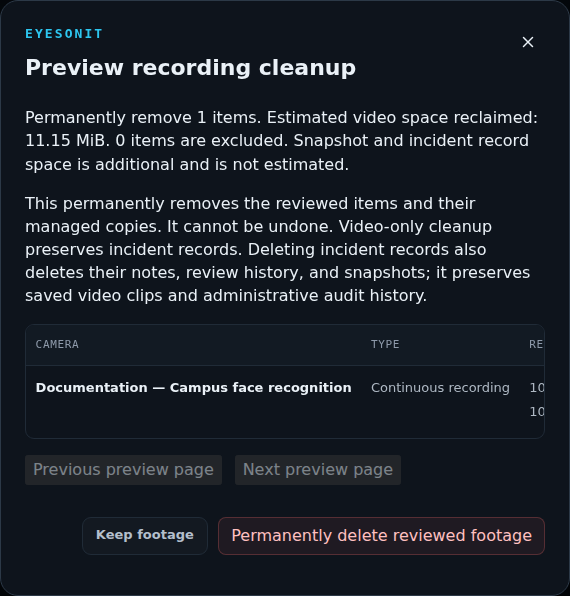
Confirm permanent deletion only for the reviewed items you intend to remove. Video-only cleanup preserves incident records. Deleting incident records also removes their notes, review history, and snapshots.
Follow Cleanup activity → View results for deleted, skipped, pending, or failed items. Disk space may be released after open playback or shared file copies finish using the footage.
Include every recording volume in your server backup and recovery plan.
Recover searchable history
Section titled “Recover searchable history”First check Archive for playable footage at the affected camera and time. In Recording Storage → Find recordings, choose the recording type and widen the time range to include the whole segment. Check the camera’s effective retention and the disk status. If a recording volume is unavailable, restore access to the existing volume and verify playback before starting index recovery. For lost storage, use a verified recovery copy.
If the footage plays, check Camera → Processing → Enable archive search and the indexing choice for the desired search method. Searchable history depends on what the camera collected. Enabling a method now governs future processing.
When System shows Archive integrity, read the affected UTC interval and reason. Searches overlapping a known gap are blocked. Follow the displayed state:
| Status | What to do |
|---|---|
| Recovering | Check the attempt count and next retry. Automatic recovery uses retained continuous footage and gives live analysis priority. |
| Action required | Resolve the reported cause. If Retry recovery is available, an administrator can start another attempt. Verify that the warning clears and rerun the search over the affected interval. |
| Status unavailable | Restore connectivity to the server and refresh System. Treat coverage as uncertain until the server reports its state. |
| Footage confirmed lost | After reviewing retention, backups, and the affected interval, an administrator can use Acknowledge footage loss when offered. It requires identity verification and the displayed confirmation text. It permanently records the loss. Searches still reject the affected interval. |
Warnings for fully expired history close automatically. Saved incident clips and snapshots follow their separate retention policies.