
Enroll people in Genetec
Give an enrolled face a useful name and clear samples for recognition and search.
1. Create an identity
Section titled “1. Create an identity”- Open EyesOnIt Face Recognition in Config Tool and choose Directory.
- Check Face enrollment ready.
- Choose Add identity.
- Enter Name and Identity ID. Use an ID that is stable and unique in the directory.
- Under Face photos, choose Add photos → Choose files…, or use Capture… for a suitable available image.
- Review the pending images and choose Save changes to create the identity and enroll the photos.
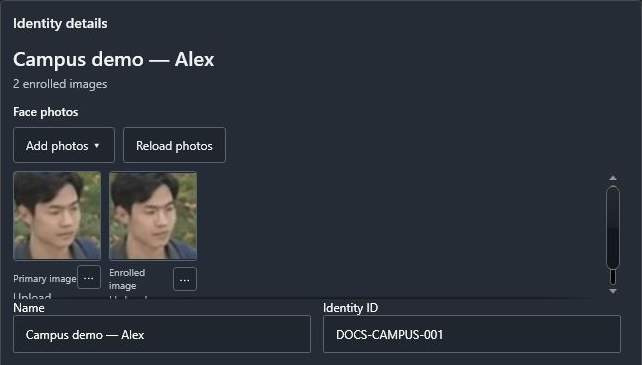
Use a sharp, well-lit image with one clear face. The campus example uses Campus demo — Alex and DOCS-CAMPUS-001, with two samples of the blue-backpack character.
2. Review and manage samples
Section titled “2. Review and manage samples”Find the person with Find a person, then select the identity tile. Reload photos refreshes its enrolled samples. Open a sample’s ⋯ menu to view the image, set it as primary, or remove it.
Set as primary (applies immediately) changes the representative portrait immediately. Remove image… (applies immediately) is also an immediate operation after its confirmation. Name, ID, pending photos, and group edits use Save changes or Cancel.
Check that the samples represent the intended person before using the identity in a camera rule. An identity managed remotely is read-only in this editor; update it through its owning system.
Continue with Identity groups, photo imports, or face recognition.