
PPE detection and incidents
Spot missing PPE in a work area and give your team an incident to review. This example creates an incident when a person is missing gloves.
Client: EyesOnIt web UI. For the core workflow, see How EyesOnIt works.
A Missing gloves — work area incident after a person meets the confirmed missing-gloves condition for 3 seconds.
Use the example name and timing below, or adapt them to your procedure.Before you start
Section titled “Before you start”- Open a connected camera in Monitor, using an account with camera configuration and incident review access.
- Choose a clear view of the work area. For gloves, hands should be visible during the activity you want to monitor.
- Have a notification profile ready if you want alerts, and recording storage ready if you want evidence clips.
Use a safe setting for tests involving missing equipment.
How a PPE incident is created
Section titled “How a PPE incident is created”- AssessConfirm the person’s equipment.
- QualifyMatch the PPE condition.
- TimeApply the rule’s dwell period.
- ReviewInvestigate the incident.
Detection defines the PPE condition. Rules sets its duration, active hours, and actions. EyesOnIt confirms equipment through repeated clear views, then applies dwell to the same tracked person.
Watch the walkthrough
Section titled “Watch the walkthrough”Follow this captioned EyesOnIt web UI walkthrough, or use the written steps below.
1. Select the camera and region
Section titled “1. Select the camera and region”- In Monitor, select the camera and choose Configure.
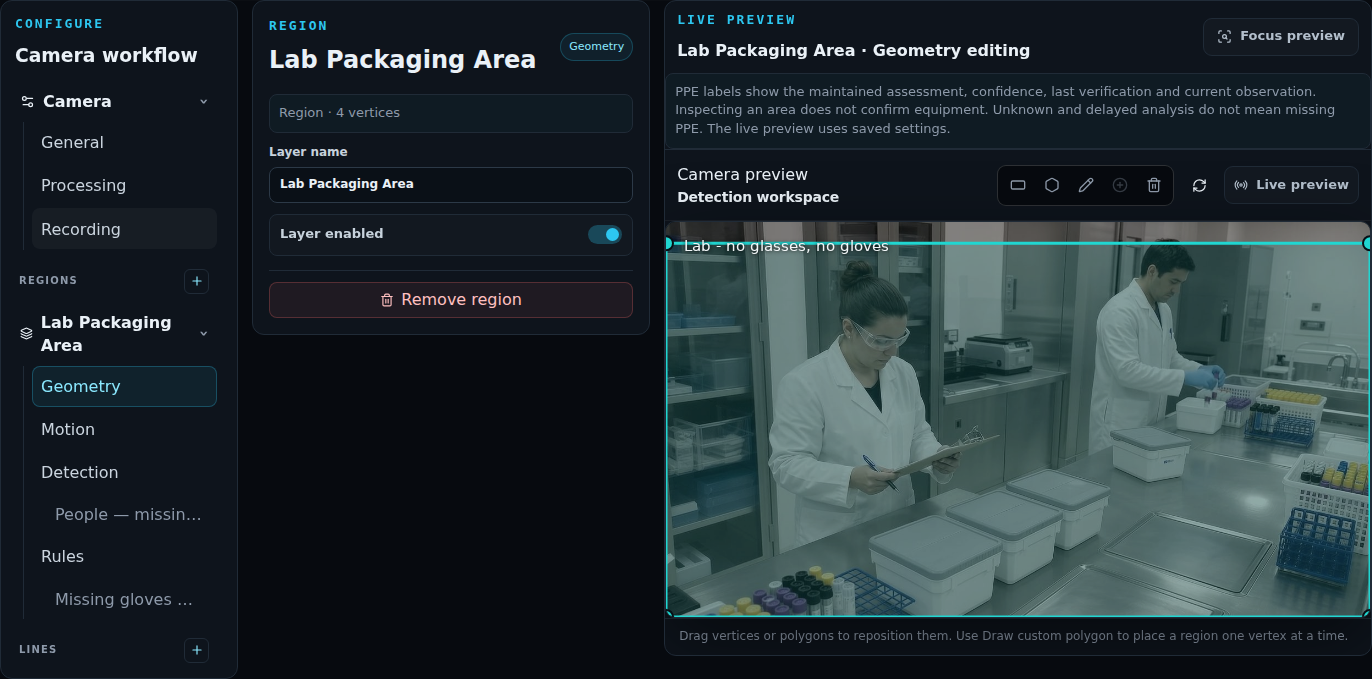
- In the detection workspace, draw or select a region around the area you want to monitor. Use Geometry to adjust its boundaries.
- Open Detection for that region. Add a detection configuration with the + control, or choose a suitable existing one.
- Give it a descriptive Configuration name, such as People — missing gloves. Keep Configuration enabled on.
- Set Object types to Person, then select PPE under the additional detection options.
Use separate configurations for additional natural-language, similarity, or face recognition conditions.
The center of a person’s detected box determines region membership. Check the boundary with people in their expected working positions.
2. Choose the PPE condition
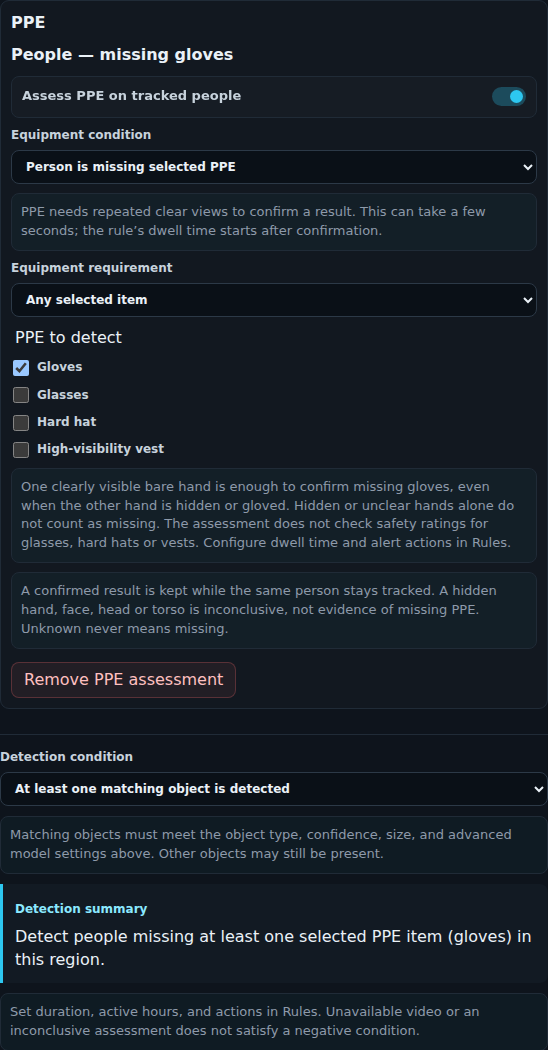
Section titled “2. Choose the PPE condition”For the missing-gloves example, use these settings in Detection:
| Control | Setting |
|---|---|
| Assess PPE on tracked people | On |
| Equipment condition | Person is missing selected PPE |
| Equipment requirement | Any selected item |
| PPE to detect | Gloves only |
| Detection condition | At least one matching object is detected |
Selecting PPE starts with a missing-equipment condition and the available equipment selected. For this example, leave only Gloves checked. Read the Detection summary to confirm the setup.
At least one matching object is detected means a person meeting your PPE condition is present. Use No matching objects are detected for a rule about their absence.
Choosing more than one item
Section titled “Choosing more than one item”Choose from Gloves, Glasses, Hard hat, and High-visibility vest, as offered by your server. Equipment requirement combines the selected items on one person:
| Equipment condition | Any selected item | All selected items |
|---|---|---|
| Person is missing selected PPE | Confirmed missing equipment for at least one selected item qualifies. | Every selected item must be confirmed missing. |
| Person is wearing selected PPE | Confirmed wearing of at least one selected item qualifies. | Every selected item must be confirmed worn. |
For gloves and a hard hat, Any selected item matches a person missing either. All selected items matches a person missing both.
3. Create the incident rule
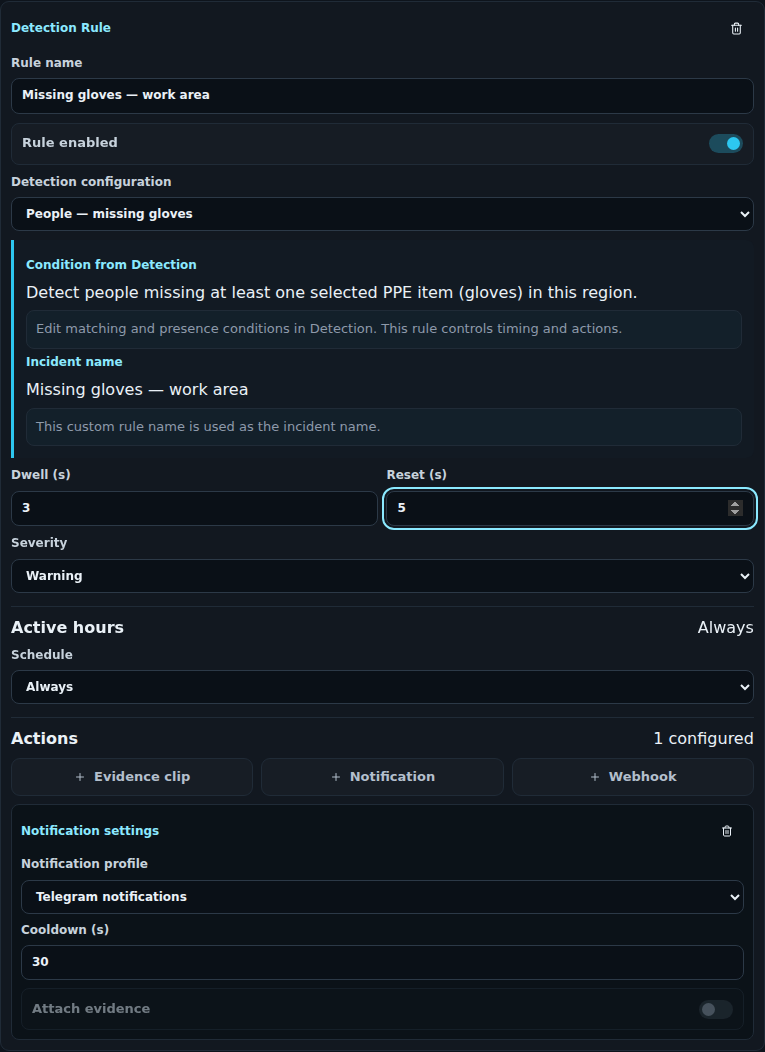
Section titled “3. Create the incident rule”- Open Rules for the region and choose Detection rule.
- Select People — missing gloves as the Detection configuration.
- Enter Missing gloves — work area as the Rule name and keep Rule enabled on.
- Set the timing and severity. The following values are an example for a controlled test:
| Control | Example | What it changes |
|---|---|---|
| Dwell (s) | 3 | The same person must continue to qualify for this duration after PPE confirmation. |
| Reset (s) | 5 | How long the condition must be confirmed clear before the occurrence ends. |
| Severity | Warning | The priority shown to the person reviewing the incident. |
| Schedule | Always | The rule is active at all times. Use Custom weekly hours for a defined schedule. |
Check Condition from Detection and Incident name. Your custom rule name becomes the incident name. For Custom weekly hours, check the time zone in Active hours.
Add notification or evidence actions
Section titled “Add notification or evidence actions”Add actions to notify your team or capture video:
- Choose Notification, select your Notification profile (for example, Telegram notifications), and set Cooldown (s). Cooldown controls notification frequency; it is separate from the incident rule’s dwell.
- Use Attach evidence to include evidence when permitted by the notification profile.
- Choose Evidence clip and set Pre-roll (s) and Post-roll (s) to capture the surrounding activity. Check recording and storage as part of your test.
4. Save and start monitoring
Section titled “4. Save and start monitoring”Choose Save configuration and confirm the save succeeds. In Monitor, use Start if the camera is stopped. Check the live preview with the saved settings.
PPE annotations show the equipment assessment and verification information. The rule creates an incident once its dwell period completes.
5. Test the complete workflow
Section titled “5. Test the complete workflow”Test at the lighting, distance, and working positions you expect to use.
| Test | Expected behavior |
|---|---|
| Both hands are visible and gloved | The missing-gloves condition stays clear. |
| A bare hand is clearly visible | Equipment confirmation followed by 3 seconds of dwell creates an incident. |
| A new person’s hands are hidden | The equipment assessment stays inconclusive until there is a clear view. |
| The person leaves before dwell completes | Their pending dwell ends; each person has their own timer. |
| The condition clears | The occurrence ends after the reset interval. The incident remains available for review. |
A confirmed assessment stays with the tracked person. Inconclusive evidence resets pending PPE dwell. Use a newly observed person when testing an unclear view.
If you added a notification, confirm receipt. If you added an evidence clip, open it and check the coverage.
6. Review the incident
Section titled “6. Review the incident”- Open Incidents and filter by camera, severity, or review status. Use the occurrence time to locate your test.
- Open the incident for your rule, such as Missing gloves — work area. Check the camera, occurrence time, rule, and available snapshot or video evidence.
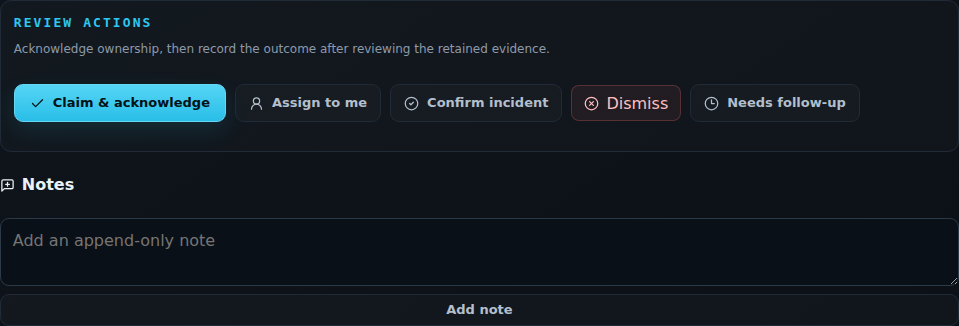
- Choose Claim & acknowledge to take responsibility for a new incident, or Assign to me when appropriate.
- Examine the visible equipment and the context. Add a factual note using Add note.
- Choose Confirm incident, Dismiss, or Needs follow-up, according to the evidence and your procedure. Provide a reason when prompted. Available actions depend on your permissions.
Acknowledging records who is handling the incident. Confirming or dismissing records the review outcome. Review remains available after an occurrence ends.
See Review and resolve incidents for the full queue and review workflow.
Troubleshoot the setup
Section titled “Troubleshoot the setup”| What you want to improve | What to check |
|---|---|
| Make PPE available in Detection | Select Person and check the server’s PPE support. |
| Get a clear equipment assessment | Adjust the camera view, lighting, or distance so the relevant body area is visible. |
| Create an incident from assessments | Choose a wearing or missing condition. Save an enabled rule with the correct configuration and active hours. |
| Check incident timing | Allow for equipment confirmation followed by dwell. Keep the person and equipment clearly visible. |
| Match people present in the region | Select At least one matching object is detected under Detection condition. |
| Deliver notifications | Check the notification action, profile, cooldown, and delivery status. |
| Capture the full evidence interval | Check the evidence action, recording, retention, storage, and pre-/post-roll settings. |
Your PPE rule is ready once you have tested detection, reviewed the incident, and checked its actions. Repeat the test when camera placement or working conditions change.