
Manage camera ownership and customer rule editing
Give each customer the right cameras and the ability to manage their own detections. Camera ownership keeps the camera’s history associated with its customer; permissions define who can view and configure it.
Watch the walkthrough
Section titled “Watch the walkthrough”Prepare the customer workspace
Section titled “Prepare the customer workspace”Use a system administrator account in the provider workspace. Open Administration → Organizations and select the customer. Complete its resource allowance and administrator setup before handoff. Servers with customer workspaces use browser accounts and scoped service tokens for access.
Keep these three choices separate:
| Choice | Purpose |
|---|---|
| Ownership | Associates the camera and its history with the customer. |
| Camera access | Selects the cameras available to the customer and its users. |
| Rule-editing access | Allows customer administrators and security managers to edit analytics on selected owned cameras. |
Create the camera under its owner
Section titled “Create the camera under its owner”Choose Choose cameras → Add customer camera in customer setup. Enter the camera name, masked source address, time zone, and analyzed FPS, then choose Create customer camera. It starts paused so you can review the settings before monitoring.
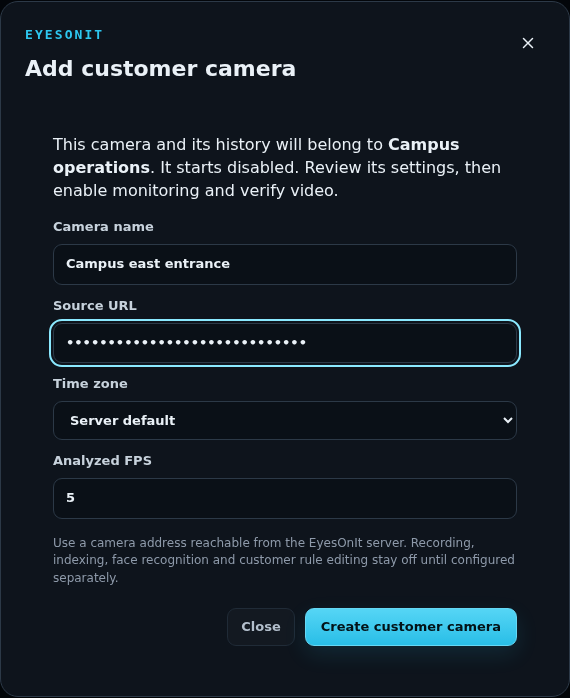
You can also use the customer camera selector to assign an existing eligible, unassigned camera. Assign a new camera while it is paused, before configuring analytics. Review the selected customer before applying the selection.
Individual users can receive a narrower selection through user and camera access settings. Camera grants control access; retained history remains associated with its original owner.
Delegate detection configuration
Section titled “Delegate detection configuration”- In Manage customer, review Allow camera configuration changes.
- Open Set up camera rules.
- In Cameras the customer can edit, select the owned cameras to delegate and choose Apply. The selection saves the rule-editing permission.
- Check the count of cameras that allow customer rule editing.
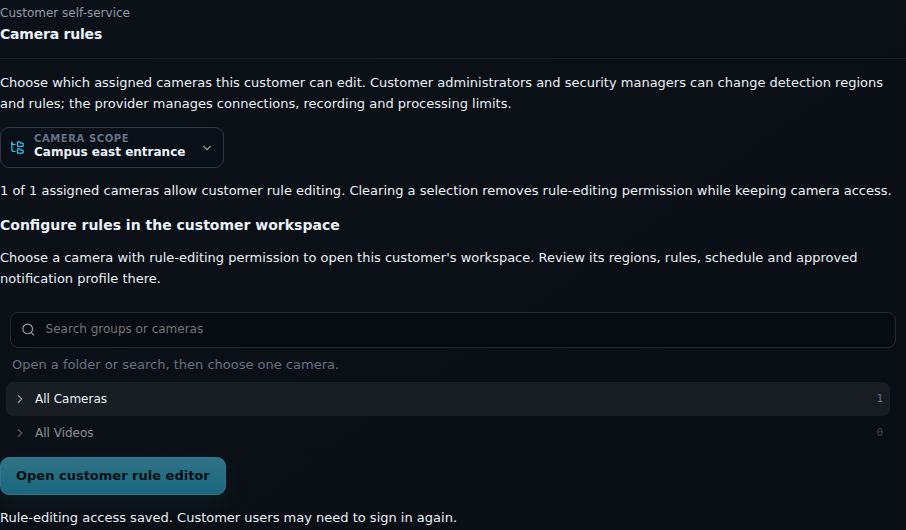
The provider manages connections, recording, and processing limits. Customer administrators and security managers can configure detection regions, filters, rules, schedules, and approved notification profiles on delegated cameras.
Verify the customer workflow
Section titled “Verify the customer workflow”Select the delegated camera under Configure rules in the customer workspace and choose Open customer rule editor. Start the camera in Monitor to check its live video, then review the detection settings. Save a tested configuration in the customer workspace.
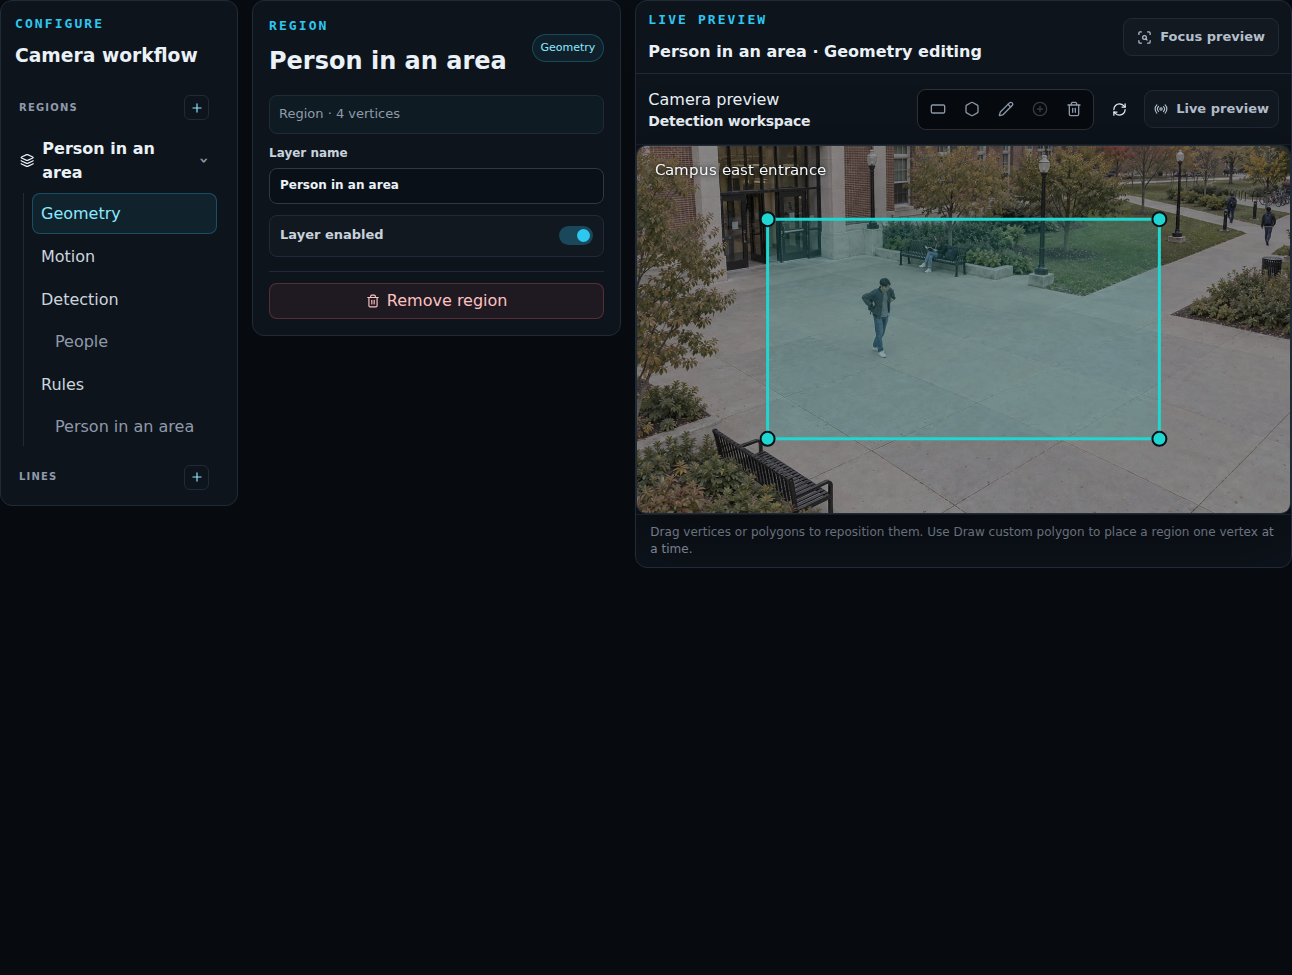
Use Return to provider workspace to resume central administration. Before handing over the camera, verify customer sign-in, live video, configuration access, and the resulting incident workflow.