
Send notifications and capture evidence
Give your team an alert they can act on and video they can review. A notification profile chooses the destination; a rule action chooses when to use it.
Before you start
Section titled “Before you start”- Have a saved detection rule or use the PPE example.
- Use administrator access to create delivery profiles. To attach an existing profile, use an account with analytics configuration access for the camera.
- For Telegram, have your team’s chat destination and access to the selected bot ready. Your administrator can confirm the bot used by your installation.
- For video clips, have recording storage configured and available.
Watch the walkthrough
Section titled “Watch the walkthrough”Follow this captioned EyesOnIt web UI walkthrough, or use the written steps below.
1. Create a notification profile
Section titled “1. Create a notification profile”- Open Administration → Notifications and choose Add profile.
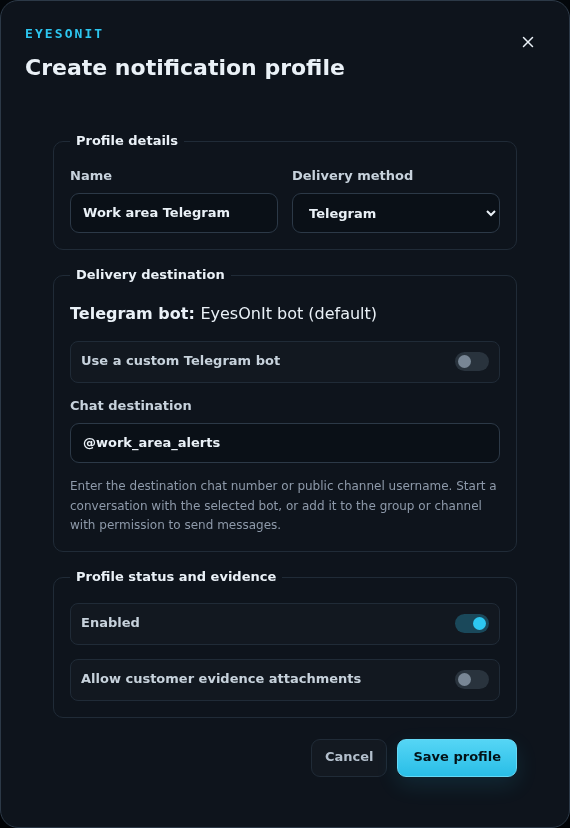
- Enter a name such as Work area Telegram and set Delivery method to Telegram.
- Use the default EyesOnIt bot, or select Use a custom Telegram bot to choose a Saved bot. Add bot token lets an administrator save a custom bot’s token.
- Enter Chat destination: the chat number or public channel username for your team. Start a conversation with the bot, or add it to the group/channel with permission to send messages.
- Keep Enabled on. Choose Allow customer evidence attachments if this destination should receive evidence.
- Choose Save profile.
Approve a customer destination
Section titled “Approve a customer destination”For customer use, choose Customer approval on the saved profile. Select the customer, review the destination and evidence permission, then choose Approve current settings. After changing a profile or its credential, review and approve the updated settings again.
Customer workspaces use the profiles approved for them; their provider manages destinations and credentials.
2. Attach delivery to the rule
Section titled “2. Attach delivery to the rule”- Open the camera’s Configure workspace, select the region, and open Rules.
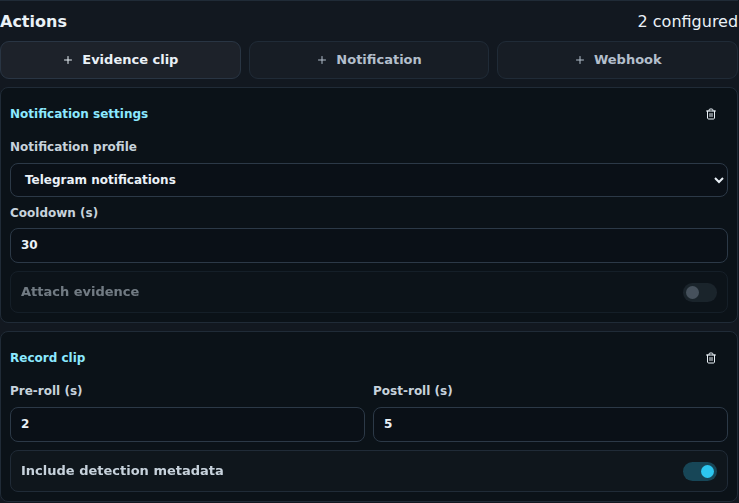
- In the rule’s Actions, choose Notification.
- Select the intended Notification profile. This example uses the installation’s Telegram notifications profile.
- Set Cooldown (s), such as 30, to space repeat notifications.
- Use Attach evidence when the profile allows attachments and the recipients should receive them.
Cooldown controls notification frequency. Dwell (s) controls when the rule qualifies for an incident; Reset (s) controls recovery.
3. Retain an evidence clip
Section titled “3. Retain an evidence clip”In the same rule, choose Evidence clip. Set Pre-roll (s) and Post-roll (s) to include context around the trigger. For example, use 2 seconds before and 5 seconds after. Keep Include detection metadata on when you want detection information with the clip.
Choose Save configuration and confirm the save succeeds.
Add continuous camera history
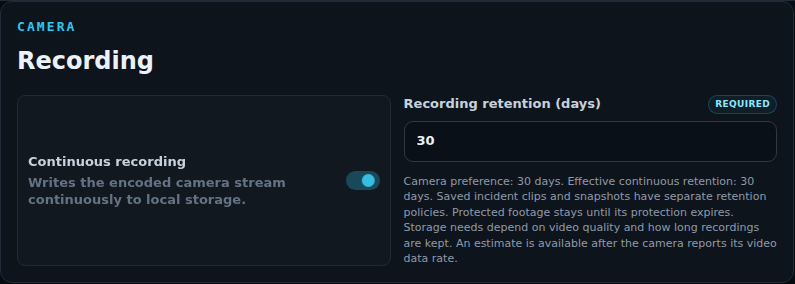
Section titled “Add continuous camera history”For ongoing playback in Archive, open Camera → Recording, enable Continuous recording, and choose Recording retention (days). Save the configuration. Continuous recordings and incident clips have separate retention policies; the site’s archive policy also applies to camera recording retention.
4. Test delivery and the complete workflow
Section titled “4. Test delivery and the complete workflow”Test delivery on a profile sends a labeled [TEST] message. For this test, use an active customer with a camera assigned and the current profile settings approved. Notification delivery must be enabled in the server settings.
- Choose Test delivery on the profile.
- Review the destination and select the customer camera.
- Choose Send test notification, completing the identity check if prompted.
- Use Check result to review delivery status, then confirm receipt with the recipient. This test sends no image or recording and creates no incident.
Then test the full rule with a controlled event. Open the incident, check its clip and surrounding context, and confirm the notification arrived. This also checks the rule’s schedule, dwell, and actions together.
| Check | Verify |
|---|---|
| Destination | The selected profile belongs to the intended team or customer. |
| Rule | The rule is enabled, scheduled, and saved with its actions. |
| Evidence | Pre-/post-roll and storage provide the context your team needs. |
| Receipt | The intended recipient sees the notification and can open the relevant incident. |