
Monitor system health
Use the health views to check that monitoring is running as expected and find the next action when a camera or service needs attention.
Before you start
Section titled “Before you start”Open the EyesOnIt web UI with permission to view system status. Overview summarizes daily monitoring; System provides server details. Your role and workspace determine the available information. The resource examples below use the system administrator view.
Watch the walkthrough
Section titled “Watch the walkthrough”Follow this captioned EyesOnIt web UI walkthrough, or use the written steps below.
1. Review the overview
Section titled “1. Review the overview”Open Overview and check System status, the service indicators, monitoring-camera count, and Camera attention. Choose Refresh status to update the view.
| Check | What to review |
|---|---|
| Local API | Connection to the EyesOnIt backend. |
| Analytics | Readiness of video analysis. |
| Compute node | Processing-server health in the system view. |
| Archive Search | Search service readiness, when shown. |
| Camera attention | Cameras reporting degraded or offline status. |
Use Open monitor to review individual sources. Check the selected source’s status, analyzed FPS, resolution, and last-frame time. Compare those details with its intended schedule and processing settings. A stopped or completed sample video has a different expected state from a continuously monitored camera.
2. Check processing resources
Section titled “2. Check processing resources”Open System and choose Refresh. Review CPU, RAM, GPUs, and Cameras, then Compute node health for each processing server.

Compare utilization with the workload you normally run. Camera count, resolution, analyzed FPS, and selected analysis features all contribute to processing demand.
Read the node’s status message when it needs attention. It distinguishes a processing problem from missing resource telemetry. Use the message to focus your next check—for example, camera status, video connectivity, or search readiness.
3. Review features and recording space
Section titled “3. Review features and recording space”Licensed features lists the features available on the system. Review it when preparing a new workflow, such as archive search or face recognition.
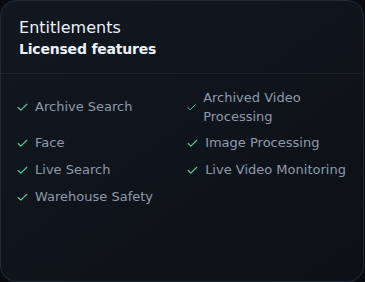
For recording capacity, open Recording Storage. Compare free disk space, recording usage, and retention with the history your team needs.
Follow up with useful context
Section titled “Follow up with useful context”When an issue continues after refreshing, collect:
- The camera or processing-server name and the time the behavior occurred.
- The status message and affected task, such as live monitoring, playback, or search.
- The relevant processing settings and any recent change.
- A screenshot of the affected status or result, with credentials and private account information outside the image.
Share that context with your EyesOnIt administrator or support contact. It helps them connect the visible behavior with the correct source and time. Runtime settings and recovery controls are administrator tools; review the affected workflow before changing them.
For a multi-node installation, check cluster health and camera failover before and after planned maintenance.
For checks organized by symptom and the details to include in a support request, follow Troubleshoot EyesOnIt.