
Recognize enrolled people in video
Recognize enrolled people in a camera view, create incidents when they appear, and find their appearances in recorded video.
Before you start
Section titled “Before you start”Use the EyesOnIt web UI with access to the camera, identity directory, and the workflow you want to configure. Enroll the person’s photos and create any identity groups first.
Choose a view where faces are clear and visible. Test with footage that represents the camera’s lighting, distance, and viewing angle. The example recognizes the enrolled campus character Campus demo — Alex through Documentation — Campus staff.
Watch the walkthrough
Section titled “Watch the walkthrough”Follow this captioned EyesOnIt web UI walkthrough, or use the written steps below.
1. Choose who to detect
Section titled “1. Choose who to detect”- In Monitor, open the source’s Configure workspace.
- Select the region to monitor, then open its Detection configuration.
- Enable Use object type, select Person, and choose Face.
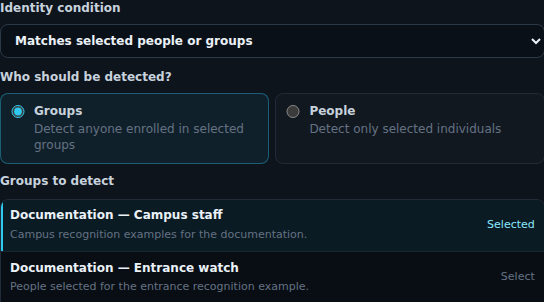
- Set Identity condition to Matches selected people or groups.
- Under Who should be detected?, choose Groups or People, then select your targets. In larger directories, search by name or external ID.
- Set Minimum face match. The illustrated test uses 0.75; verify the setting against representative footage.
2. Create and test the incident rule
Section titled “2. Create and test the incident rule”- Open Rules for that detection and add a Detection rule.
- Give it a useful name, such as Campus staff recognized. Set its duration, active hours, and severity for the task.
- Choose Save configuration and run the source.
- In Incidents, select the camera and review the resulting event and snapshot.
The example uses a presence rule with zero dwell time and no notification actions. Its snapshot highlights the enrolled person with their display name and face-match score.
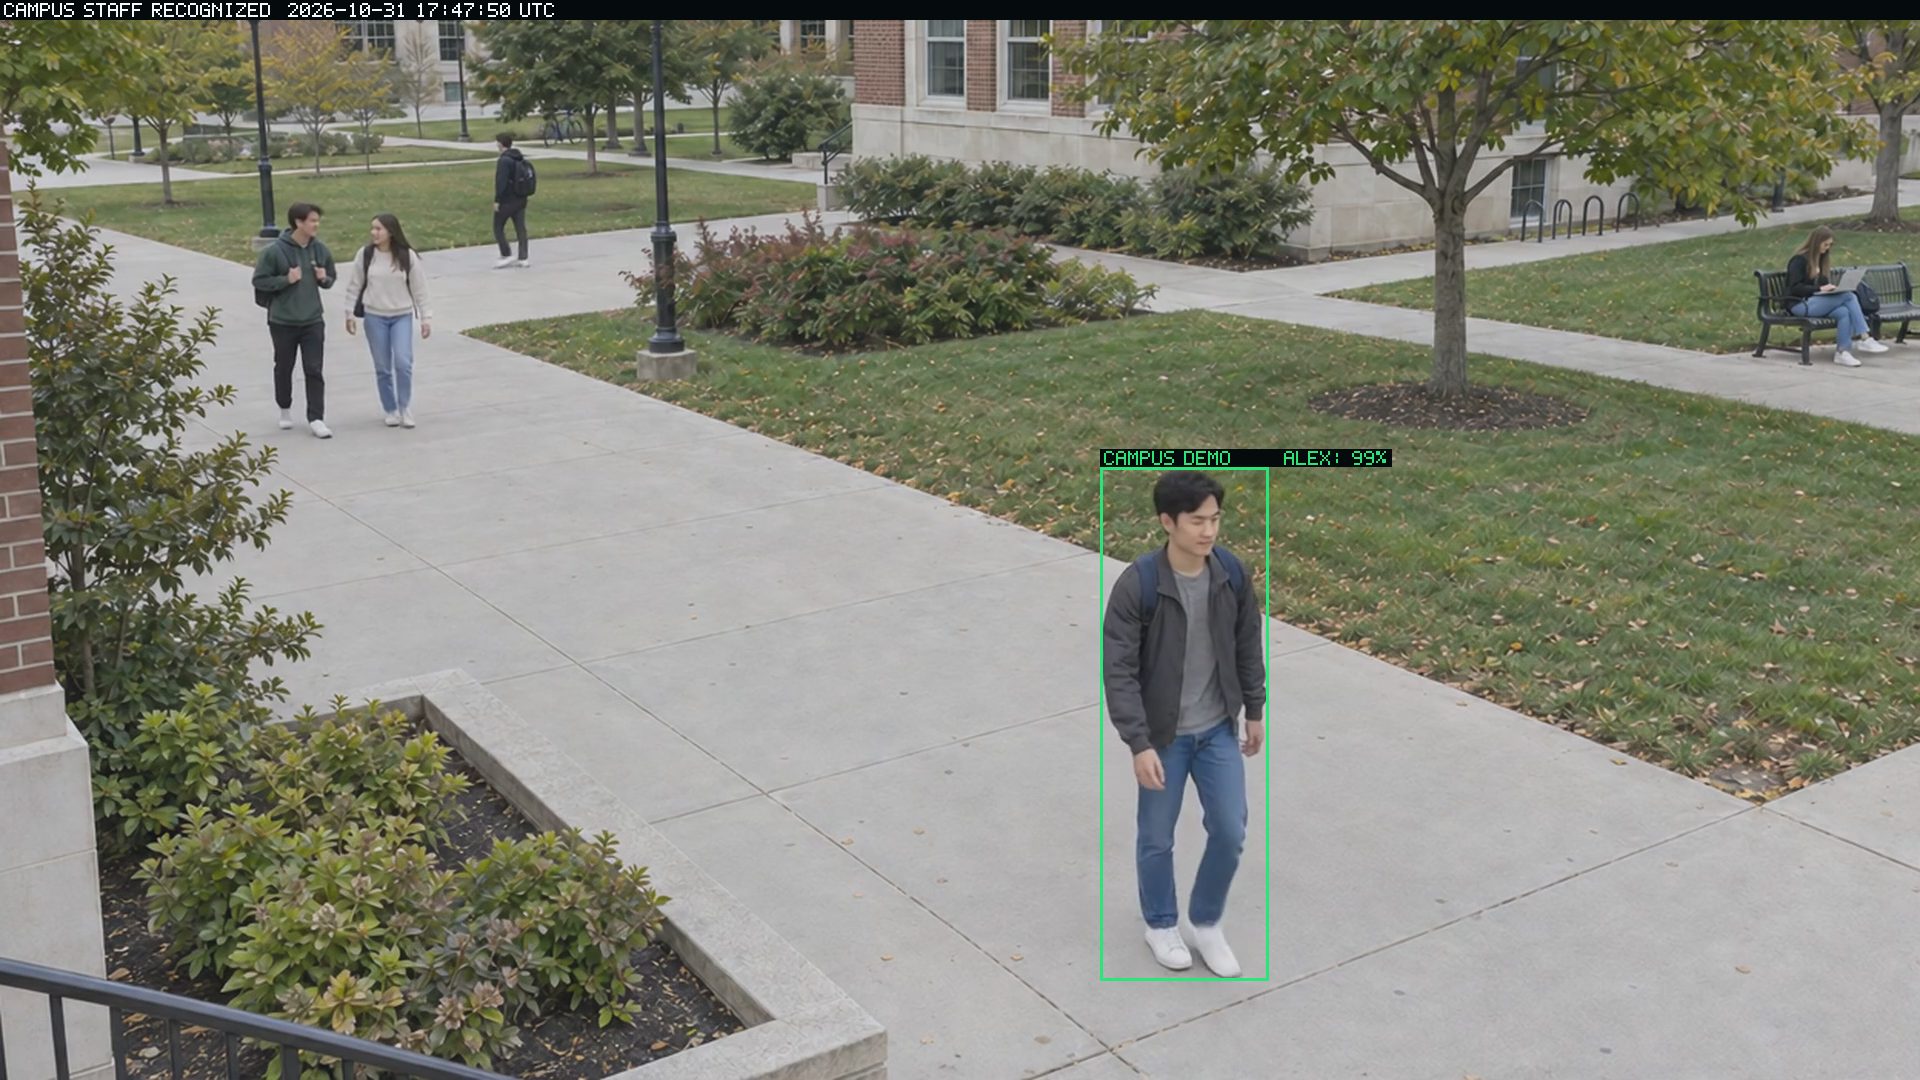
Check the image and surrounding footage as part of incident review. Add notifications and evidence actions when you are ready to deliver the event to your team.
3. Find appearances in recorded video
Section titled “3. Find appearances in recorded video”Enable Camera → Processing → Enable archive search → Faces for the sources whose history you want to search. Enable Continuous recording under Recording for surrounding playback, then save and run the sources to collect history.
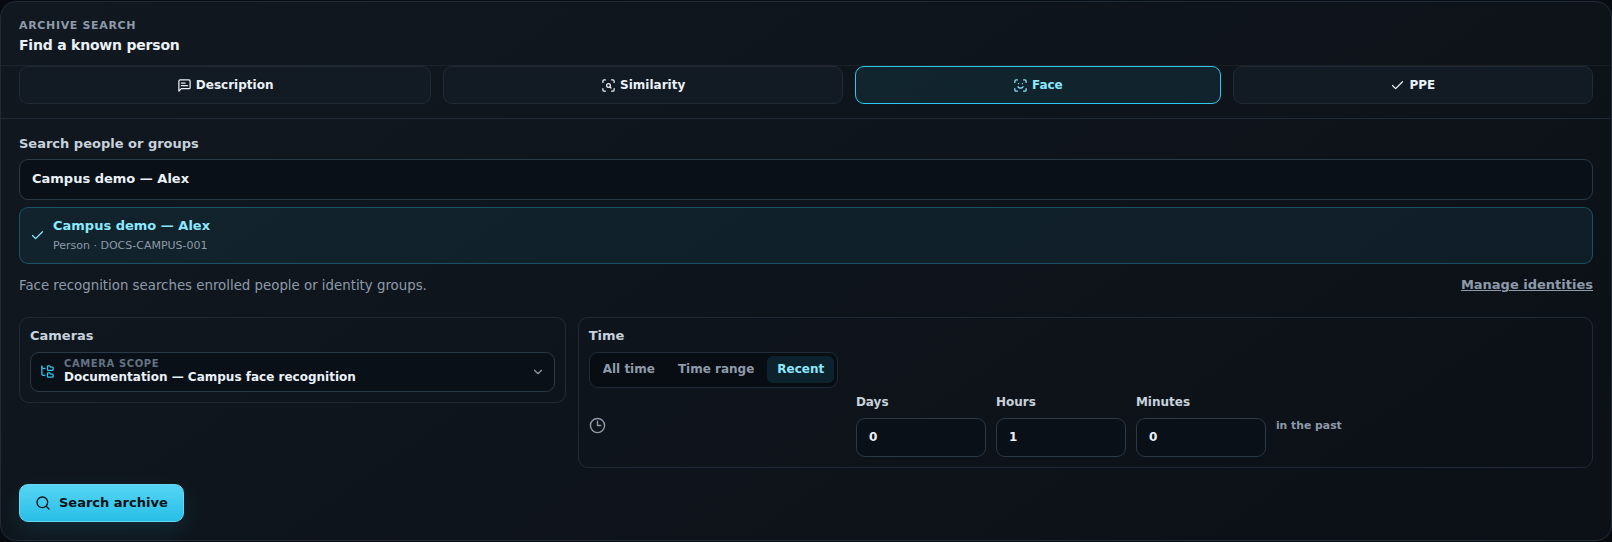
- Open Search → Archive → Face.
- Under Search people or groups, type the display name or external ID and select the correct Person or Group result.
- Choose Camera scope and the time period, then Search archive.
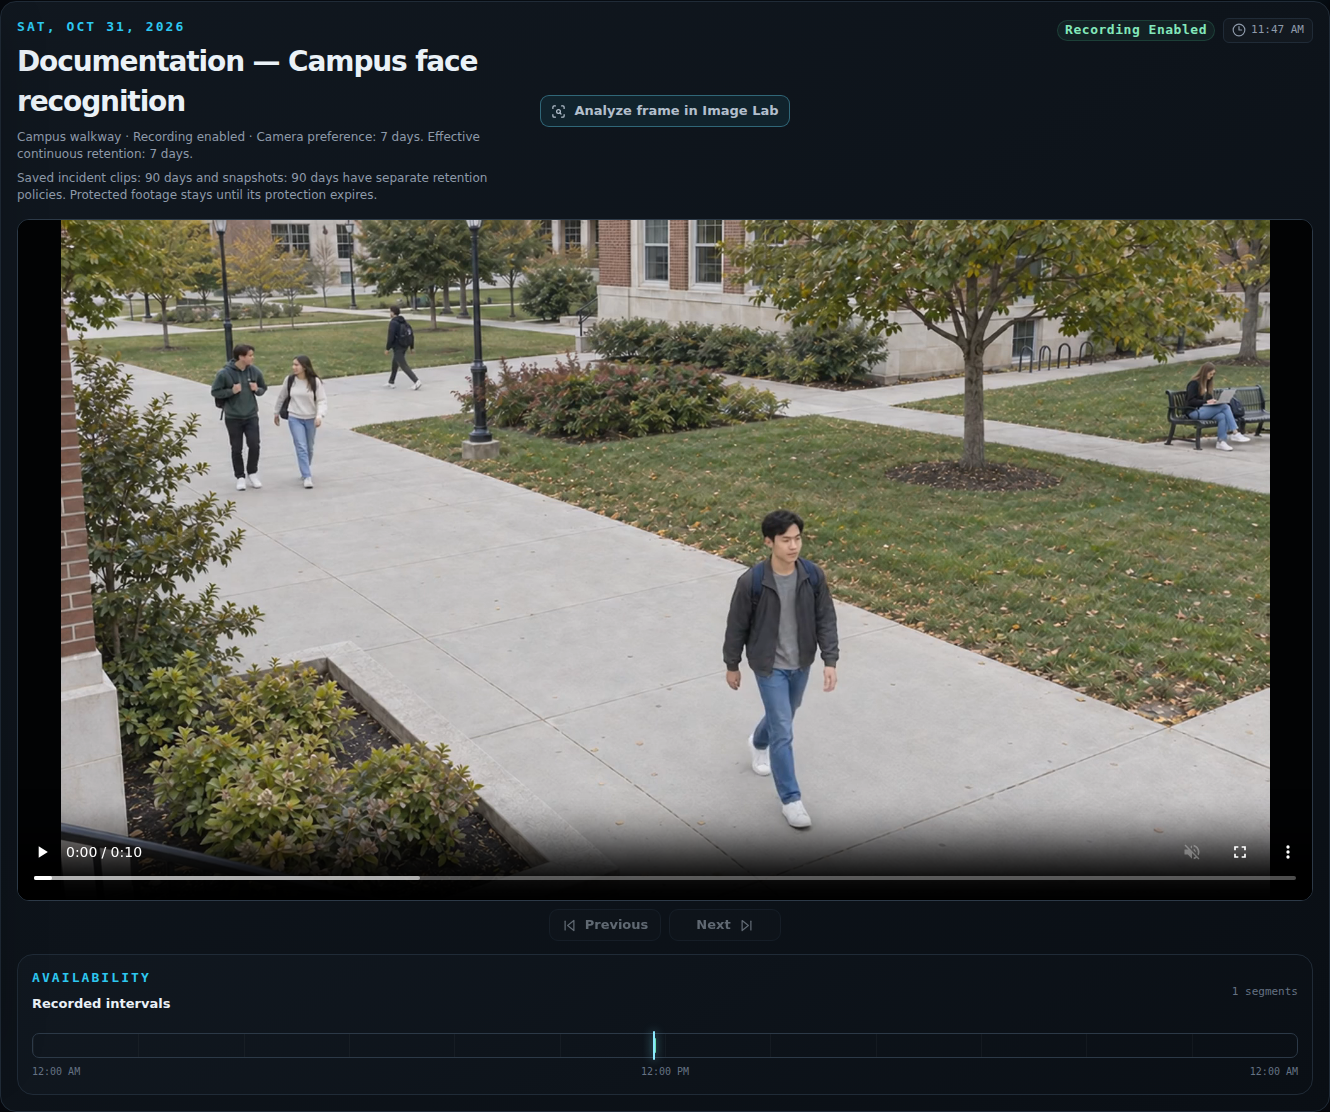
Review All matches with Best match sorting to inspect candidates. Use Open playback to compare the person in the recording with the enrolled samples and review the surrounding activity.
Watch for new appearances
Section titled “Watch for new appearances”For a temporary watch, choose Search → Live → Face, select the person or group, and choose the cameras. Set Duration (seconds), Alert threshold, and Alert cooldown (seconds), then choose Start live search. Check for Ready for matches.
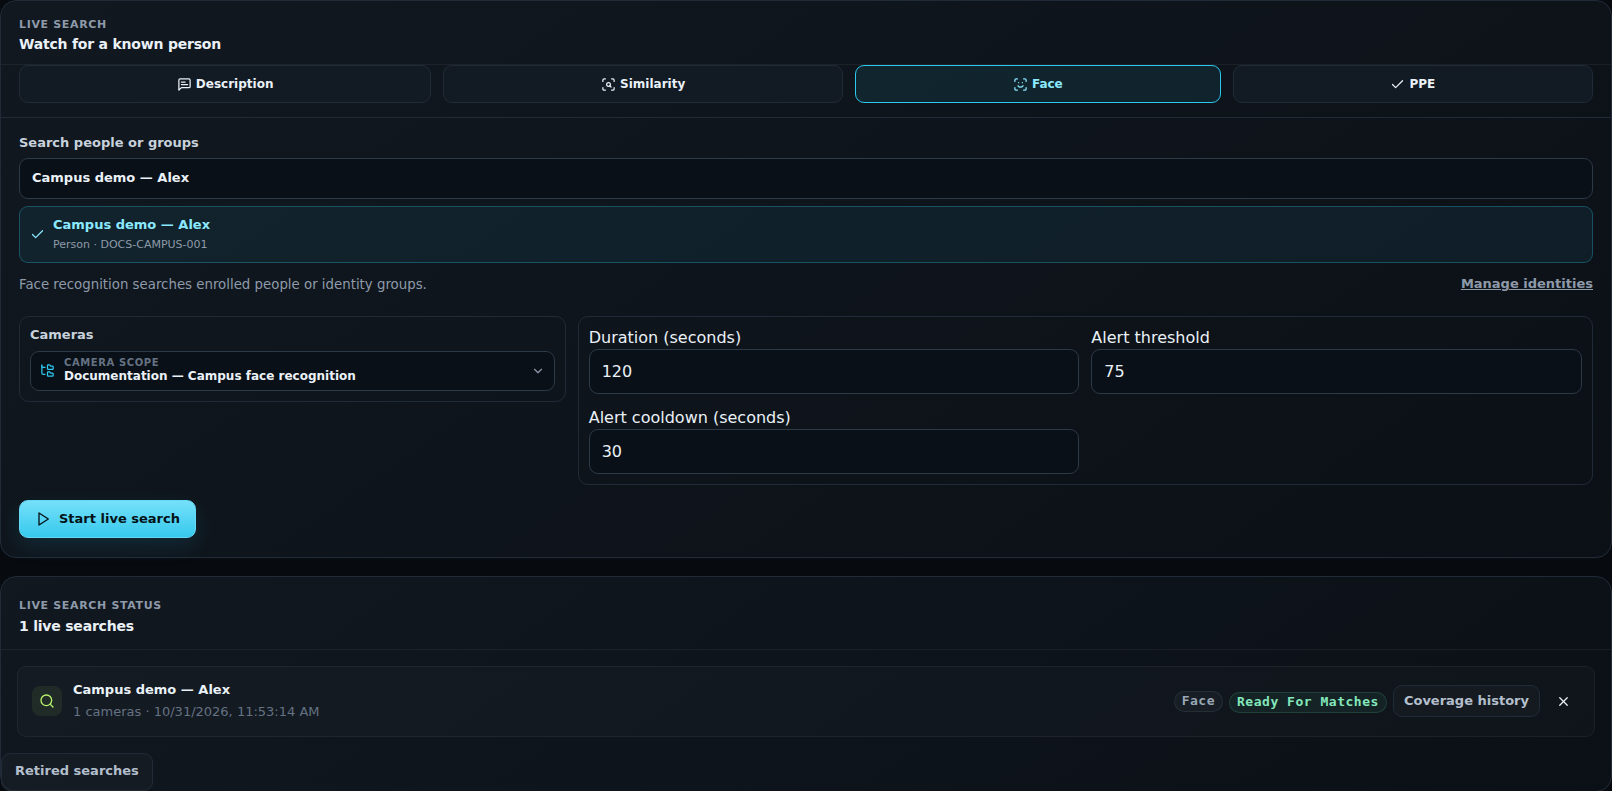
Review candidates in Overview → Live search results. Return to Search → Live and use the session’s X control when finished. A saved detection rule handles ongoing incident creation; a live search follows a temporary investigation.
Other recognition conditions
Section titled “Other recognition conditions”Choose Recognized as someone outside the selection when the task concerns arrivals outside a selected team. Enable Include unidentified faces to also include clear, successfully assessed faces that have no enrolled identity match. Review this condition against representative arrivals before adding incident actions.