
Organize cameras and video sources
Group cameras by site, area, or task so your team can find the right views quickly. The shared folder tree is available throughout the web UI, including Monitor, Archive, Incidents, and Search.
Before you start
Section titled “Before you start”Use an account with permission to manage camera organization. Open Camera organization from the navigation, or use Manage camera organization beside Camera scope in Monitor.
Folders can contain cameras and recorded-video sources. Start with a structure that reflects how your team works. The screenshots use this example:
Documentation examples Campus Entrances Walkways Loading bay Investigation setWatch the walkthrough
Section titled “Watch the walkthrough”Create folders, assign sources, and apply Camera scope in this captioned EyesOnIt web UI walkthrough. The example groups campus demo sources under Campus walkthrough, with Entrances and Review set subfolders.
1. Create the folders
Section titled “1. Create the folders”- Under Folders, choose Add top-level folder and enter a name.
- Use Add folder inside … on that folder’s row to create a subfolder.
- Repeat for the areas you need, such as Entrances and Walkways under Campus.
Every change saves immediately. All Cameras and All Videos are automatic groups that update as sources are added or removed. Create your own folders for sites and tasks.
2. Assign the sources
Section titled “2. Assign the sources”- Select a folder, such as Entrances.
- Under Available to add, search by source name and select the sources you want.
- Choose Add to folder. The sources move into the In this folder list.
- Use All, Cameras, or Videos to narrow either list. Select all … shown selects the currently displayed items.
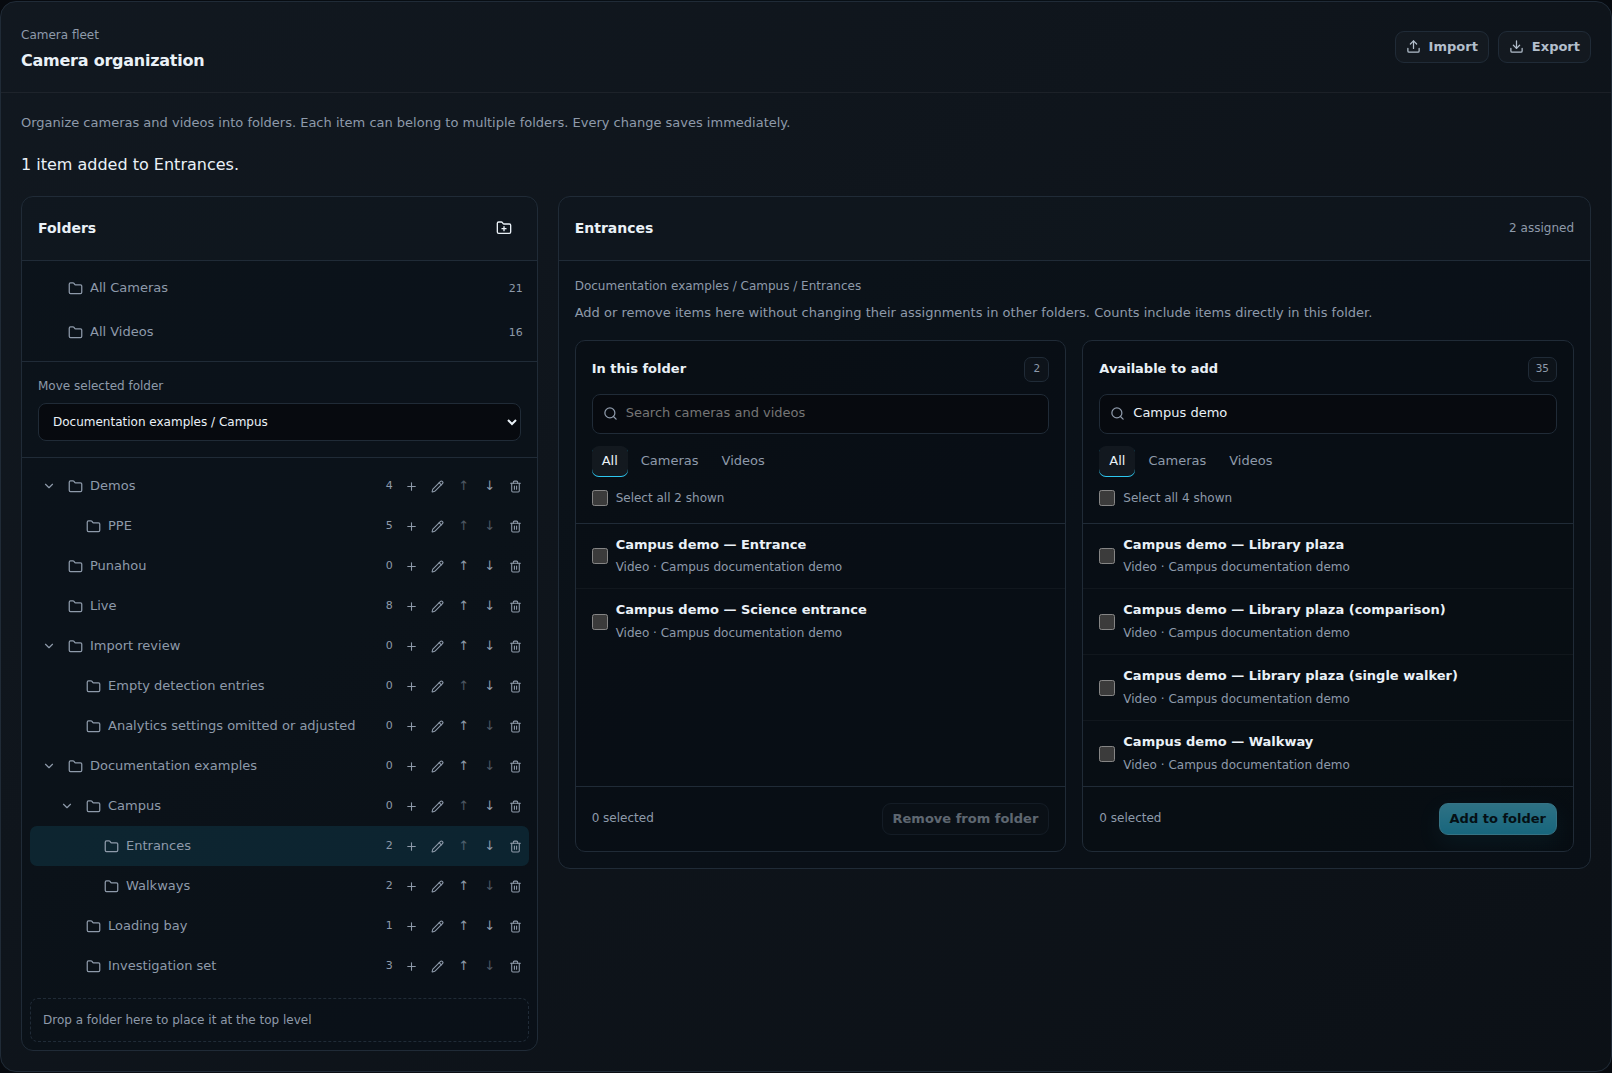
A source can belong to several folders. For example, keep an entrance camera in Campus → Entrances and also add it to Investigation set for a temporary review.
To remove an assignment, select it under In this folder and choose Remove from folder. Its assignments in other folders remain in place.
3. Use folders in your workflow
Section titled “3. Use folders in your workflow”Open Camera scope in Monitor, Incidents, or Search. Expand a folder, select individual sources or the folder’s contents, and choose Apply. Cameras selected through several folders count once.
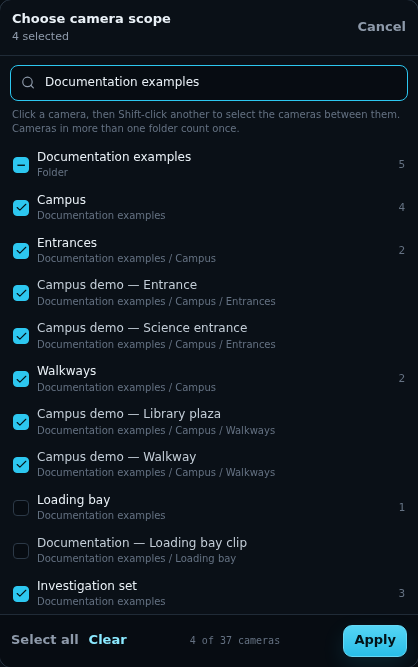
Archive uses the same folders to choose one source for recording playback. Folder counts in Camera organization describe direct assignments; scope selectors also include the contents of nested folders.
Maintain the structure
Section titled “Maintain the structure”Use the controls on a folder’s row to rename it, add a subfolder, or move it up or down. Move selected folder changes its parent. You can also drag folders to rearrange them; Undo folder move reverses the most recent move.
Deleting a folder opens a review showing its affected subfolders and assignments. Review that list before confirming Delete subtree. The camera and video sources themselves remain available.
Folders organize the views available to your account. Camera permissions determine who can access those sources.
Use the camera library to prepare sources and processing assignments. To reuse camera settings on another server, export and import the configuration.