
Define regions and lines in Genetec
Use a region for activity within an area and a line for movement across a boundary.
1. Draw and name a region
Section titled “1. Draw and name a region”- Select the camera and open Analytics → EyesOnIt Configuration.
- In Video preview & overlays, use Add Rectangle, Add Polygon, or Free Form. Hover over the toolbar icons to read their names.
- Drag to establish rectangle or polygon bounds. For Free Form, click each vertex and double-click the last vertex to close the polygon.
- Select the region’s General page. Set Region Name and keep Enabled on.
- Drag the vertices to refine the boundary and check the preview against representative working positions.
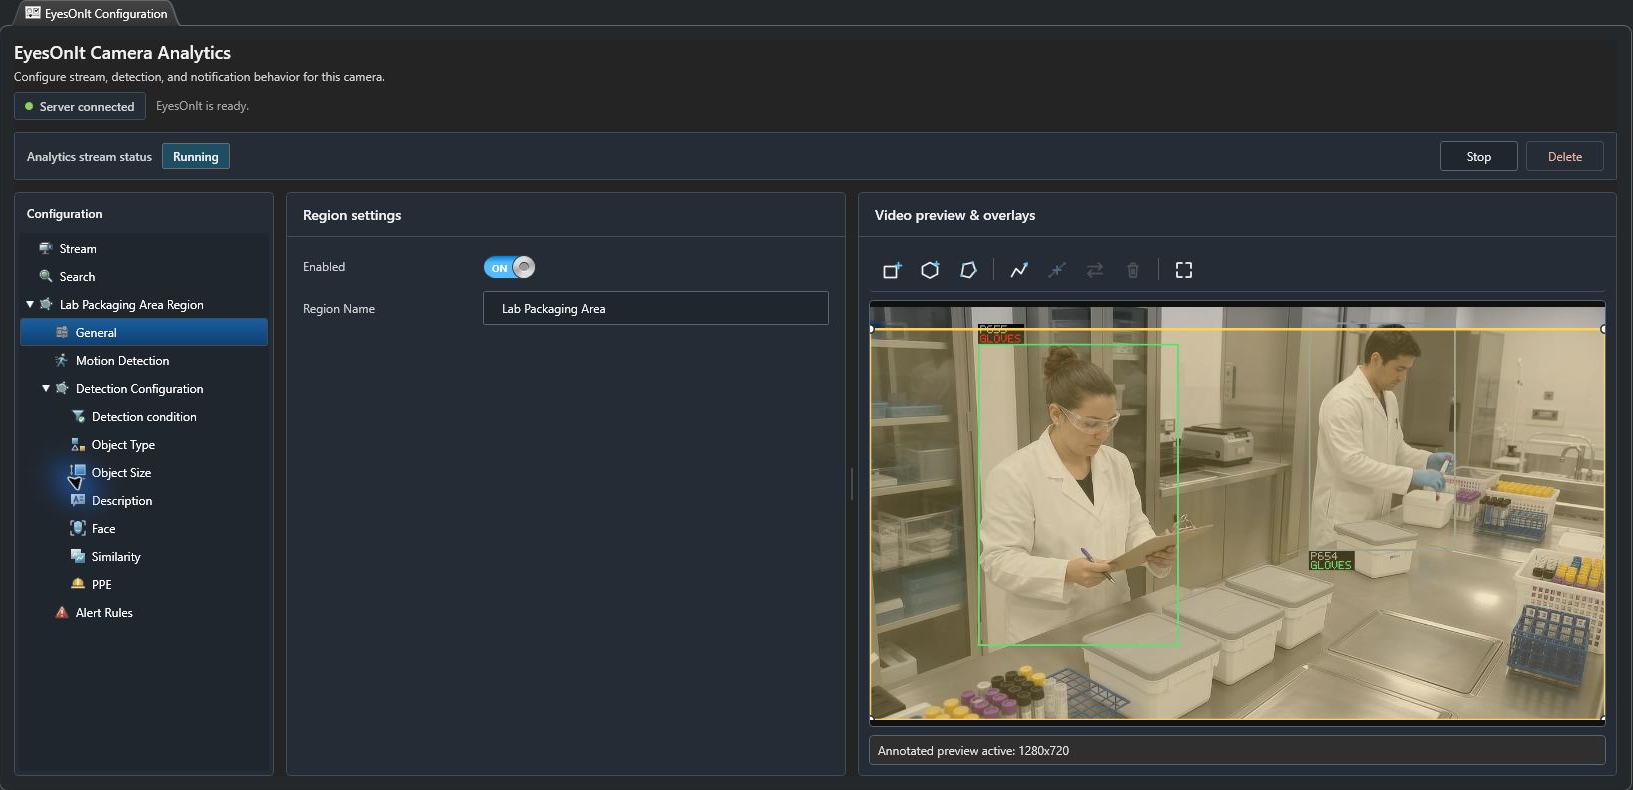
The center of the detected object’s box determines region membership. For a lab work area, include seated positions and visible hands. For a crossing, cover both sides of the boundary.
2. Add a crossing line
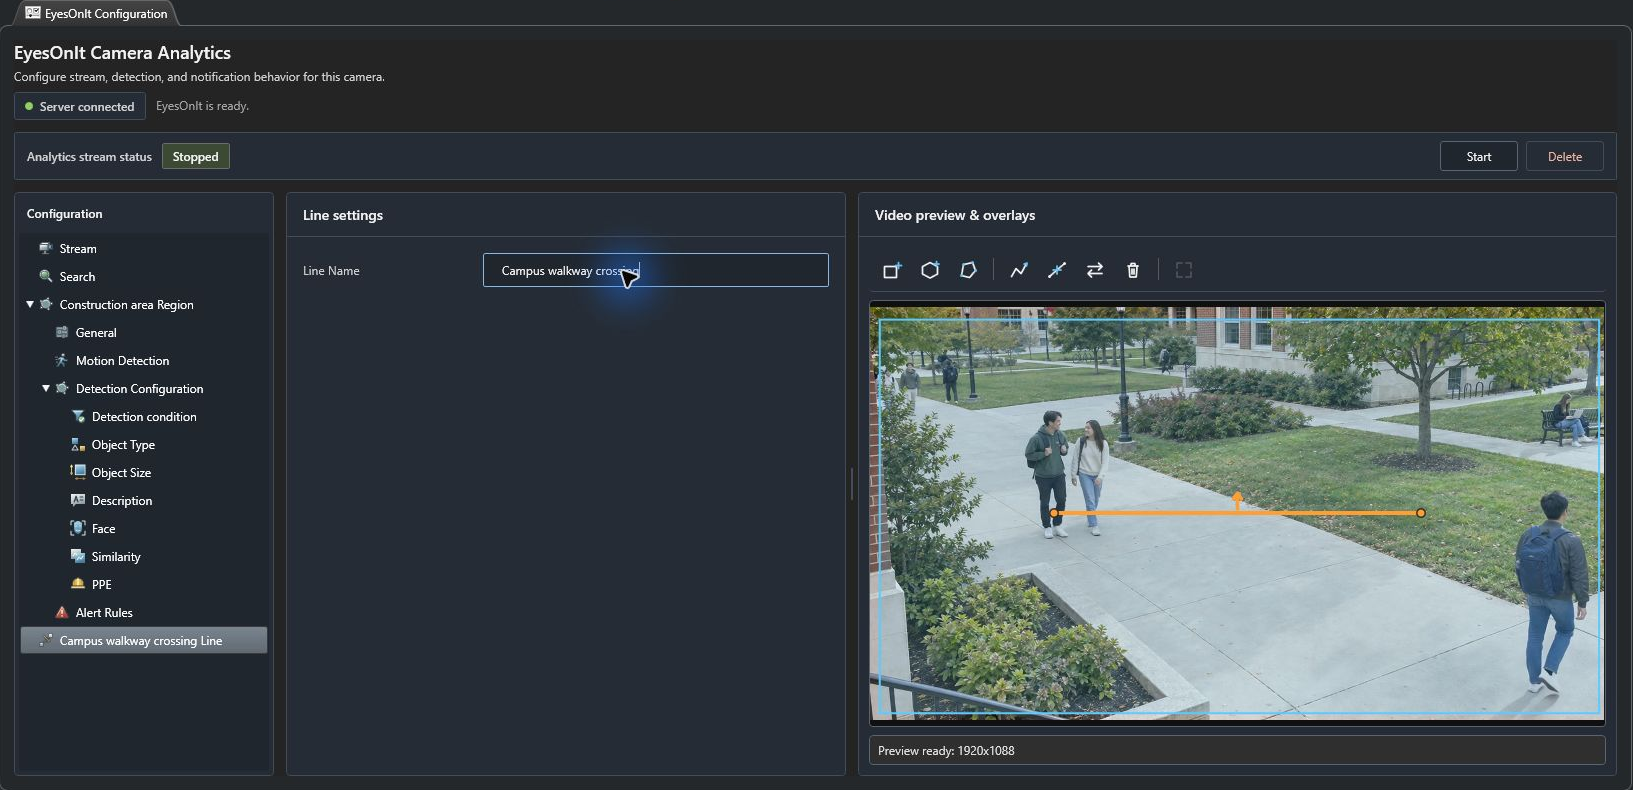
Section titled “2. Add a crossing line”Choose Add Polyline in the preview toolbar. Genetec inserts a line that you can position by dragging its endpoints. Select the line in the configuration tree and enter Line Name. Add Vertex inserts a point in the selected segment; Flip Direction reverses the line’s direction.
Place both endpoints inside the region that supplies its detections. The native editor associates a line with a containing region and validates that relationship when saving. Check the line’s direction arrow and test the direction against real movement.
3. Create the crossing rule
Section titled “3. Create the crossing rule”- Open the containing region’s Alert Rules. If you want crossing alerts only, select and remove the initial Detection condition rule.
- Choose Add Alert Rule (+). A new rule starts as Detection condition, with Warning severity, 1 second dwell, 5 seconds reset, and Always hours.
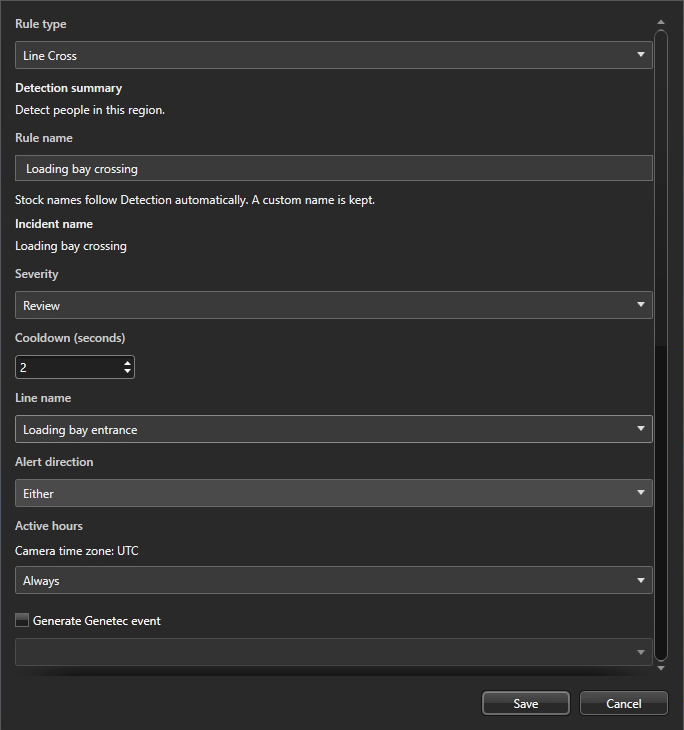
- Change Rule type to Line Cross. Enter a rule name and choose Line name. The line-cross fields initially show Either direction and 2 seconds cooldown; adjust them for your workflow.
- Choose severity and active hours. Leave Generate Genetec event unchecked unless you also want native event delivery.
- Save the rule, then apply the complete camera configuration.
The native labels Positive, Negative, and Either correspond to the directions offered by the line rule. Test each required direction with the selected object type and size filters.
Loading-bay example
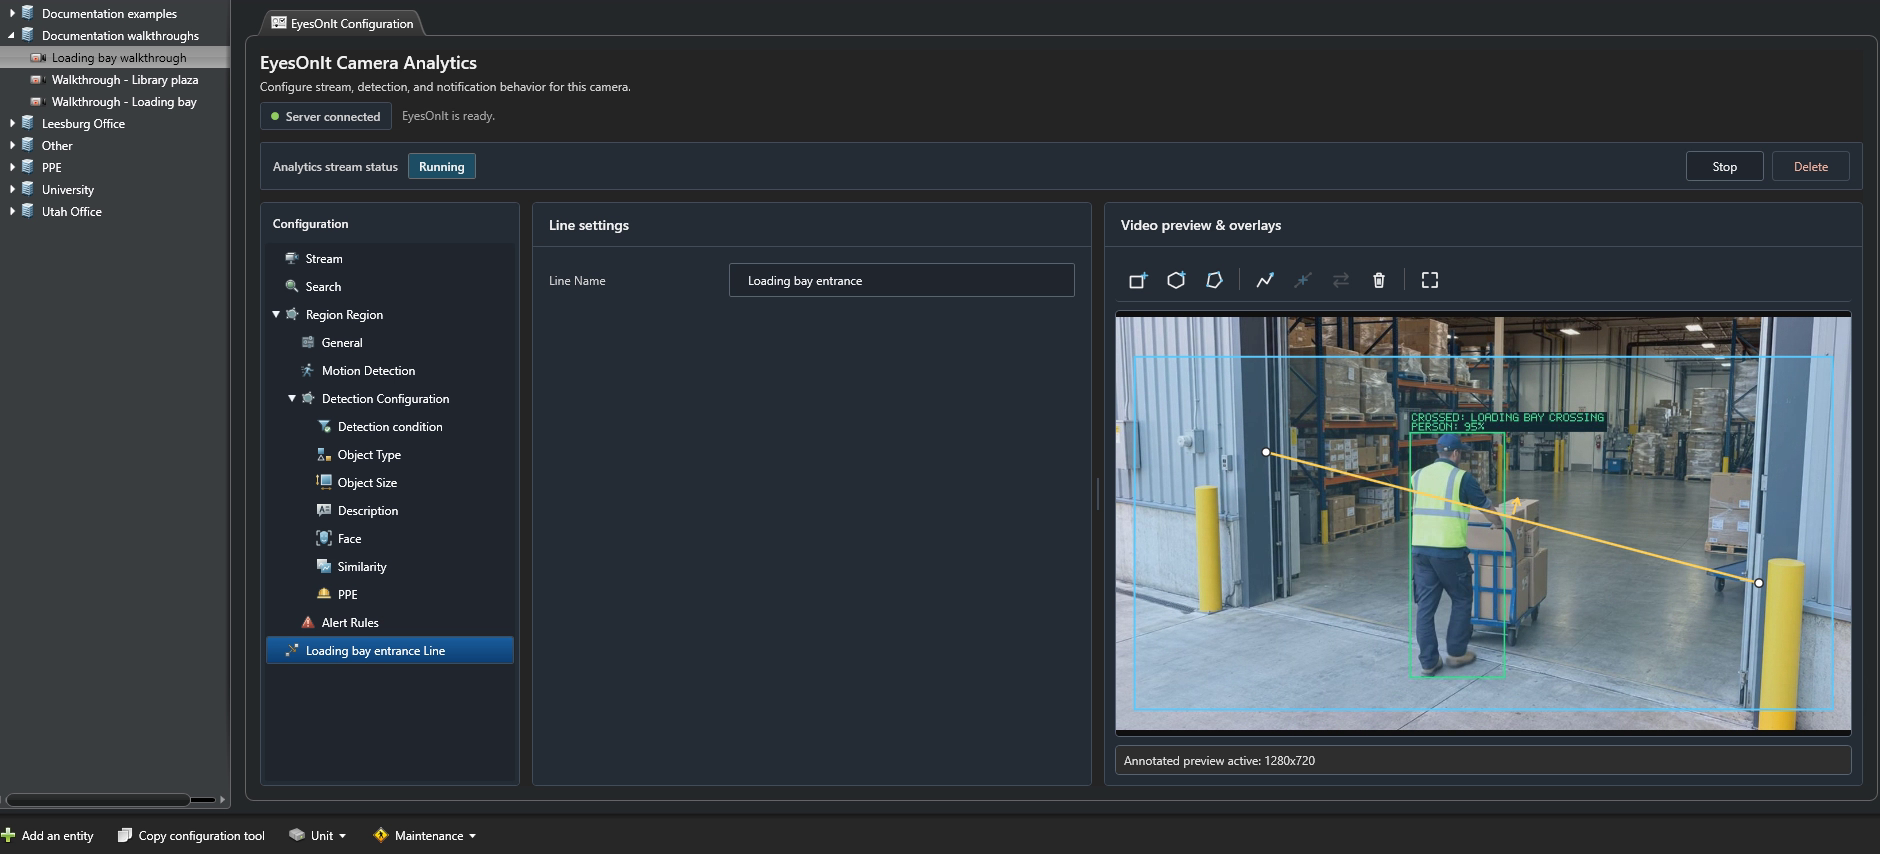
Section titled “Loading-bay example”Use the same loading-bay footage as the web UI example, provided to Genetec as an enrolled RTSP camera. Draw a region around the entrance and both approaches. The walkthrough keeps its neutral default name, Region. It keeps the default person filter at 50 confidence, turns Motion Detection off, and clears the default Minimum and Maximum object-size bounds for the initial test.
Add Loading bay entrance across the workers’ paths, with both endpoints inside the region. Use a Line Cross rule named Loading bay crossing, Either direction, 2 seconds cooldown, Review severity, and Always active hours. Test the worker entering with a loaded cart and the worker leaving with an empty cart.
Continue with conditions and alert rules and events and evidence.