
Customize detection annotations
Make live detections easy to read. Choose the label, colors, and rule-based appearance that help operators recognize the objects and events in a scene.
Watch the walkthrough
Section titled “Watch the walkthrough”Open the annotation settings
Section titled “Open the annotation settings”Open Monitor → Configure. Select the region and its detection configuration, then choose Configure annotations. Turn on Use custom annotations.
Build the label
Section titled “Build the label”Turn on Customize label to choose its parts. Use Add text for fixed wording and Add field for values from the detection or rule. Reorder the parts to put the most useful information first.
For a lingering rule, include the detection label and its qualifying dwell. Track duration measures time since tracking began; qualifying dwell follows the selected rule. Choose the value that answers the operator’s question.
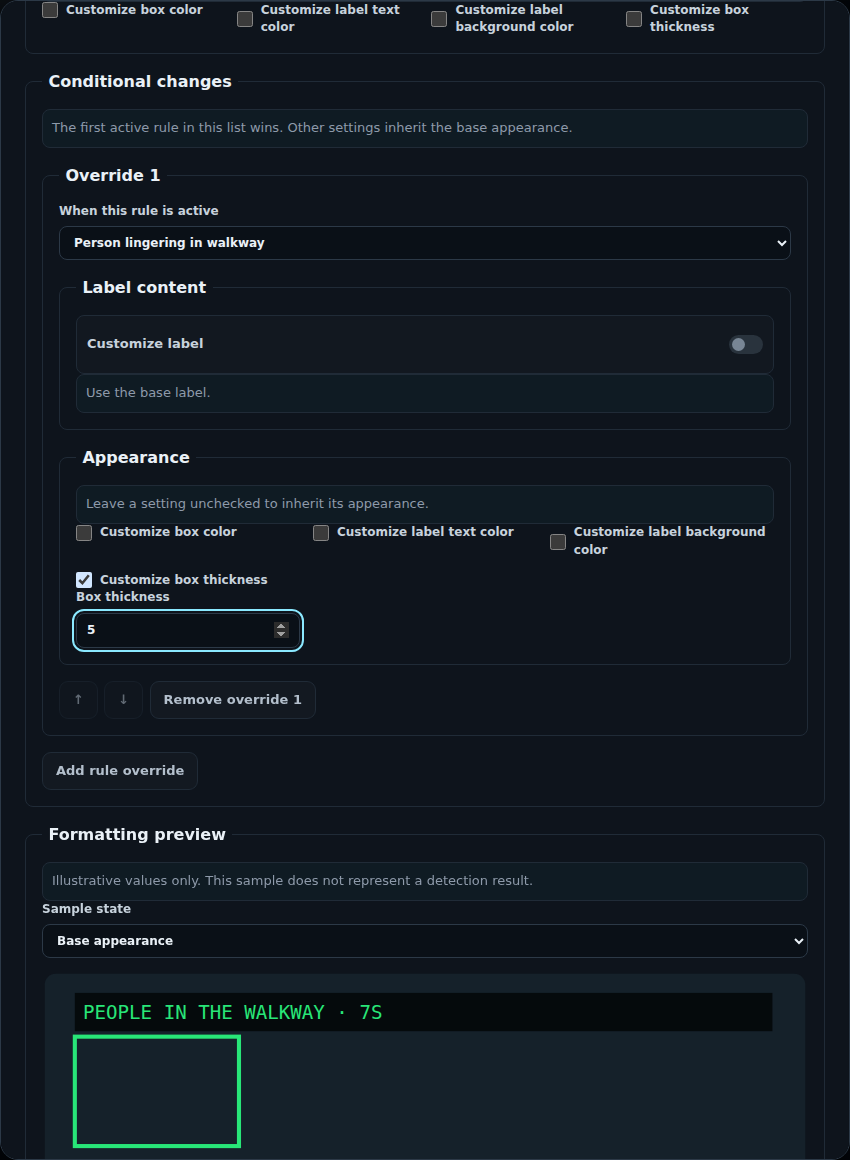
Under Appearance, customize the box color, label text, label background, or box thickness. Leave individual settings unchecked to inherit their appearance.
Highlight an active rule
Section titled “Highlight an active rule”Choose Add rule override under Conditional changes. Select the rule and set the appearance you want while it is active. The first active override in the list takes precedence; use the move controls to order them.
Choose Apply, then Save configuration on the camera. Inspect the saved result in live video with detection overlays enabled.
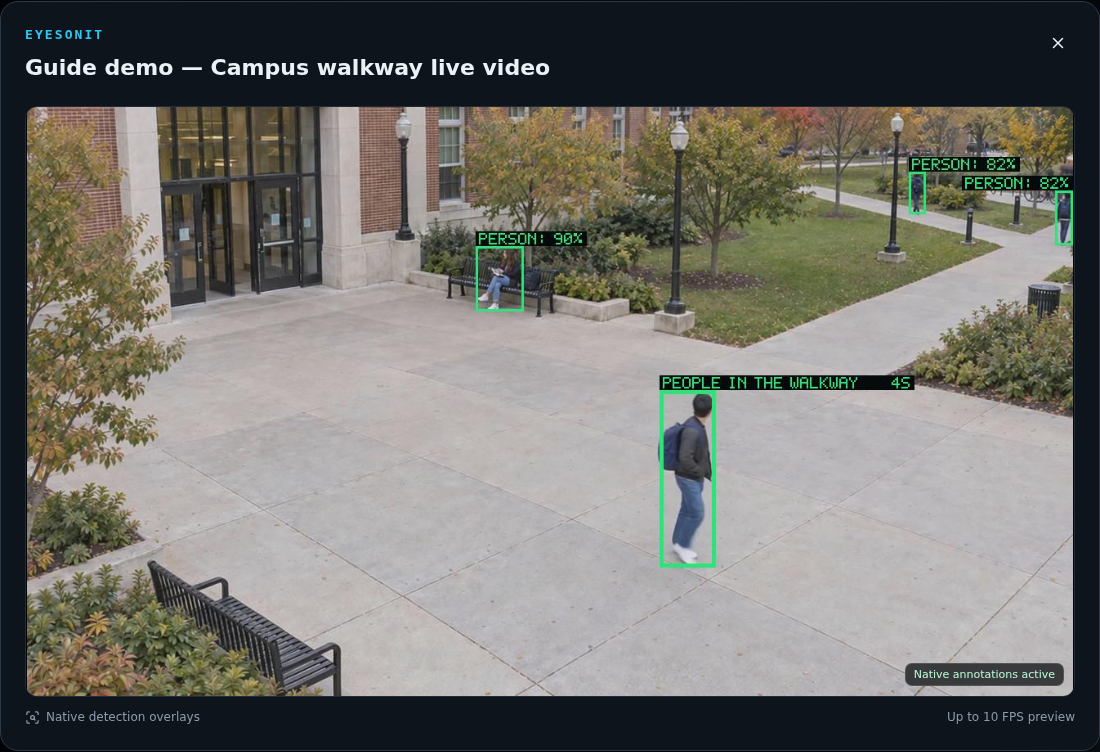
Test both normal and active-rule states. Keep labels short enough to read when several people or objects are visible.