
Install EyesOnIt
The guided installer prepares EyesOnIt and its analysis models, sets up secure browser access, and creates your administrator account.
Before you start
Section titled “Before you start”Use a server running Ubuntu 24.04, x86-64, with an NVIDIA GPU and sudo access. Complete Prepare your server and have your license key and authorization token ready. This walkthrough covers a new native installation; Docker uses its own installation download.
Watch the walkthrough
Section titled “Watch the walkthrough”Follow this captioned native Linux installation, or use the written steps below.
1. Download and verify the installer
Section titled “1. Download and verify the installer”Open a terminal on the server, change to a directory where you can download files, and run:
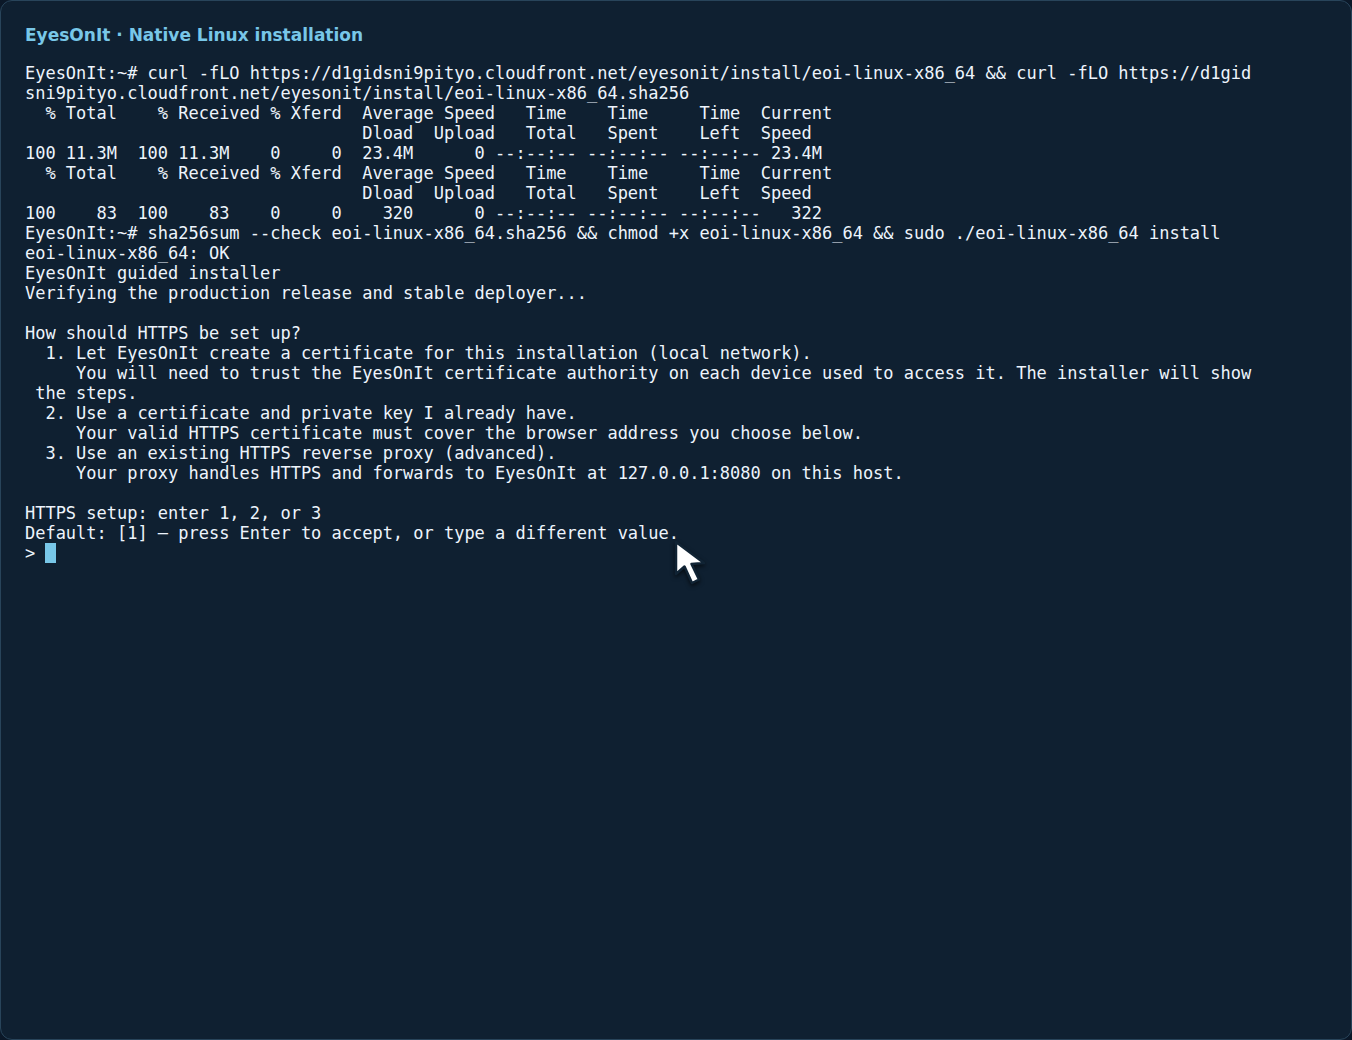
curl -fLO https://d1gidsni9pityo.cloudfront.net/eyesonit/install/eoi-linux-x86_64 && \ curl -fLO https://d1gidsni9pityo.cloudfront.net/eyesonit/install/eoi-linux-x86_64.sha256 && \ sha256sum --check eoi-linux-x86_64.sha256 && \ chmod +x eoi-linux-x86_64 && \ sudo ./eoi-linux-x86_64 installThe checksum check should report eoi-linux-x86_64: OK. The command then starts guided setup. EyesOnIt also verifies signed release information and its installer helper before continuing.
If a download or checksum check fails, this command stops before starting installation. Download both files again together and repeat the check.
2. Configure the site
Section titled “2. Configure the site”Follow the questions in the terminal. Press Enter to accept a displayed default; optional questions indicate when Enter skips them.
- Choose how to set up HTTPS:
- Create a certificate for this installation for local-network access. The installer provides the public CA certificate your browser computers will trust.
- Use an existing certificate and private key to provide your PEM file paths.
- Use an existing HTTPS reverse proxy when your administrator already manages browser access through a proxy. Supply its public CA certificate if prompted.
- Choose where your team will open the dashboard. Enter the browser address when prompted: an IP, hostname, or HTTPS address. In WSL, On this Windows computer uses
https://localhost; choose network access when other computers will connect. Confirm the local network address if requested. - Choose the administrator username, display name, and optional email.
- Enter the license key and authorization token when prompted.
- Set the administrator password, then enter it again to confirm. Use this password for your first web sign-in.
Secret entries are masked. Keep the license, authorization token, and password private.
3. Review and install
Section titled “3. Review and install”Check the installation summary, especially the Web dashboard address and Administrator username. Type INSTALL when prompted to approve installation.

Leave setup running while it prepares dependencies, downloads the application and models, and checks readiness. If driver preparation requires a reboot, follow the installer’s restart and resume instructions. Wait for the installation-complete message before moving to the browser.
Keep the dashboard URL and administrator username from the completion instructions. You will use them in the next guide.
Run sudo eoi status to confirm Running and ready and check the dashboard address.
4. Open the web dashboard
Section titled “4. Open the web dashboard”For an EyesOnIt-created certificate, follow the completion instructions to copy and trust the public CA certificate on the browser computer first. Install it as a trusted root certificate using your organization’s device-management procedure. Keep private keys on the server.
For a proxy using a private CA, trust its public CA certificate on the browser computer too.
Open the full Web dashboard URL shown by the installer. For example, if your chosen hostname is eyesonit.example.com, the dashboard address is https://eyesonit.example.com/dashboard.
Continue with Complete initial setup to sign in, check your installation, and connect your first camera.
If setup needs attention
Section titled “If setup needs attention”Use the message and next action shown in the terminal. For browser access, check that the hostname reaches the server, HTTPS is allowed through the firewall, and the browser trusts the chosen certificate. For a download or dependency error, check the server’s outbound access and available disk space.
If you need help, share the reported step and error with your EyesOnIt contact. Keep license keys, tokens, passwords, and private keys out of screenshots and support messages.
For a container deployment, use Install EyesOnIt with Docker. After setup, prepare a server recovery plan and follow Upgrades and rollback for application updates.