
Manage users and camera access
Give each team member the tools and camera views they need. A role defines their tasks; camera access defines the video sources they can work with.
Before you start
Section titled “Before you start”In the EyesOnIt web UI, open Administration → Users with an account that can manage users. Check the selected workspace before making changes.
This example creates a local Operator account and assigns one documentation video source. In an organization workspace, use Invite user to begin the invitation workflow instead.
Watch the walkthrough
Section titled “Watch the walkthrough”Follow this captioned EyesOnIt web UI walkthrough, or use the written steps below.
1. Choose a role
Section titled “1. Choose a role”| Role | Typical work |
|---|---|
| Viewer | View monitoring, incidents, recorded media, and existing searches. |
| Operator | Acknowledge incidents, run searches, and export evidence, alongside viewing. |
| Security manager | Configure detections, review incident outcomes, organize cameras, and manage identities. |
| Organization administrator | Manage accounts and delegated workflows within an organization. |
| System administrator | Manage the whole system, including accounts, settings, and all cameras. |
Choose the role for the person’s responsibilities, then assign their cameras. Organization ownership and delegated permissions also apply within customer workspaces.
2. Create the account
Section titled “2. Create the account”- Choose Add user / system administrator.
- Enter a Username and Display name. Add a Contact email for account recovery.
- Select the Role. Where offered, set Require multi-factor authentication (MFA) for the account.
- Choose Create user.
- Give the user the One-use temporary credential through your approved channel. Choose Configure camera access to continue.
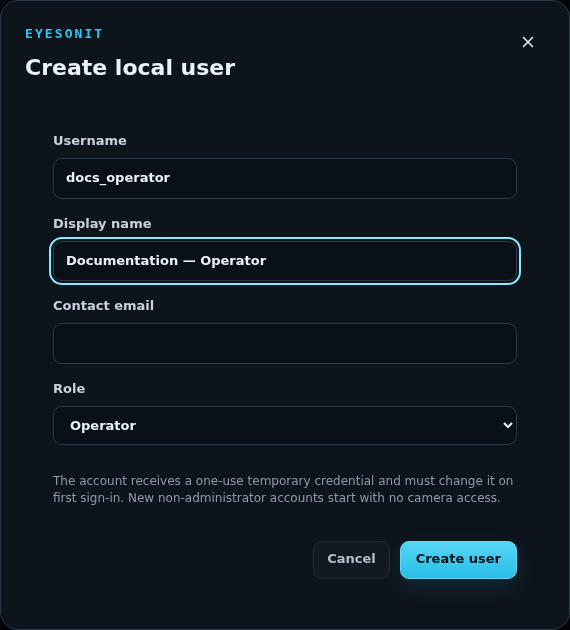
The credential is shown once. On first sign-in, the user chooses a private password and completes any required authenticator setup. See Secure your account.
3. Assign camera access
Section titled “3. Assign camera access”New non-administrator accounts start with No cameras. In the user editor, choose:
| Access | What it includes |
|---|---|
| No cameras | Sign-in access while camera-derived data remains unassigned. |
| All cameras | All available cameras, including cameras added later. |
| Selected cameras | The specific sources selected in Camera scope. |
For Selected cameras, open Camera scope, find the cameras or folders, select the required sources, and choose Apply. Choose Save changes in the user editor.
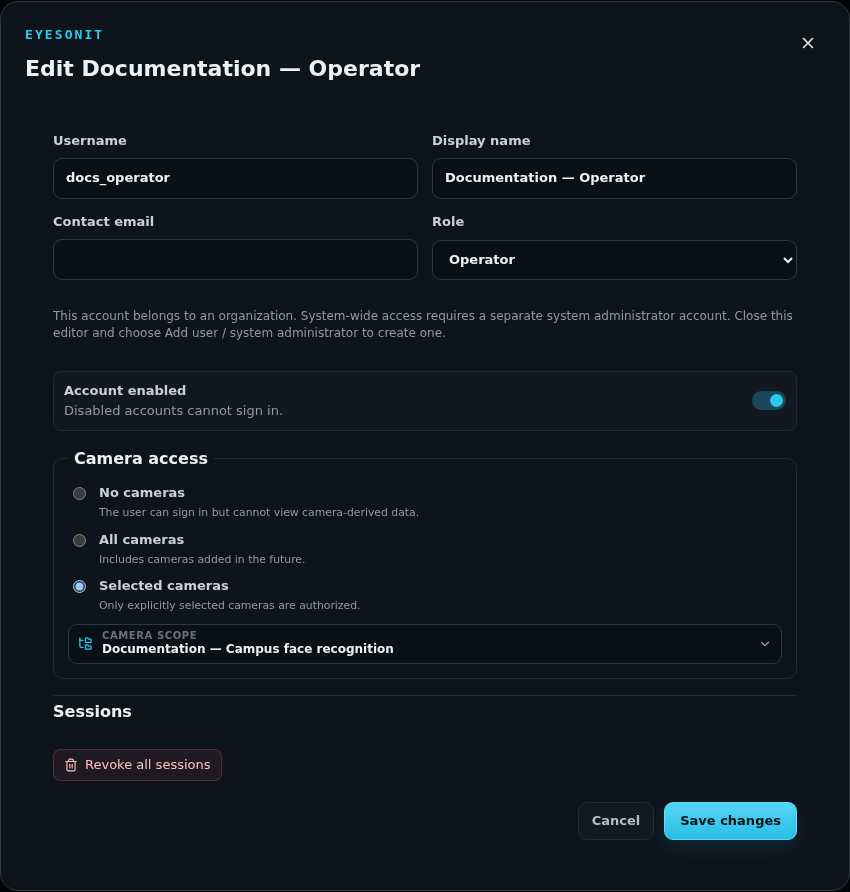
Selecting a folder assigns its current cameras. Review the account’s selection when the team or camera inventory changes. System administrators have access to all current and future cameras.
4. Review the account
Section titled “4. Review the account”After the person completes setup, refresh Users. Use Find a user and Account status to locate the account. Check its role, camera count, authenticator status, and sign-in status. In this example, the operator signed in successfully and received only its assigned source.
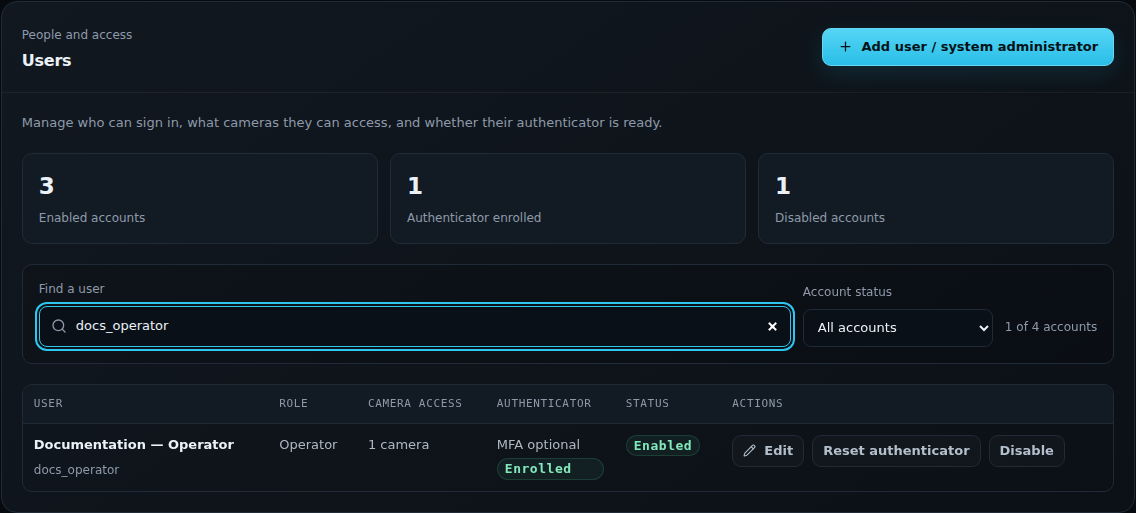
Use Edit to update an account. Disable prevents further sign-in. In the editor’s Sessions section, Revoke all sessions signs the account out everywhere; the person can sign in again if their account remains enabled.
Sensitive actions may open Confirm your identity. Enter your current EyesOnIt password and, when applicable, an authenticator code to continue.
Review service credentials
Section titled “Review service credentials”In the provider workspace, open Administration → Service tokens. Find the integration by name or filter by token status. Check Allowed access, Created, and Last used before changing a credential.
A server operator with root access issues a named credential in the installation’s configured administrative environment with eoi-admin issue-service-token --name NAME --scope SCOPE. Choose a supported scope from the command’s --help; repeat --scope for each permission the integration needs. Deliver the returned credential through private credential storage.
To rotate a credential, issue its replacement, update the intended consumer, and verify access with the new token. Then select the old token and choose Revoke token. Revocation stops access using that token. Filter by Revoked to verify the result.
Review and export audit history
Section titled “Review and export audit history”- Open Administration → Audit in the intended workspace. Use Find an audit event and Event result to locate activity by person, camera, or event. Review the time, actor, result, and references for the event.
- Choose Export audit history and read the export scope. Download CSV includes up to the latest 10,000 available events in the workspace, across pages and regardless of the on-screen filters.
- Check the UTC timestamps and support references in the downloaded spreadsheet. Keep the export with the authorized customer records. Events added during the export appear in the next one.
For organization invitations and workspace selection, follow Set up a customer workspace.