
Process a recorded video file
Try a detection against recorded footage, build a searchable example, or repeat a test. Add the clip as a video source, configure it, and run it from Monitor.
Before you start
Section titled “Before you start”Have your administrator make the clip available in the configured video folder on an EyesOnIt node. Use an MP4 or AVI containing H.264 or H.265 video. Your account needs access to add and configure video sources.
This example uses a ten-second loading-bay clip with people pushing handcarts. The line-crossing guide shows the detection setup for this scene.
Watch the walkthrough
Section titled “Watch the walkthrough”Follow this captioned EyesOnIt web UI walkthrough, or use the written steps below.
1. Add the clip
Section titled “1. Add the clip”- Open Monitor and choose Add video file.
- Select the Node, browse its media folders, and choose the clip.
- Check the displayed resolution, frame rate, codec, and duration.
- Choose Use entire video for this example. To work with a section, enter Start time and End time under Processing range, using
hh:mm:ssorhh:mm:ss.sss. - Enter a Source name, such as Documentation — Loading bay clip. Add a Location and choose a Time zone if needed.
- Set Analyzed FPS and choose Create video source. The example starts with 5 analyzed frames per second.
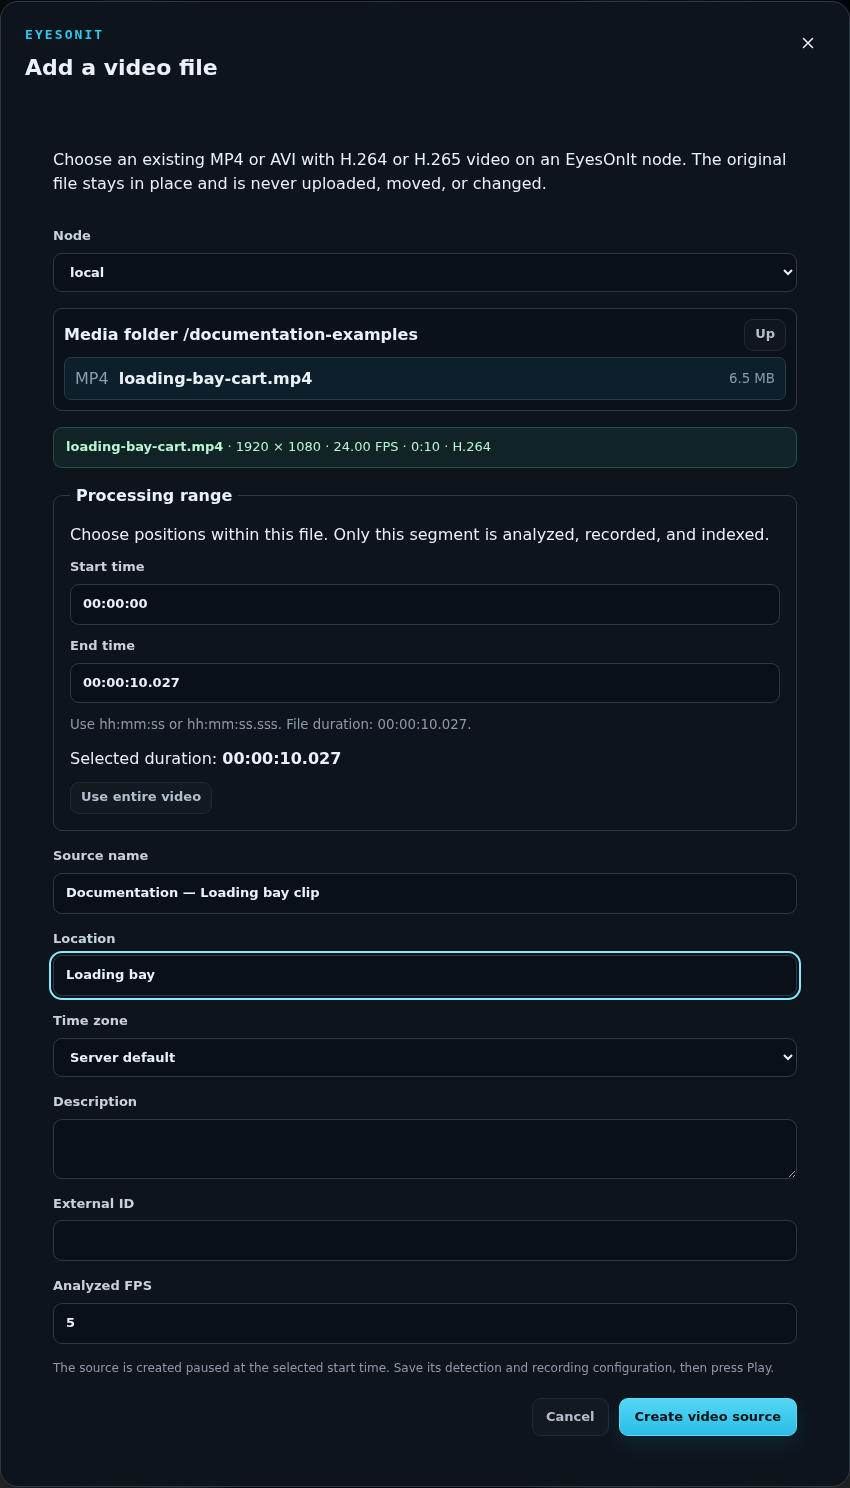
EyesOnIt creates the source paused at the selected start position, ready for configuration.
2. Configure the detection
Section titled “2. Configure the detection”In the source’s configuration:
- Draw the region and crossing line for the loading-bay entrance.
- Choose Person as the object type and select the condition in Detection.
- Configure the crossing rule under Rules, including its direction and cooldown.
- Review any existing rules and actions, then choose Save configuration.
The controls for regions, descriptions, PPE, and rules follow the same workflow used for cameras. Choose the detection that fits the footage you are testing.
3. Choose recording and search options
Section titled “3. Choose recording and search options”| Open | Enable it when you want |
|---|---|
| Camera → Recording → Continuous recording | Playback of the processed footage in Archive. Set Recording retention (days) for your needs. |
| Camera → Processing → Enable archive search | Searchable history from the run. Select Descriptions and visual similarity for those search methods. |
| A rule’s Actions | Notifications or evidence clips for the incidents it creates. |
Choose Save configuration after changing these settings. For an initial detection test, start with the rule and review its incidents; add notifications and evidence when you are ready to test those actions.
4. Run and review the result
Section titled “4. Run and review the result”Return to Monitor, select the video source, and choose Start. Watch Progress as the selected footage is processed.
When the run finishes, the source shows Completed and offers Run again. Open Incidents to review triggered rules, or choose View archive to play back the recording.
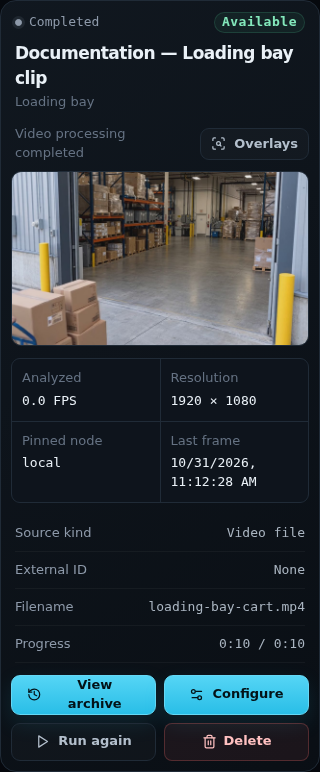
Repeat a test or change the range
Section titled “Repeat a test or change the range”Use Run again to replay the configured range. Stop pauses a run; use Start to continue it.
To change the section being processed, choose Configure → Camera → General and edit Processing range. Saving a changed range resets progress for a fresh run. Earlier incidents and recordings remain available under their retention settings.
For searches, use the time when EyesOnIt processed the clip. Continue with description search or image similarity search.