
Monitor a cluster and verify failover
Keep cameras processing across a group of EyesOnIt servers. Check node health before maintenance, verify that camera processing recovers on the remaining node, and confirm a clean rejoin afterward.
Watch the walkthrough
Section titled “Watch the walkthrough”Set up a native cluster
Section titled “Set up a native cluster”Start with two installed native servers on the same qualified EyesOnIt release. Schedule a maintenance window. Use service-manager privileges on each native host and have the database, object-storage, and private TLS settings available. This procedure is for a new cluster with its own coordination database and media storage. For an existing standalone system, back up the installation and plan the transfer of existing camera configuration and history before changing its service settings.
- Prepare the shared services. Provide PostgreSQL outside either compute node’s failure domain, with point-in-time recovery. Provision a private S3-compatible bucket and prefix with encryption, versioning, and recovery enabled. Grant the service identity read, write, delete, multipart, and encryption-key access for that location. Size each remaining node for the cameras it must take over.
- Establish peer identity. Give each node a stable, unique node ID and private DNS name. Provision a private CA, client certificate and key for each node, and a separate shared request-signing secret. Put a private HTTPS listener in front of each internal cluster service. Require and verify client certificates at this listener. Keep the public web/API listener separate.
- Configure both nodes. In the native service environment (normally
/etc/eyesonit/backend.env), set the values below. Provision secret values and private keys as the service identity using your installation’s protected configuration. Verify name resolution and certificate trust from each peer before starting. - Start services in order. Make the database and bucket available first. On each node start the native GPU, search, and preview workers, then the internal cluster listener and public API. With the supplied systemd units these last two services are
eoi-cluster-apiandeoi-api. Check startup status on each node. The public readiness check at/api/v1/health/readyshould succeed after licensing and a successful coordination cycle. - Verify placement. In the web UI open System. Expect two distinct, available nodes. In Monitor, start a demonstration camera, check its Owner, and verify live video and increasing processing activity on that node. Repeat with a second camera. Placement follows available capacity. Record the initial owners before a failover check.
| Native environment setting | What to supply |
|---|---|
EOI_CLUSTER_ENABLED |
true on both nodes. |
EOI_CLUSTER_CELL_ID |
One stable ID shared by this deployment. Independent clusters need distinct IDs. |
EOI_CLUSTER_NODE_ID, EOI_CLUSTER_INTERNAL_BASE_URL |
A different stable ID and private HTTPS origin for each node, for example node-a and https://node-a.internal.example:8443. The origin contains no path. |
EOI_CLUSTER_POSTGRES_DSN |
The protected connection string to the same coordination database. |
EOI_CLUSTER_TLS_CA_PATH, EOI_CLUSTER_TLS_CERTIFICATE_PATH, EOI_CLUSTER_TLS_PRIVATE_KEY_PATH |
Paths to the trusted CA and this node’s client credentials. Restrict private key access to the service. |
EOI_CLUSTER_REQUEST_SECRET_PATH |
A protected regular file containing the same high-entropy signing secret on each node. |
EOI_OBJECT_STORAGE_BUCKET, EOI_OBJECT_STORAGE_REGION, EOI_OBJECT_STORAGE_PREFIX |
The shared media location. For a private S3-compatible endpoint set EOI_OBJECT_STORAGE_ENDPOINT_URL to its HTTPS address. Supply EOI_OBJECT_STORAGE_KMS_KEY_ID for the site’s managed encryption key. |
If a node fails to appear, check its public readiness, database connection, local worker status, and both directions of private HTTPS trust. A reachable public dashboard alone does not establish peer communication. Keep the database and object storage available during the following compute-node test. Continuous archive footage stays on its recording node; recovery of camera processing and availability of earlier footage are separate checks.
Check the healthy baseline
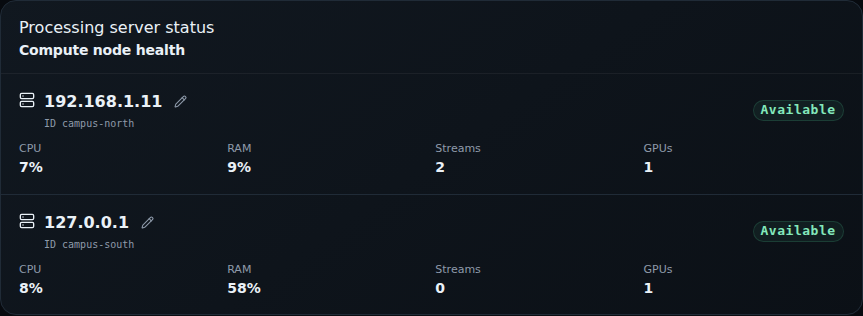
Section titled “Check the healthy baseline”Open System and review Compute node health. Check that the expected nodes are Available and reporting resources. In Monitor, select the test cameras with Camera scope and confirm their frame rates and live video. Note which nodes are processing them.
Verify recovery during an outage
Section titled “Verify recovery during an outage”- Stop one test node through its approved service-management workflow.
- Refresh System and review the node state.
- Return to the scoped cameras in Monitor. Check that processing resumes on an available node and the analyzed frame rates update. Select a camera to check its Owner.
- Verify live video and a representative detection.
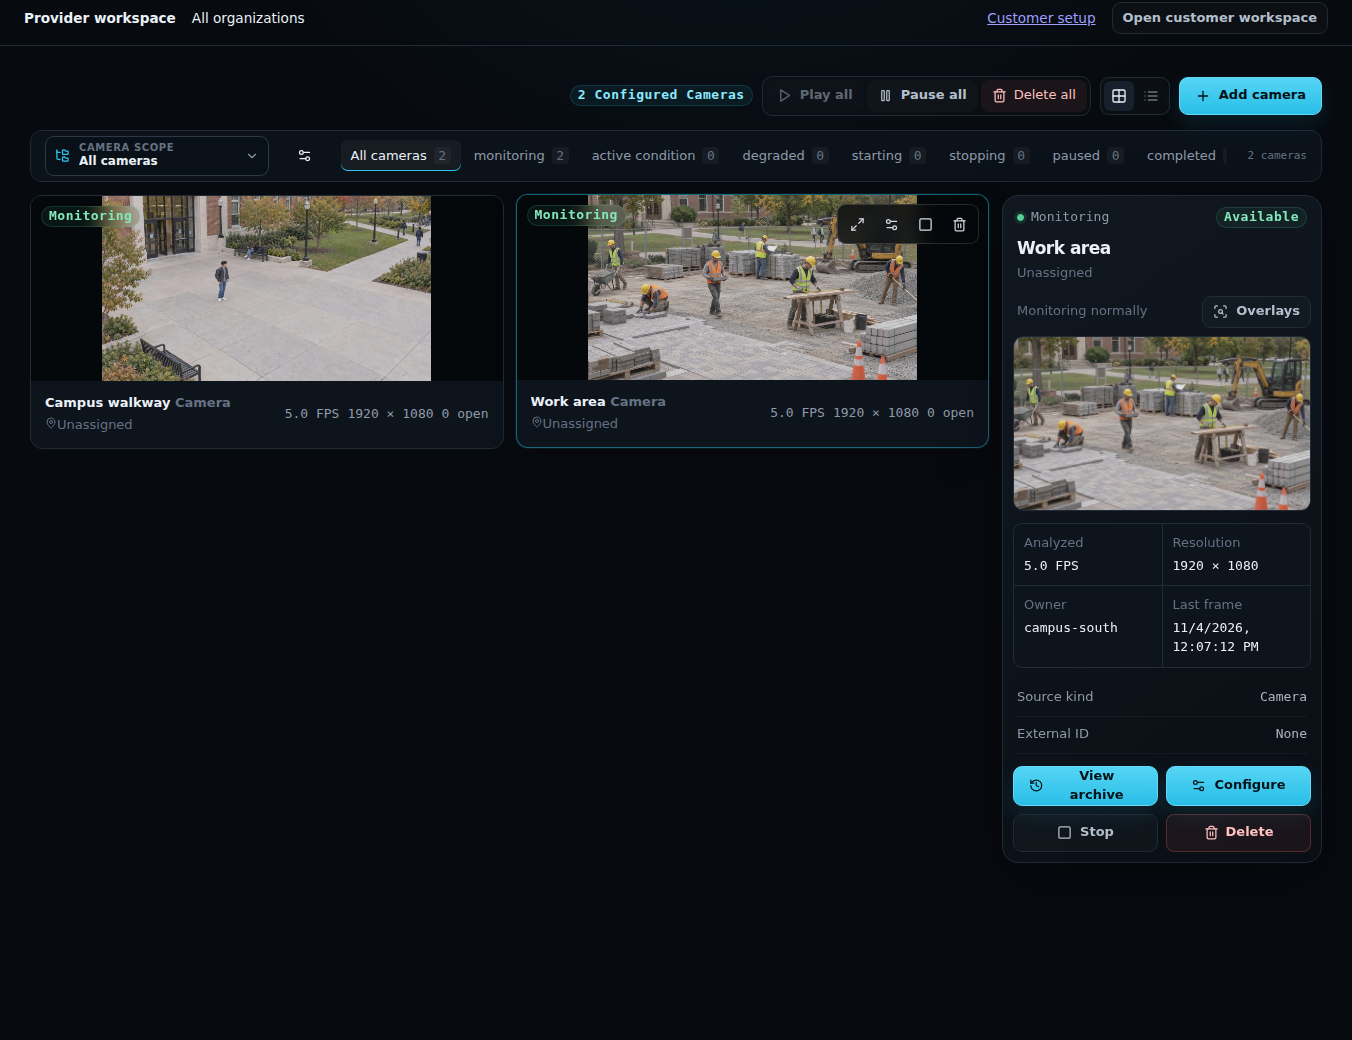
Failover uses ownership leases to give each camera one processing owner. Allow recovery to complete and check the resulting camera state before sending another start or stop command.
Rejoin the node
Section titled “Rejoin the node”Start the node through the same approved service workflow. Refresh System until it reports healthy, then recheck the scoped cameras and their live video. Confirm that each camera has one active processing owner.
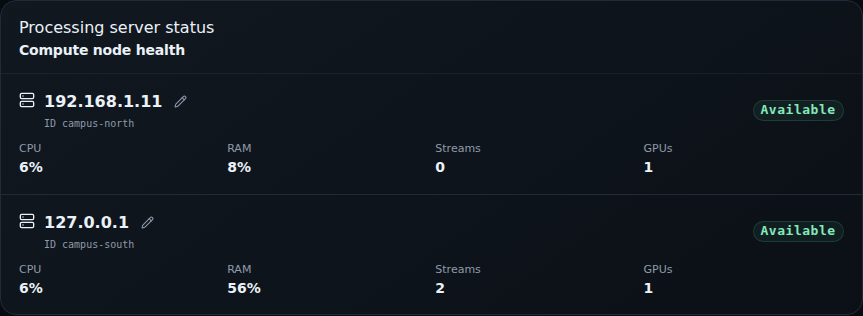
For planned maintenance, create the marker at the configured EOI_CLUSTER_DRAIN_MARKER_PATH as the service identity. Wait for the node to report zero camera assignments before stopping its worker or private listener. After maintenance, verify worker and peer connectivity, then remove the marker to make the node eligible for placement again.
Record the observed recovery time and the workload used for the test. Recheck this workflow after a significant deployment or capacity change. For a broader review of resources and licensed features, see System health.