
Search video using a reference image
Start an investigation with a visual example. Find similar appearances in recorded video, then use a reviewed result to watch for new matches across selected cameras.
Before you start
Section titled “Before you start”Use an account with search and media access. The cameras need searchable history for Descriptions and visual similarity. Enable it under Monitor → Configure → Camera → Processing, alongside Enable archive search. Enable Continuous recording when you want surrounding playback.
See prepare searchable video for the setup steps.
Watch the walkthrough
Section titled “Watch the walkthrough”Follow this captioned EyesOnIt web UI walkthrough, or use the written steps below.
1. Choose a useful reference
Section titled “1. Choose a useful reference”Use a JPEG or PNG with a clear view of the person you want to find. Include their clothing, bag, and full body where possible. Choose a focused image so the intended person is easy to distinguish.
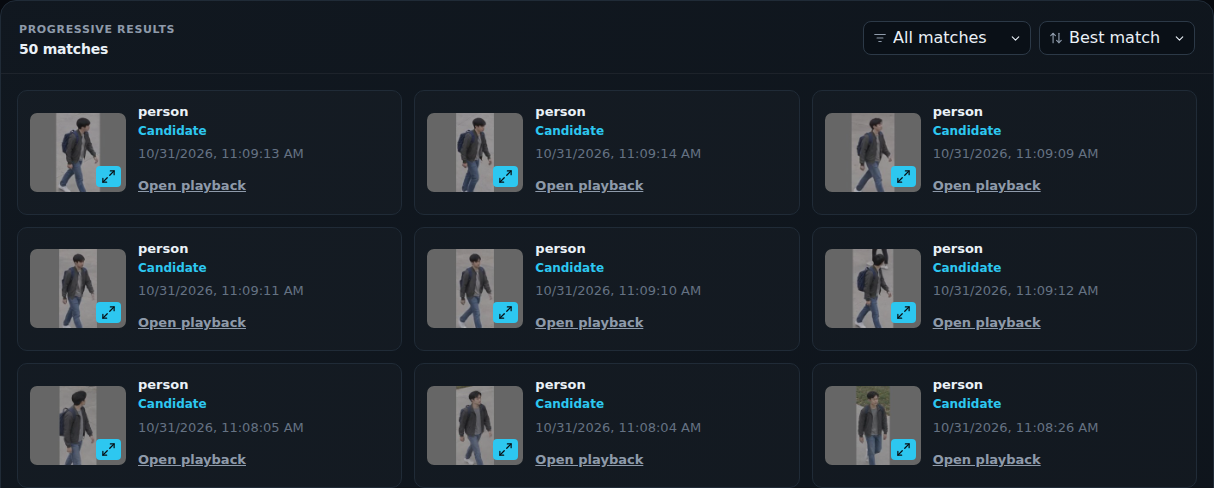
This campus example uses an actual EyesOnIt archive thumbnail of the person in a gray jacket, blue jeans, white shoes, and a blue backpack.

2. Search the archive
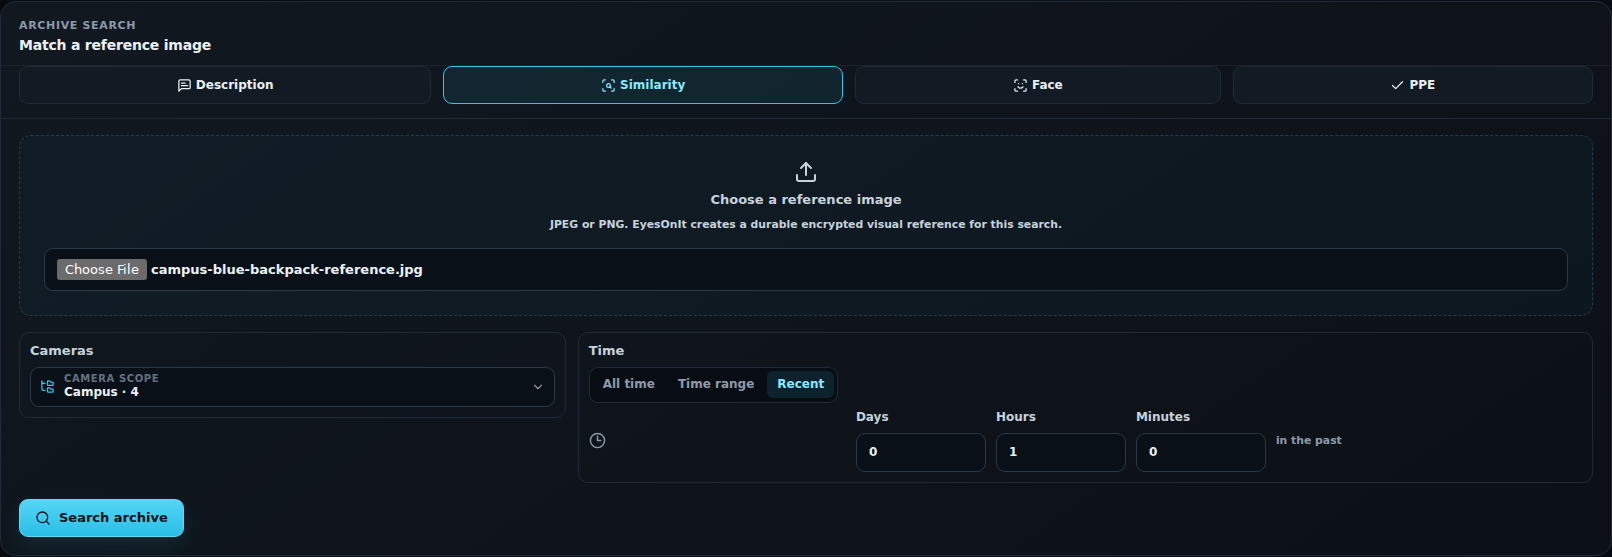
Section titled “2. Search the archive”- Open Search → Archive and choose Similarity.
- Under Choose a reference image, select your JPEG or PNG.
- Open Camera scope and select the cameras or folders to search. Choose Apply.
- Choose Time range, Recent, or All time. In this example, Recent covers the last hour of campus demo footage.
- Choose Search archive.
3. Review appearances across cameras
Section titled “3. Review appearances across cameras”Keep All matches selected for the first review. Best match ranks the returned candidates by visual similarity. Use Oldest first or Newest first to review their capture times in order.
Click a thumbnail to enlarge it. Compare the person’s clothing, backpack, and overall appearance with your reference. Choose Open playback to review the surrounding video in Archive.
Use Archive searches to reopen a previous job. Refine the reference, camera scope, or time period and run another search when you want a different view of the event.
4. Watch for a similar appearance
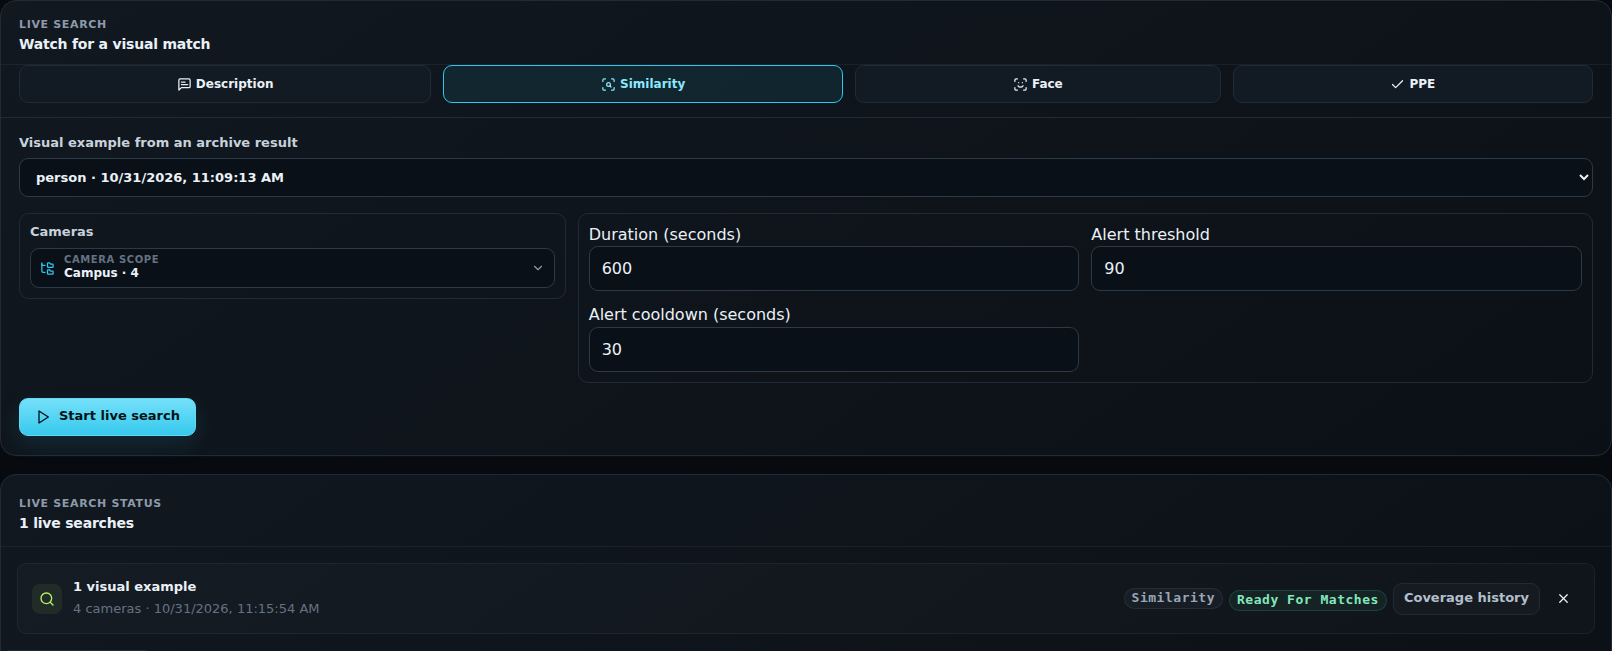
Section titled “4. Watch for a similar appearance”- In Search, choose Live → Similarity.
- Under Visual example from an archive result, select a result you have reviewed. The example menu includes its capture time.
- Choose the cameras to watch and have those sources running.
- Set Duration (seconds), Alert threshold, and Alert cooldown (seconds). The illustrated watch uses 600 seconds, threshold 90, and a 30-second cooldown. Test values against representative footage for your scene.
- Choose Start live search and check for Ready for matches.
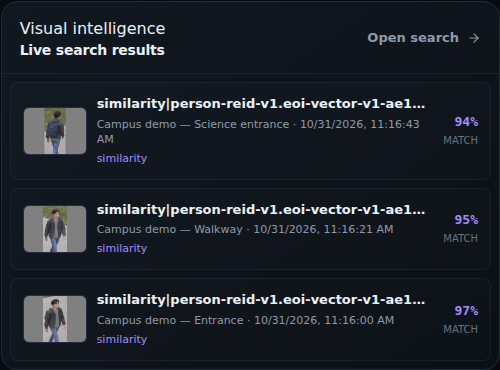
Open Overview → Live search results to review recent candidates and their camera names and capture times.
Return to Search → Live and use the session’s X control when the watch is finished. Coverage history provides the session’s processing history.
For an investigation that starts with words, follow Search video with a description.