
Connect your first camera
Bring a camera into Monitor, verify its video, and prepare it for detections.
Before you start
Section titled “Before you start”For a new server, complete installation and initial setup first.
- Sign in as a system administrator with camera configuration access.
- Have the camera’s stream address and any required credentials ready. Use an address reachable from the EyesOnIt server.
- Choose a descriptive name and the camera’s time zone. The time zone helps your team interpret schedules and event times.
This guide follows Monitor → Add camera. If the camera is already listed, select it and continue with Check the video.
Watch the walkthrough
Section titled “Watch the walkthrough”Follow the full workflow in this captioned recording of the EyesOnIt web UI. The arrow pointer and gold click highlights show each action. The example uses campus footage delivered as a live RTSP demo feed. Use the chapter buttons to jump to a step, or continue with the written instructions below.
1. Add the camera
Section titled “1. Add the camera”- Open Monitor and choose Add camera.
- Complete the connection form:
| Field | What to enter |
|---|---|
| Camera name | A name your team will recognize, such as Lab work area. |
| Location | A useful location label, such as Packaging bench. |
| Time zone | The camera’s local zone, or Server default when appropriate. |
| Description | Optional context about the view or its purpose. |
| External ID | An identifier used by your organization, if needed. |
| Source URL | The camera’s video-stream address. This field masks its contents. |
| Analyzed FPS | The analysis rate. 5 is the form’s starting value; choose a rate suited to the activity. |
- Choose Create camera. New cameras are enabled immediately. Wait for the camera to appear in Monitor.
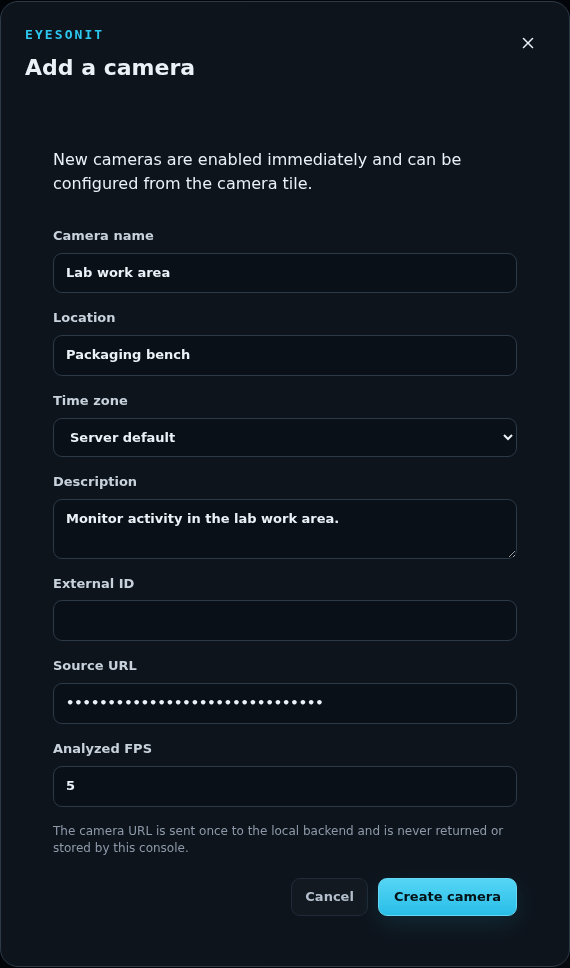
The screenshot uses an illustrative address. Enter the actual stream URL supplied for your camera, including credentials when that URL requires them.
2. Check the video
Section titled “2. Check the video”- Select the camera tile. Check its status, preview, resolution, and analyzed frame rate.
- If monitoring is stopped, choose Start. Camera-control access is required for this action.
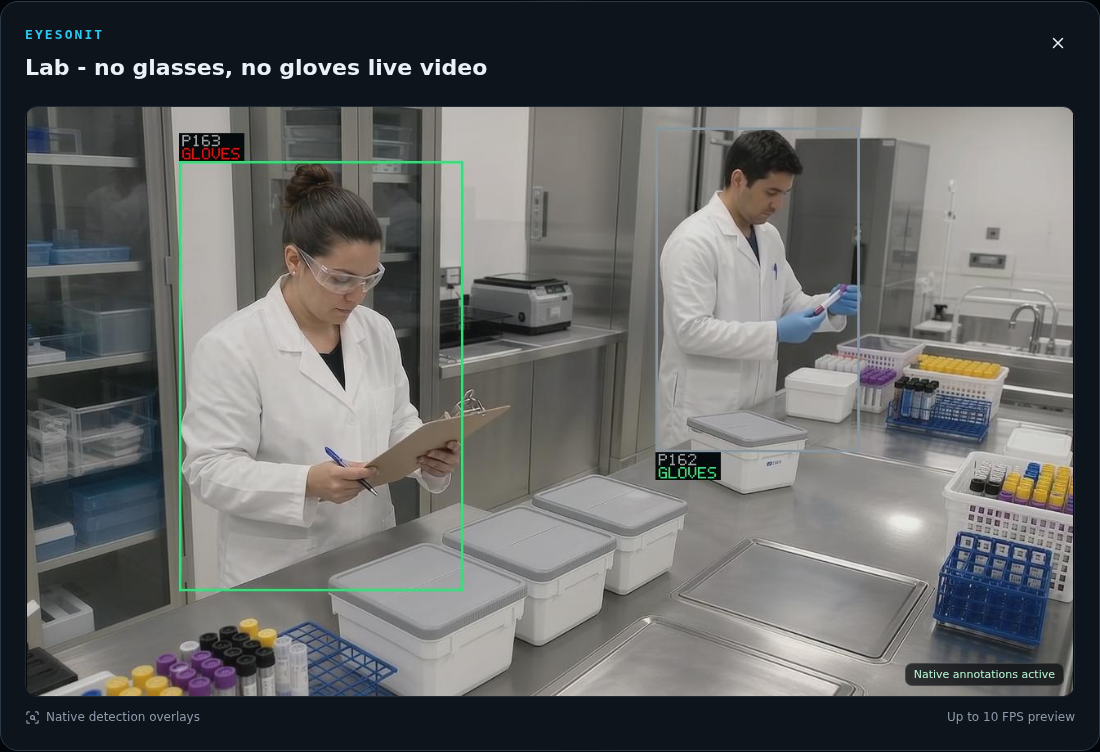
- Use the tile’s Open live video control to inspect a larger view. Overlays in the camera details shows detection annotations when configured.
- Confirm that the view is current and shows the activity you want to detect. Check lighting, obstructions, and the size of people or objects in the image.
3. Open camera configuration
Section titled “3. Open camera configuration”Choose Configure in the selected camera’s details. The camera workflow groups settings into Camera, Regions, and Lines.
Under Camera, review General, Processing, and Recording as needed. To start building analytics, define a region and then choose a detection condition.
Choose Save configuration after editing and confirm that the save succeeds.
Check the connection
Section titled “Check the connection”| What to check | Next step |
|---|---|
| The camera is not in the list | Check the workspace, camera scope, and status filter. |
| Video has not appeared | Confirm the camera is running and that its stream address is reachable from the EyesOnIt server. |
| The address or credentials changed | Update the connection through the system that manages this camera, then check the preview again. |
| You need to inspect the saved address | A system administrator can use Camera connection → Show URL or Copy URL, completing the identity check when prompted. Keep the address private. |
Once the view is ready, define regions and lines, choose the video quality and analysis rate, and monitor the camera.