
How EyesOnIt works
EyesOnIt helps your team spot activity that needs attention, receive an alert, and review what happened. Start with a camera and a clear question: what should this view help you watch for?
Watch the walkthrough
Section titled “Watch the walkthrough”See the workflow in the EyesOnIt web UI, from a connected camera to a reviewed incident.
From camera to incident
Section titled “From camera to incident”- ConnectBring the camera view into Monitor.
- DetectChoose the area and condition.
- ActCreate an incident and run its actions.
- ReviewCheck the evidence and record an outcome.
Each part has a specific job:
| Part | What you choose | Example |
|---|---|---|
| Camera | The video source to monitor. | A view of a packaging bench. |
| Region or line | Where the condition applies. | The work area, or a boundary people cross. |
| Detection configuration | Which people or objects qualify. | People, vehicles, or people missing gloves. |
| Rule | When the condition creates an incident. | A person is present for 3 seconds during working hours. |
| Actions | What happens alongside the incident. | Send a Telegram notification and retain an evidence clip. |
| Incident review | How your team handles the event. | Claim it, inspect the evidence, and confirm the outcome. |
For a complete worked example, follow PPE detection and incidents.
Find your way around the web UI
Section titled “Find your way around the web UI”Sign in at your EyesOnIt web address. Read the current workspace name. Provider administrators can choose Open customer workspace and select an active customer. Customer users sign in directly to their assigned workspace. Use Return to provider workspace to resume provider administration. Customer workspace setup explains how a pending customer becomes active. Your account controls which cameras and actions are available.
| Open | To do this |
|---|---|
| Overview | Check monitoring activity and system status. |
| Monitor | View cameras, start or stop monitoring, and open camera configuration. |
| Incidents | Find events, inspect evidence, and manage review. |
| Archive | Play back retained camera recordings. |
| Search | Find relevant activity in available video and search history. |
| Administration | Manage setup such as users, notifications, and recording storage. |
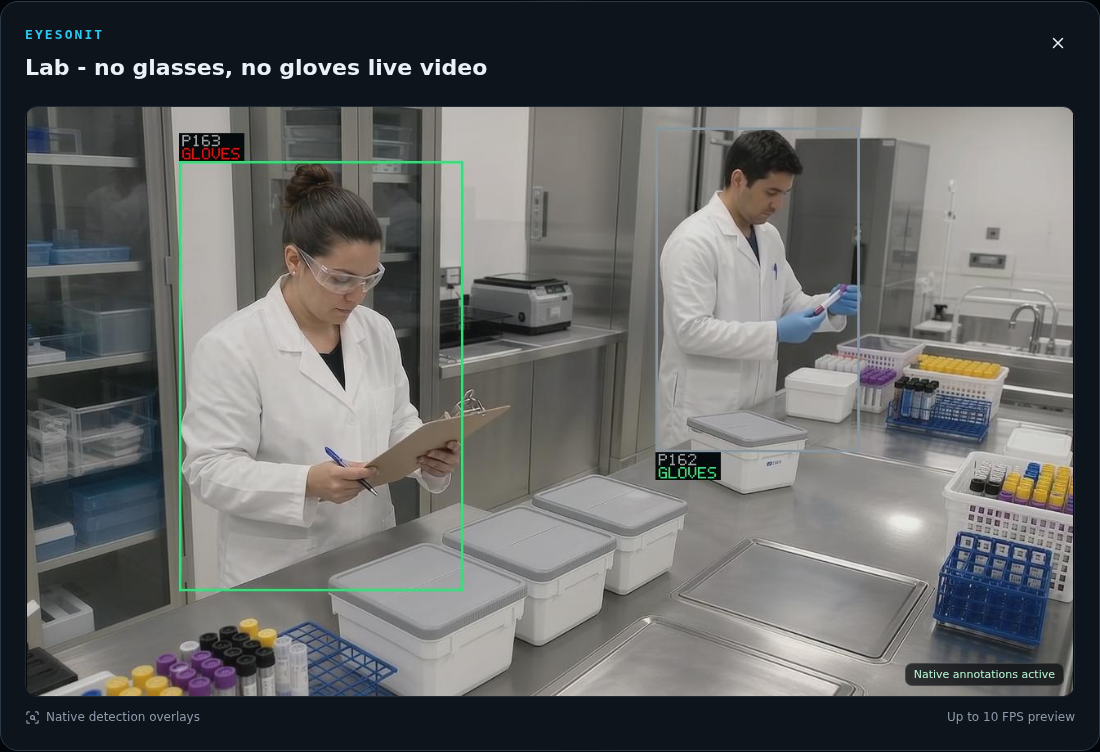
In Monitor, select a camera to see its details. Use Configure to edit its regions, detections, and rules. Open its live-video control to view annotations at a larger size.
Read live views and incident evidence
Section titled “Read live views and incident evidence”Live annotations show current observations. An incident snapshot highlights the person or objects associated with that event. A saved incident gives your team a record to investigate, even after the condition ends.
Use rule actions to choose notification delivery and video evidence. Configure notifications and evidence explains how to set up both.
Build your first workflow
Section titled “Build your first workflow”Setting up a new server? Start with Prepare your server, Install EyesOnIt, and Complete initial setup.
- Connect your first camera and verify its view.
- Define a region or line around the area you want to monitor.
- Create a detection and incident rule.
- Add notifications or evidence and test the result.
- Review and resolve the incident.
For appearance-based investigations, describe a person to detect, then use the same description to search video across cameras.
To try the workflow with existing footage, process a recorded video file. Use shared camera folders to keep the views easy to find.
When the team is ready to use EyesOnIt, create their accounts and camera access, then check daily system health.