
Detect an object using a reference image
Use a clear visual example to define what the camera should look for. This guide detects the campus character with the blue backpack using a cropped reference image.
Watch the walkthrough
Section titled “Watch the walkthrough”Choose a useful reference
Section titled “Choose a useful reference”Use a JPEG or PNG showing the person or object clearly. Crop around the subject so its appearance fills the image. Choose a view representative of the camera footage you will monitor.
Configure the comparison
Section titled “Configure the comparison”- Open Monitor → Configure and select the region.
- Under Detection, create or select a configuration. Choose the relevant object type, such as Person.
- Choose Similarity. Select a saved reference, or choose Upload new reference.
- Set Similarity condition to Looks like a selected reference.
- Review Minimum similarity. This example starts at 0.75. Tune it using matching and unrelated subjects from your own scene.
- Keep Detection condition set to At least one matching object is detected.
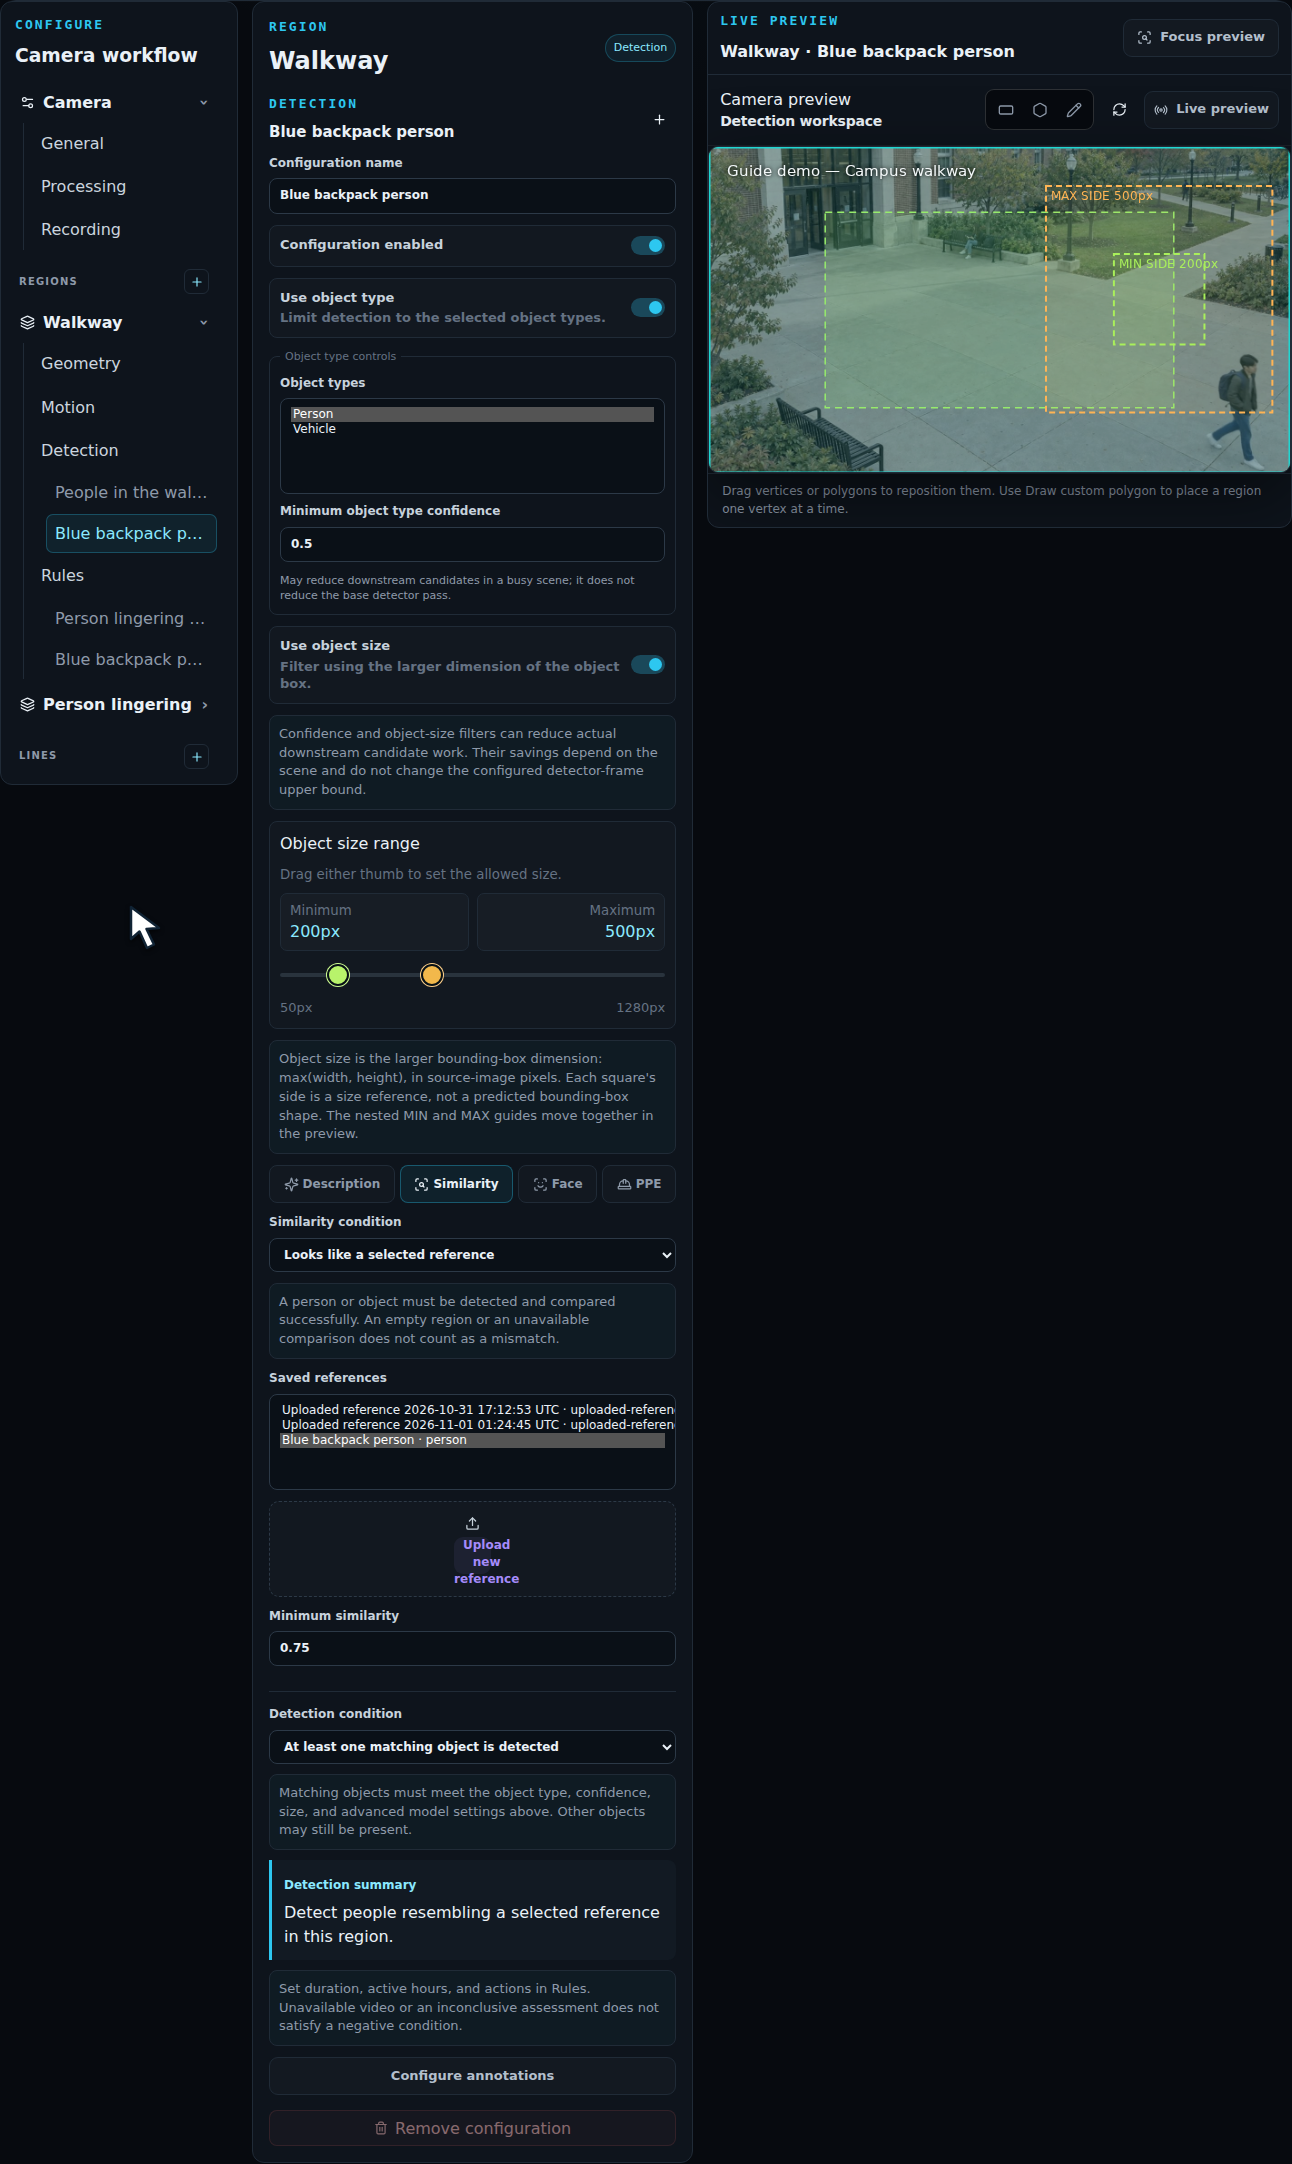
Object type, confidence, and size still apply before the similarity condition. A higher similarity threshold requires a closer visual match.
To detect other appearances, choose Does not look like any selected reference. That condition requires a detected subject and a successful comparison; it is separate from an empty-region absence condition.
Add an incident rule
Section titled “Add an incident rule”Open Rules, add Detection rule, and select the similarity configuration. Set the incident name, dwell, reset, severity, and schedule. Choose Save configuration.
Test the intended subject from several viewpoints alongside people with different clothing or accessories. Review the resulting incident evidence before adding notification actions. For a one-off investigation using an example image, use reference-image search.