
Detect a described person in Genetec
Describe one appearance you want to detect. The rule keeps looking for that appearance as different people enter the camera view.
1. Describe the campus target
Section titled “1. Describe the campus target”For this campus example, look for:
person wearing a yellow top and dark pants
Choose visible clothing, colors, or carried items that matter to the task. One target description is enough for this workflow; people passing through the scene can have any other appearance. Use face recognition when you need to match an enrolled identity.
2. Configure the region
Section titled “2. Configure the region”- In EyesOnIt Configuration, select the library-plaza region.
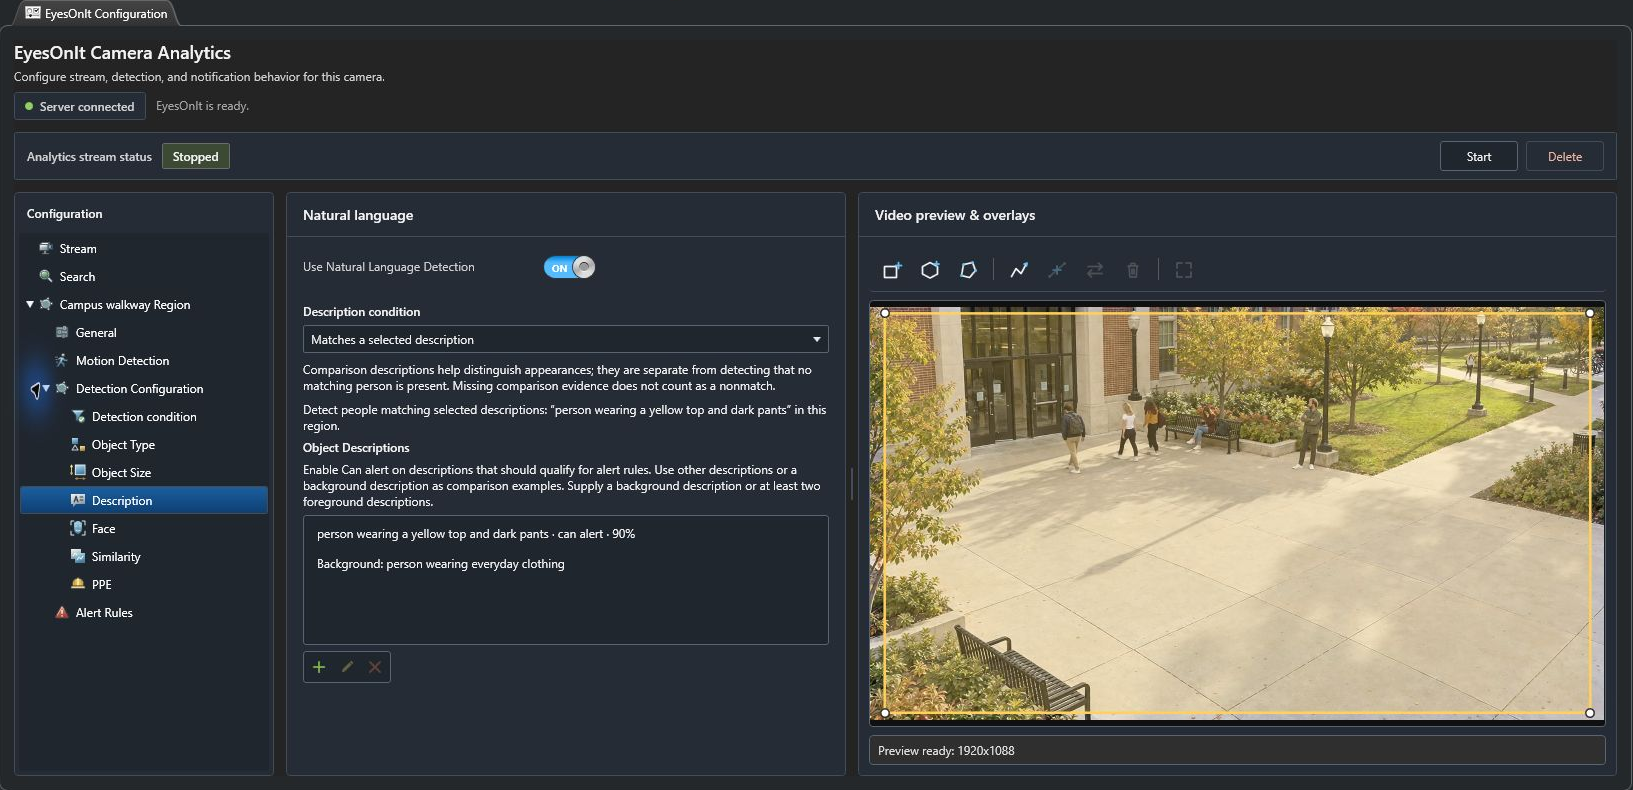
- Under Detection Configuration → Object Type, enable object detection, choose person, and use 50 for the initial Object Detection Threshold.
- Open Object Size. For the matching 1080p plaza source, the campus example uses 100–1080 px. Check those limits against the preview.
- Open Description and turn Use Natural Language Detection on.
- Double-click the blank row created under Object Descriptions when detection is enabled, or choose + if no row is present. Enter the target in Object Description, leave Background Description off, and enable Can alert.
- Set Match Threshold, then choose Save. The illustrated test uses 90; tune this value against your own footage.
- Add one broad comparison: person wearing everyday clothing. Enable Background Description and leave Can alert off, then Save. This supplies the background required by the current native editor for a single target.
- Set Description condition to Matches a selected description. Open Detection condition, choose At least one matching object is detected, and read the summary.
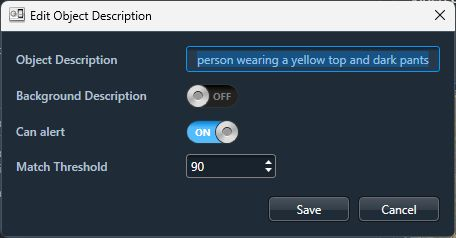
The background is a general comparison for scoring. Only the yellow-top description qualifies for alerts. The same broad comparison remains useful as new people appear.
3. Test and refine the description
Section titled “3. Test and refine the description”Test video containing the target and video containing ordinary activity without the target. Review the highlighted person and surrounding footage. Check different distances, viewing angles, lighting, and times of day that matter to your operation.
Refine the target wording and Match Threshold if needed. Keep the background broad. For a recurring unwanted match, an optional comparison can describe a general alternative appearance with Can alert off. The main workflow still has one alerting target.
4. Create the alert rule
Section titled “4. Create the alert rule”In Alert Rules, add a Detection condition rule named Person wearing a yellow top. The sample uses 1 second dwell, 5 seconds reset, Always active hours, and a severity that fits your procedure. The walkthrough keeps the default Warning severity; Review is another option for an initial test. Choose timing and hours that fit your procedure.
Save the rule, apply the camera configuration, and start analytics. Check the annotated preview and resulting incidents. Keep optional event delivery off during initial tuning.
To investigate appearances across cameras, use Search video.