
Choose object types and tune filters
Focus a detection on the objects that matter. Combine object type, confidence, and size to pick out people in a work area or vehicles near an entrance.
Watch the walkthrough
Section titled “Watch the walkthrough”Choose the object type
Section titled “Choose the object type”Open Monitor → Configure, select the region, then select its configuration under Detection. Turn on Use object type and choose Person, Vehicle, or the combination your task needs. Give the configuration a name that describes its purpose.
Start with Minimum object type confidence at 0.5. Raise it to require a stronger object classification; lower it when representative objects need a more inclusive threshold. Check the result across the lighting and distances your camera will see.
Set a useful size range
Section titled “Set a useful size range”- Turn on Use object size.
- Set the minimum and maximum size in pixels. The example uses a minimum of 140 px and a maximum around 900 px to focus on people in the nearer part of the walkway.
- Compare the MIN and MAX guides with people in the preview. Move the guides over the area you want to inspect.
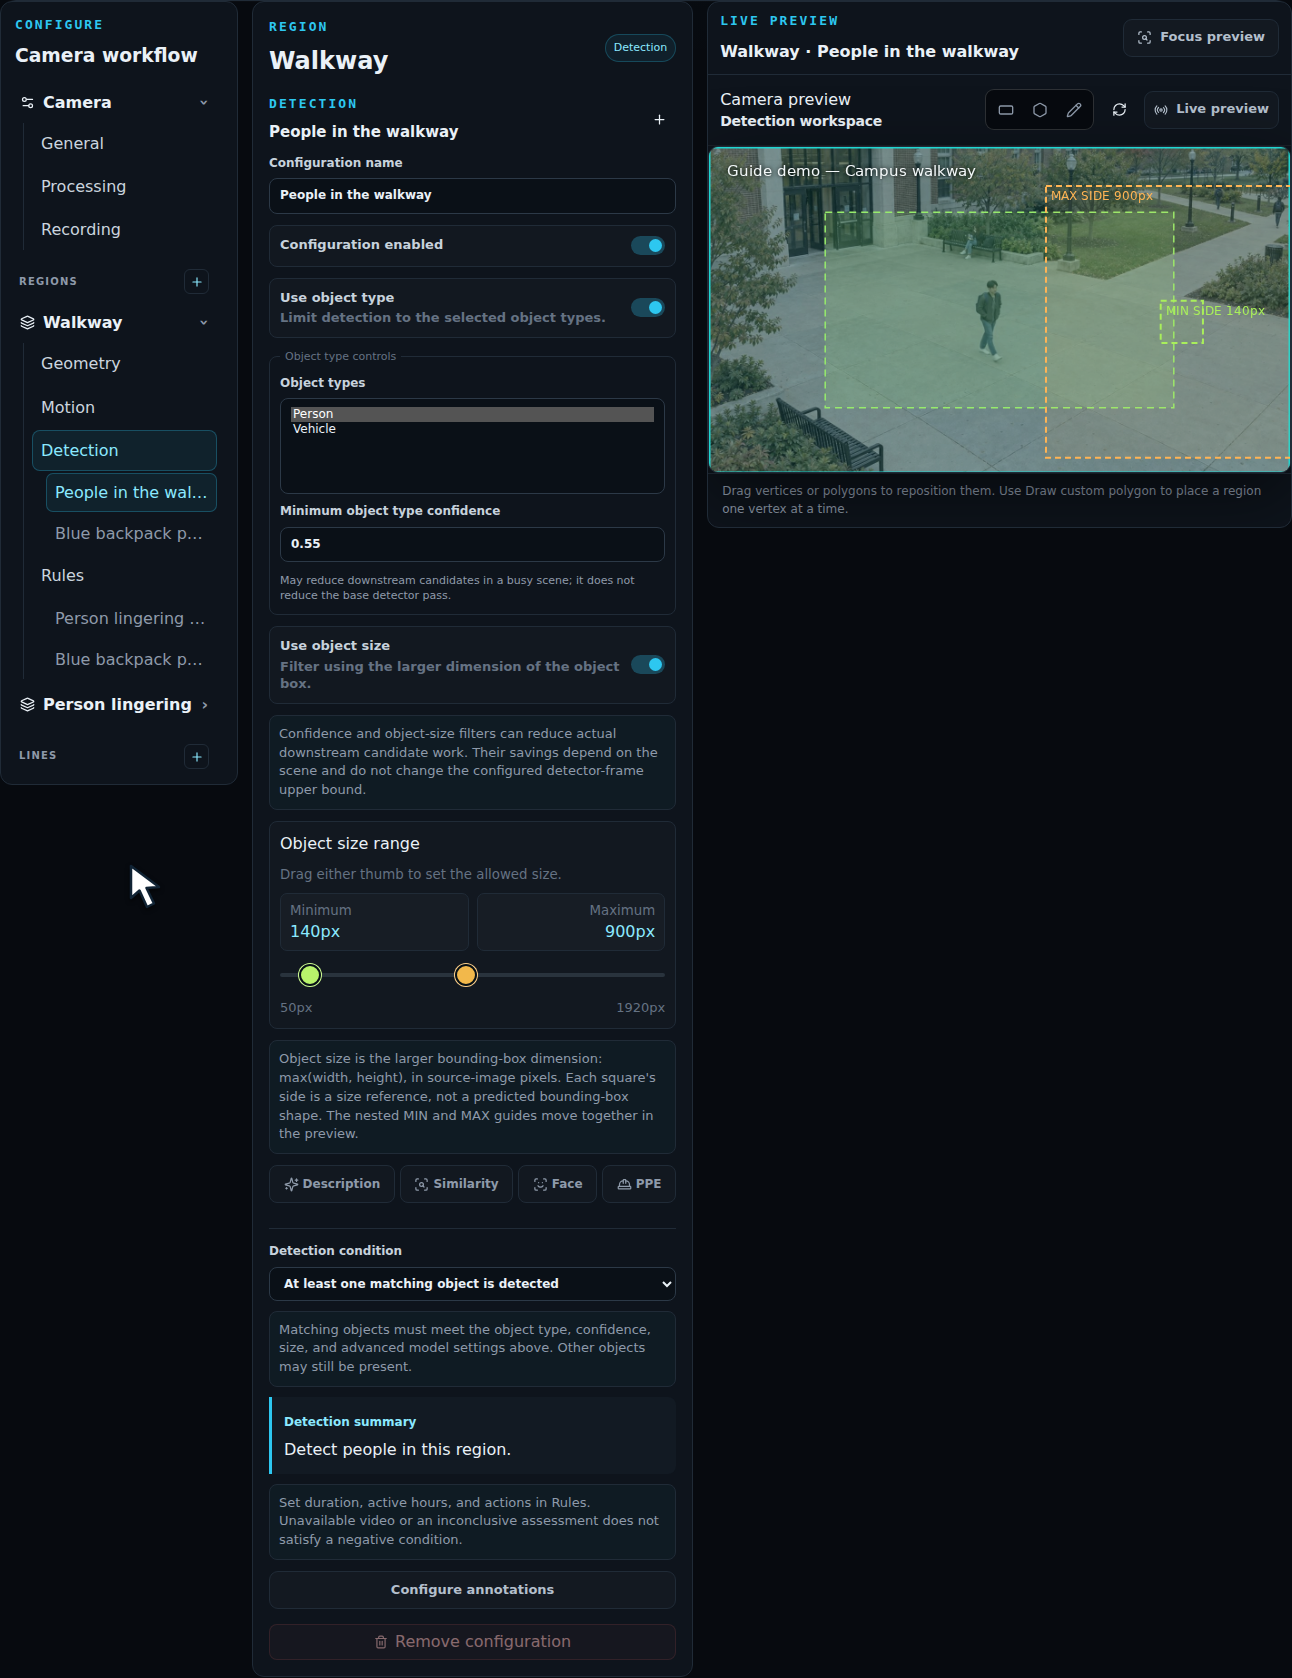
Size means the larger side of the detected box: max(width, height) in source-image pixels. The square guides show that dimension. Choose a range that includes the people or vehicles you want throughout the region.
Save and check the result
Section titled “Save and check the result”Choose Save configuration, then watch representative video. Check near and far objects, brief occlusion, and changes in lighting. Adjust one setting at a time so the effect is clear. Recheck pixel sizes after changing the source resolution.
All selected filters work together. Add a description, PPE condition, or reference image when the task needs more detail. Set incident timing and actions in Rules.