
Define regions and lines
Tell EyesOnIt where to look. Use a region for activity within an area and a line for movement across a boundary.
Before you start
Section titled “Before you start”Open a camera in Monitor, verify its view, and choose Configure. Use an account with analytics configuration access for that camera.
| Use | For example |
|---|---|
| Region | People in a work area, missing PPE at a bench, or an unattended zone. |
| Line | A person crossing a doorway, entrance, or walkway boundary. |
Start with geometry that covers the activity clearly. Leave room for people in the positions and directions you expect.
Watch the walkthrough
Section titled “Watch the walkthrough”Follow this captioned EyesOnIt web UI walkthrough, or use the written steps below.
1. Draw a region
Section titled “1. Draw a region”- In the camera workflow, choose the + beside Regions.
- Choose Rectangle, Polygon, or Draw custom polygon.
- For a rectangle or polygon, drag across the preview to establish its bounds. For a custom polygon, place its vertices on the image.
- Open the region’s Geometry settings and enter a descriptive Layer name, such as Work area. Keep Layer enabled on.
- Drag the vertices to refine the boundary. Drag the polygon to reposition it.
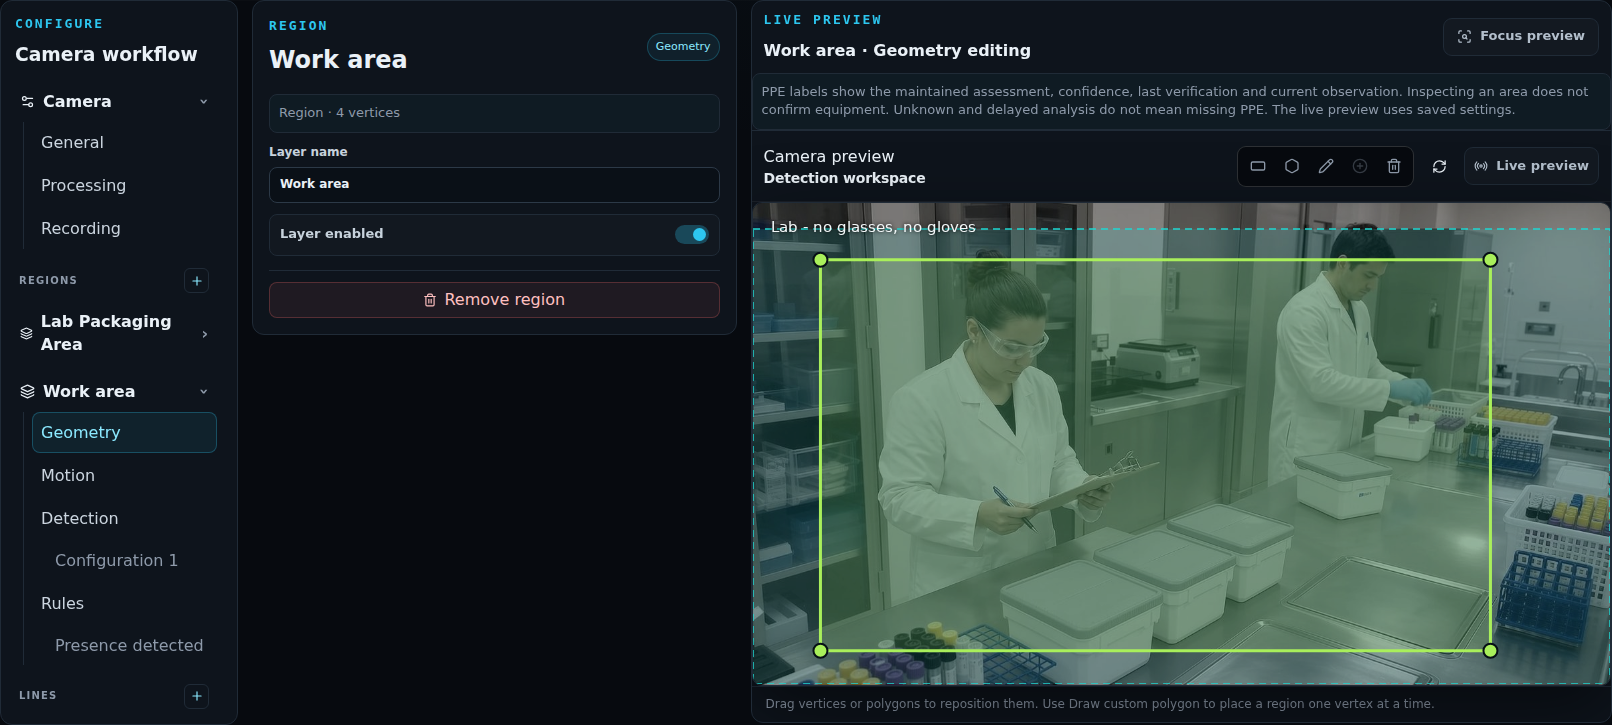
For detections of people, the center of the person’s detected box determines region membership. Check the edge with people in representative working positions, including seated positions where relevant.
Choose when the region is checked
Section titled “Choose when the region is checked”Open Motion for the region. Perform object detection only when motion detected controls motion-based admission. For an initial test, turn it off to keep object detection available continuously. You can enable it after testing when motion-based checks suit the scene.
Open Detection to choose which people or objects qualify. Open Rules to set timing and actions. Create a detection and incident rule walks through both.
2. Add a crossing line
Section titled “2. Add a crossing line”- Select the region that will supply the line’s detections.
- Choose the + beside Lines.
- Under the new line’s Geometry, enter a name such as Loading bay entrance.
- Drag its two endpoints into position across the intended path of travel.
- Open Linked region and check Detection region. Choose the region containing the people or objects you want to count as crossings.
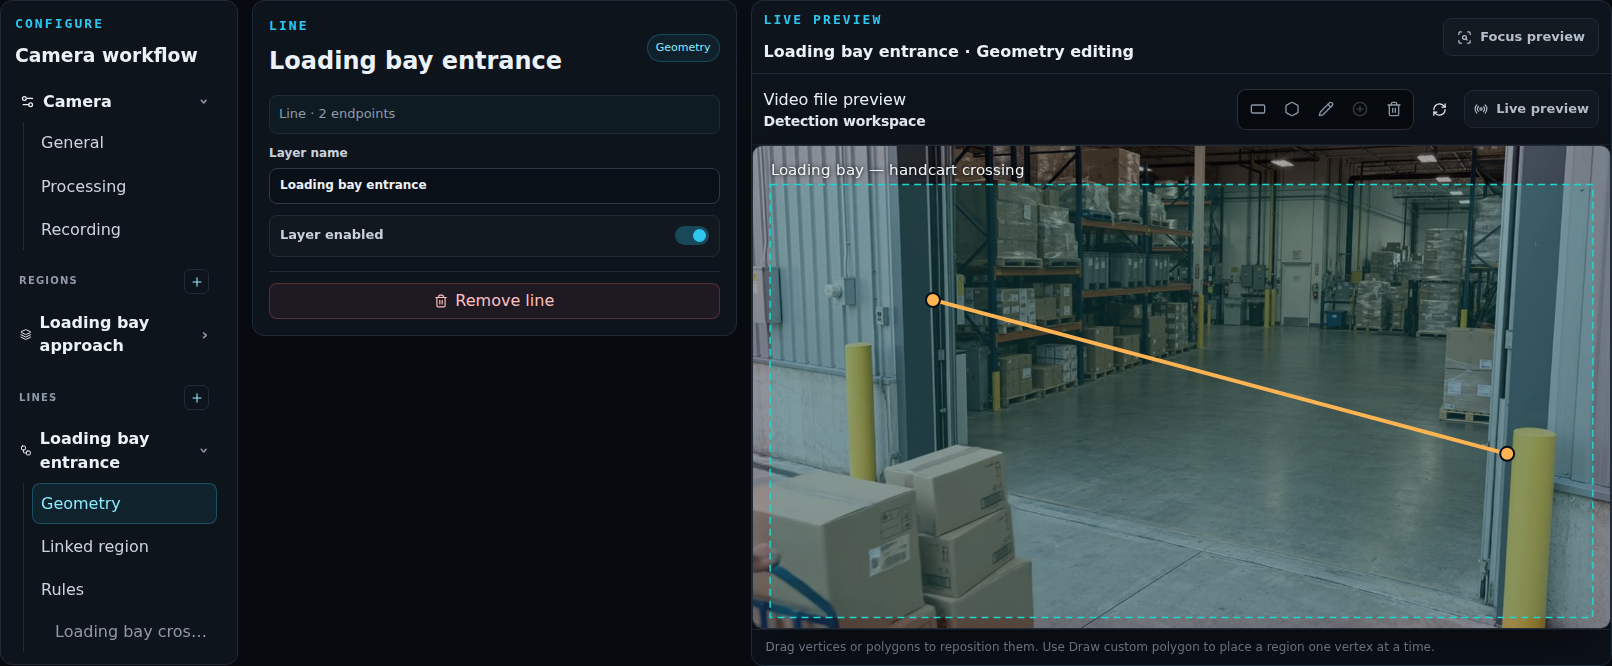
EyesOnIt detects a crossing when the center of a matching object’s tracked box moves across the line segment. Place the line where those centers will pass. In an angled view, the line may sit above the doorway’s floor edge in the image.
Open the line’s Rules and select the appropriate Detection configuration. Use Either direction for a first crossing test. For one-way monitoring, choose Positive or Negative and verify the intended direction with a test crossing. Cooldown (s) controls repeat crossing triggers.
3. Save and check the result
Section titled “3. Save and check the result”Choose Save configuration and confirm the save succeeds. Start monitoring if needed, then test positions near region boundaries and movement across lines in both directions.
Check that the intended region, detection configuration, and rule are enabled. For a crossing rule, use a configuration that detects matching objects present in the region.
Example: people crossing a loading bay
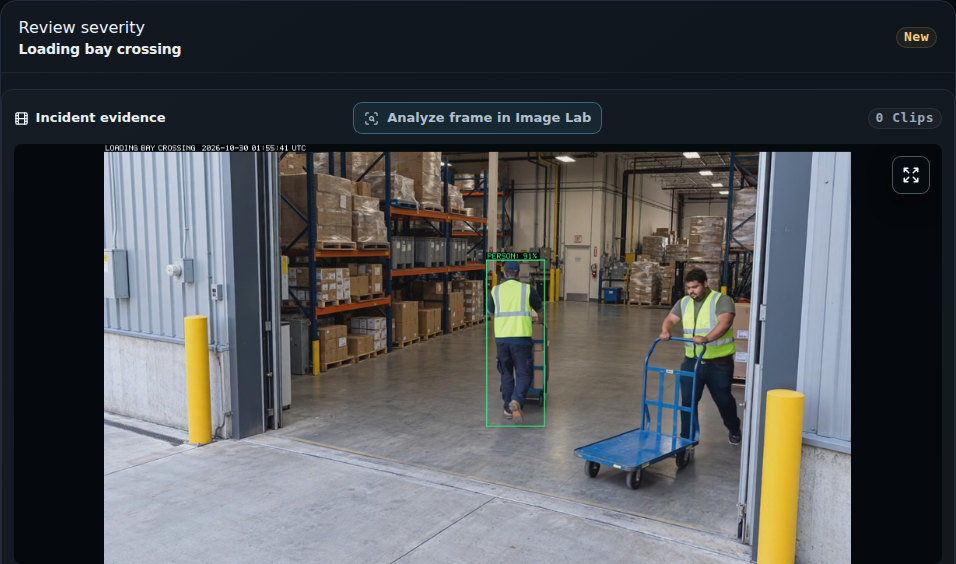
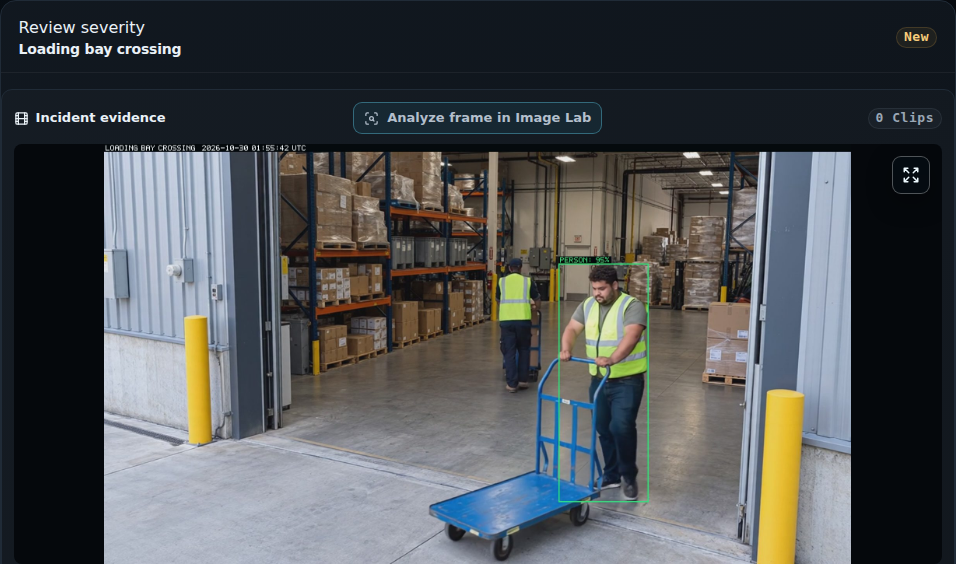
Section titled “Example: people crossing a loading bay”One worker pushes a loaded handcart into the warehouse. A second worker brings an empty cart out. Use a Person configuration to create an incident for each person crossing the entrance.
- Draw Loading bay approach around the entrance and the approach on each side.
- Under Detection, name the configuration People at the loading bay. Select Person, use Minimum object type confidence of 0.5, and turn Use object size off for the initial test. Set Detection condition to At least one matching object is detected.
- Keep motion-based admission off for this test. If the region has a separate presence rule, remove it when you want incidents only for crossings.
- Add Loading bay entrance, position its endpoints as shown above, and link it to Loading bay approach.
- Name the line rule Loading bay crossing and use these settings:
| Control | Setting |
|---|---|
| Detection configuration | People at the loading bay |
| Direction | Either direction |
| Cooldown (s) | 2 |
| Severity | Review |
| Schedule | Always |
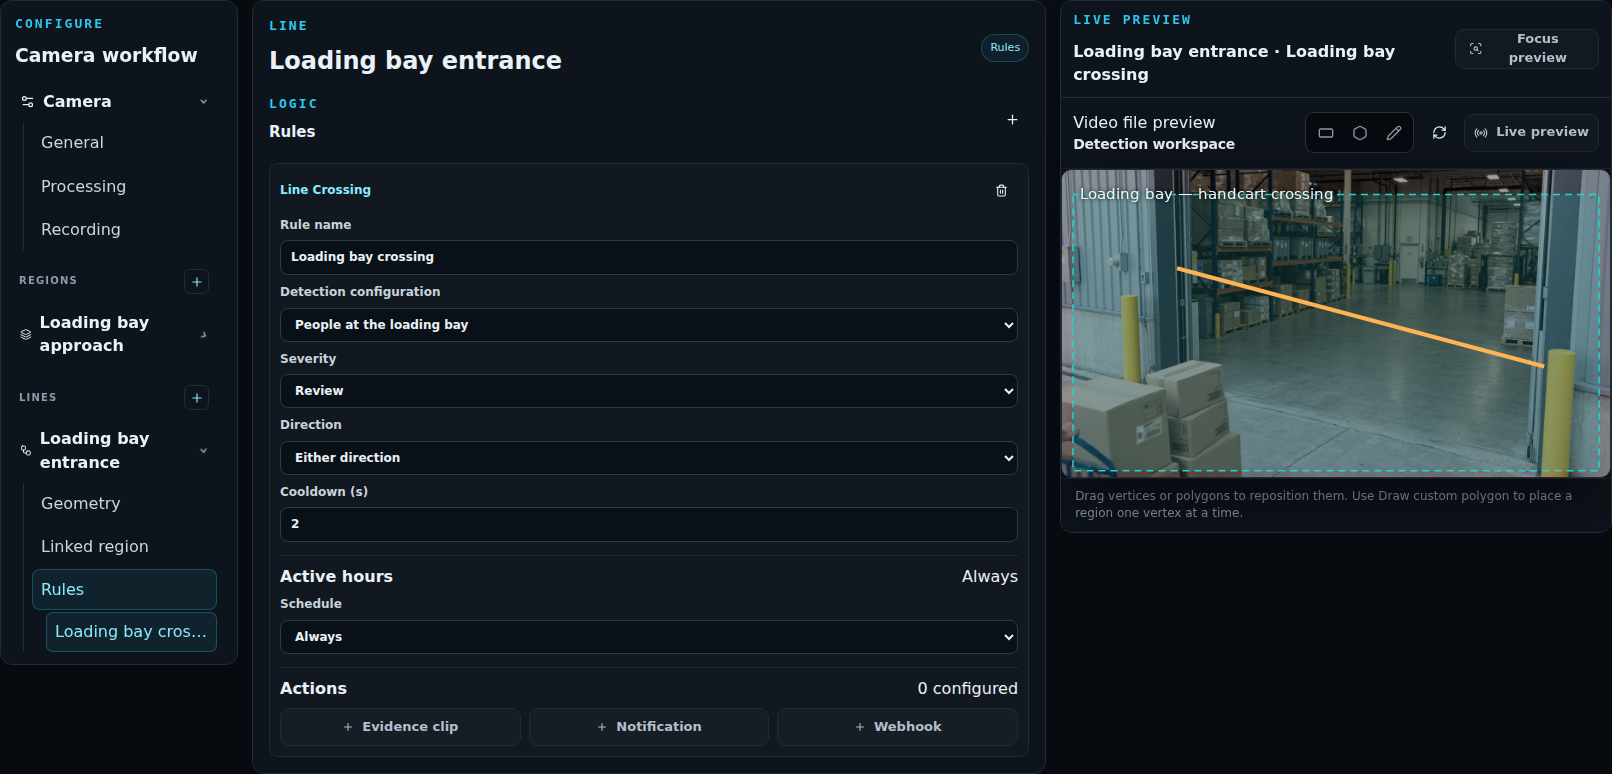
Save the configuration and choose Start in Monitor. For a completed video file, choose Run again. In this example, EyesOnIt created two Loading bay crossing incidents, one for each worker. Open Incidents and use Camera scope to select the source.
To notify your team or retain video around a crossing, add notifications and evidence.
Continue with Create a detection and incident rule to define the condition and its actions.