
Review and resolve incidents
Turn an alert into a clear record of what happened and how your team handled it. Review the evidence, take ownership, and record the outcome.
Before you start
Section titled “Before you start”Choose the workspace containing the incident’s camera. Your account needs incident access for that camera; ownership, disposition, and media actions depend on your permissions.
An incident’s review status tracks your team’s work. Its occurrence times track the detected activity. Review remains available after the detection condition ends.
Watch the walkthrough
Section titled “Watch the walkthrough”Follow this captioned EyesOnIt web UI walkthrough, or use the written steps below.
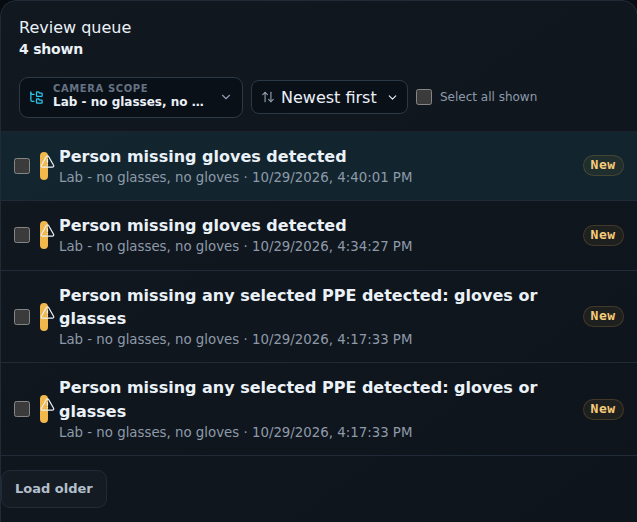
1. Find the incident
Section titled “1. Find the incident”- Open Incidents. Start with Open to review outstanding work, or choose All to include completed reviews.
- Use Camera scope to select the relevant cameras. Search by name or browse the saved folders, then choose Apply.
- Choose a severity filter when needed. Sort by Newest first, Oldest first, or Highest severity.
- Select the incident using its rule name, camera, and occurrence time. Use Load older to continue through earlier records.
2. Inspect the evidence
Section titled “2. Inspect the evidence”Check the rule name, camera, start time, and last-seen time against the activity you are investigating. Open the retained snapshot and any available clips. Use View in archive when offered to examine the surrounding camera history.
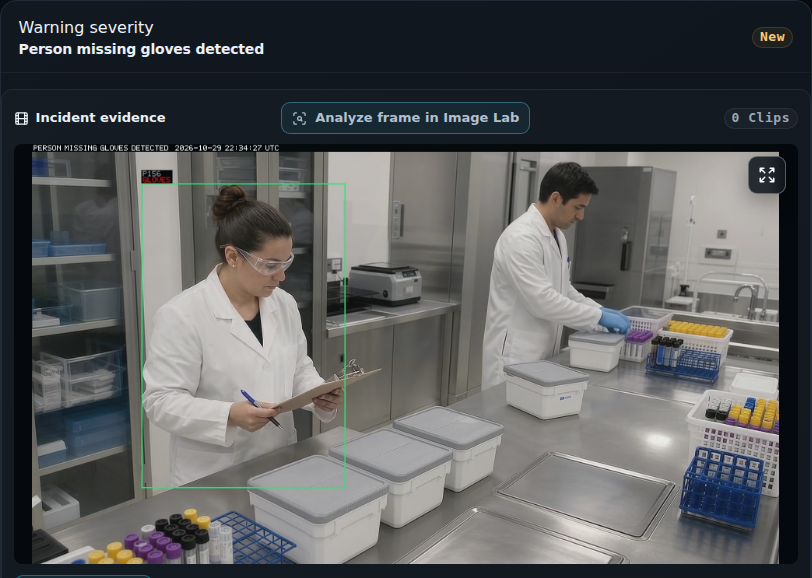
For a PPE incident, inspect the relevant equipment and body area. For a presence or crossing incident, check the person’s location and movement against the intended region or line.
3. Take ownership and add context
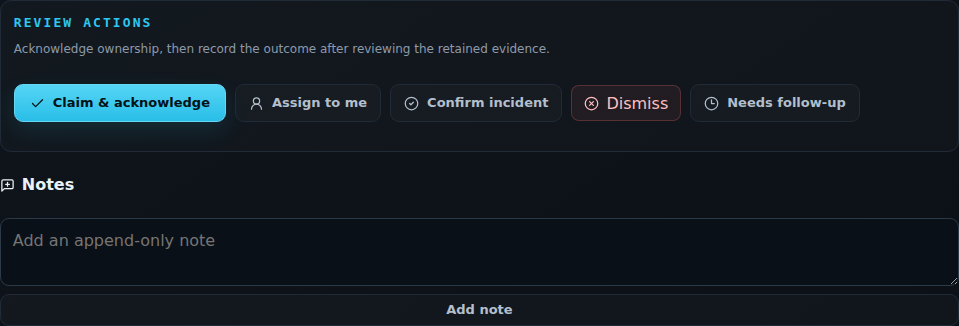
Section titled “3. Take ownership and add context”Choose Claim & acknowledge for a new incident to record that you are handling it. Assign to me records assignment when appropriate. Acknowledgment records responsibility; confirmation records the review outcome.
Use Add note to record useful facts: what you observed, the action taken, and any follow-up required. Notes are appended to the record, so keep them clear and factual.
4. Record the outcome
Section titled “4. Record the outcome”| Choose | When to use it |
|---|---|
| Confirm incident | The evidence supports the condition the rule detected. Confirm the action in the dialog. |
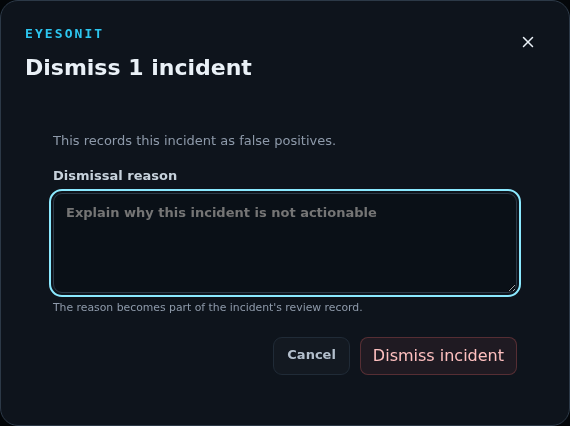
| Dismiss | The event is a false positive. Enter a Dismissal reason and confirm. |
| Needs follow-up | More investigation or action is required. Add a note explaining the next step. |
After saving, check the status and Immutable history. The history records changes and their actors/times so your team can follow the review.
Keep the queue useful
Section titled “Keep the queue useful”Use Acknowledged and Needs follow-up to return to work in progress. Confirmed and Dismissed let you review completed decisions.
To handle several incidents together, select their checkboxes and use the bulk actions. Review the selection before confirming; a bulk dismissal applies the same reason to the selected incidents.
If a recurring pattern needs a rule adjustment, record the observation and review the detection condition and timing. Check notifications and evidence when your team needs a different delivery destination or video context.