
Search video with a natural-language description
Find relevant video by describing what you saw. This example searches campus views for a person wearing a dark gray jacket and carrying a blue backpack, then uses the description to watch for new appearances.
Choose archive or live search
Section titled “Choose archive or live search”Open Search in the EyesOnIt web UI. Your account determines the cameras and search methods available.
| Choose | To do this |
|---|---|
| Archive | Find matching appearances in indexed camera history. |
| Live | Watch selected cameras for new matches during a chosen period. |
To create incidents in a camera region, use natural-language detection.
Prepare searchable video
Section titled “Prepare searchable video”For natural-language archive search, enable indexing on each camera you want to include:
- In Monitor, select the camera and choose Configure.
- Open Camera → Processing. Turn on Enable archive search and Descriptions and visual similarity.
- For surrounding video playback, open Camera → Recording and enable Continuous recording. Choose the retention period for your investigation needs.
- Choose Save configuration and start monitoring. EyesOnIt builds searchable history as video is analyzed.
For a video-file source, run the clip with these settings enabled. Search the time range under which EyesOnIt processed the footage. Existing indexed history can be searched directly.
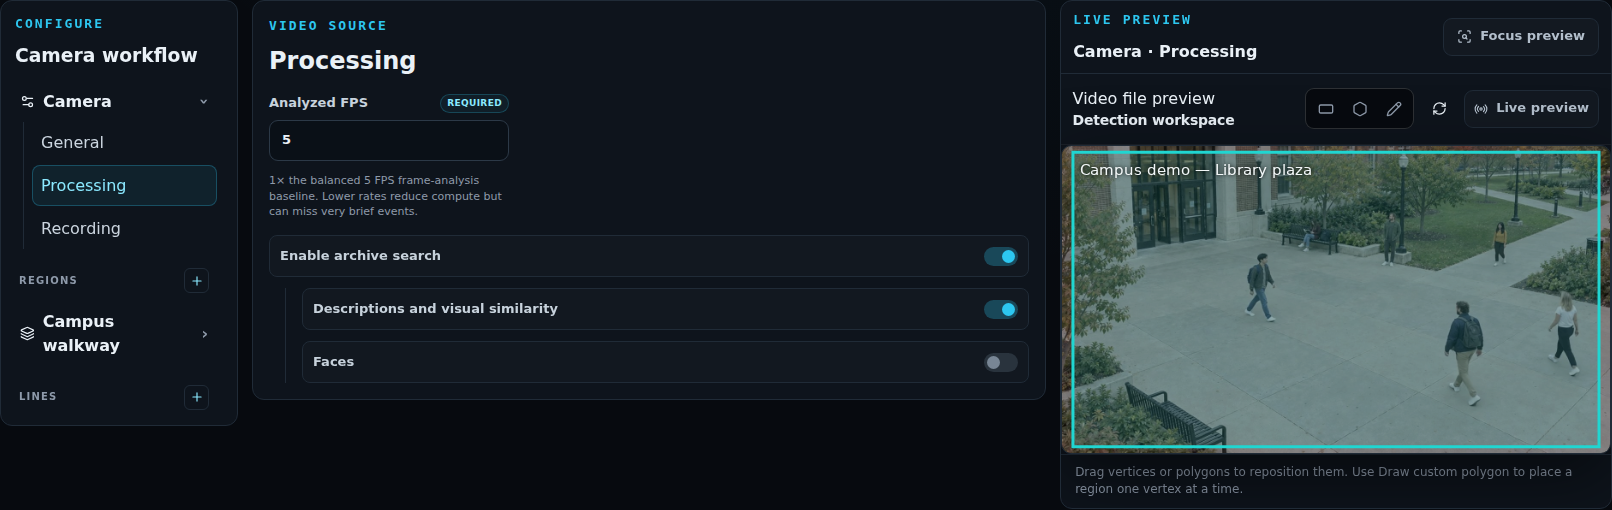
Indexing provides searchable observations; recording provides the surrounding video for Open playback. Recording and evidence settings explains continuous recording.
Watch the walkthrough
Section titled “Watch the walkthrough”Follow this captioned EyesOnIt web UI walkthrough, or use the written steps below.
1. Search the campus archive
Section titled “1. Search the campus archive”-
Open Search → Archive and select Description.
-
Paste this into Search description:
man with short black hair wearing an unzipped dark gray jacket over a gray t-shirt, blue jeans and white shoes, carrying a blue backpack
-
Under Cameras, open Camera scope and choose the campus views you want to investigate. Select Apply.
-
Choose Time range and enter Start time and End time around the event. Use Recent for a period leading up to now, or All time to search all available indexed history in those cameras.
-
Choose Search archive. Results appear as the search progresses.
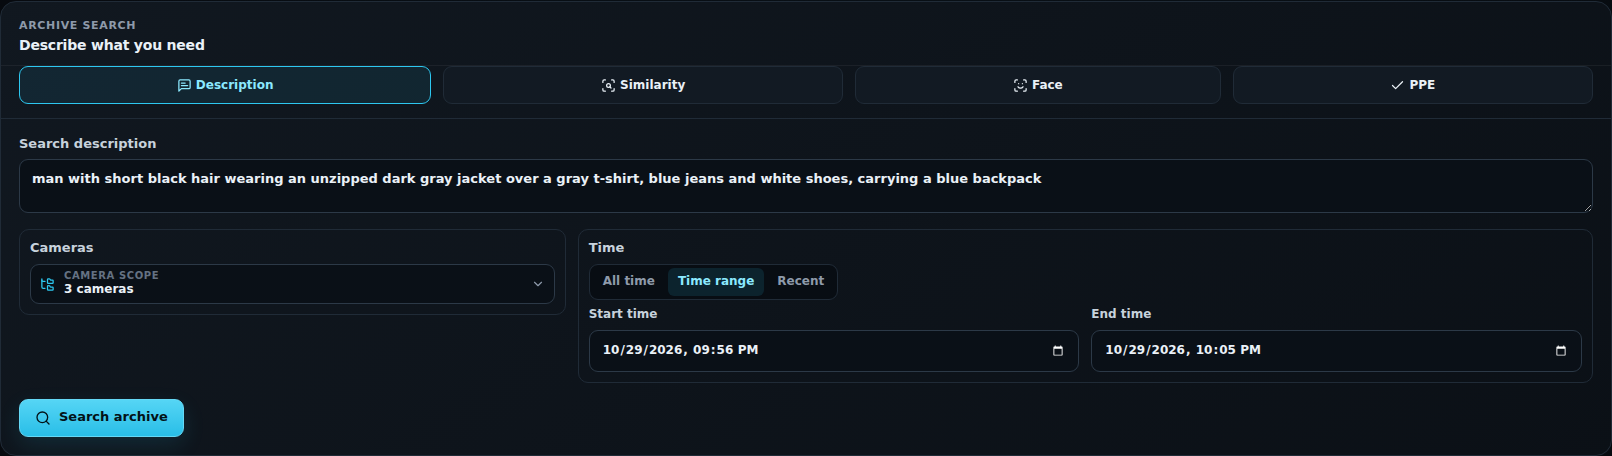
Keep the first search focused on the person’s appearance. Camera selection and time controls handle where and when to look.
2. Review matches and open the video
Section titled “2. Review matches and open the video”Start with Best match to inspect the strongest candidates. Click a thumbnail to enlarge it, then compare the jacket, shirt, jeans, shoes, and backpack with your description.
| Control | Use it to |
|---|---|
| All matches | Review the full returned set. |
| Likely & strong or Strong only | Focus on higher-scoring candidates. |
| Oldest first or Newest first | Review the returned appearances in time order. |
| Open playback | Open that camera’s Archive view at the result time. |
Match quality helps prioritize review. Confirm the person’s appearance in the image and surrounding video as you move between cameras.
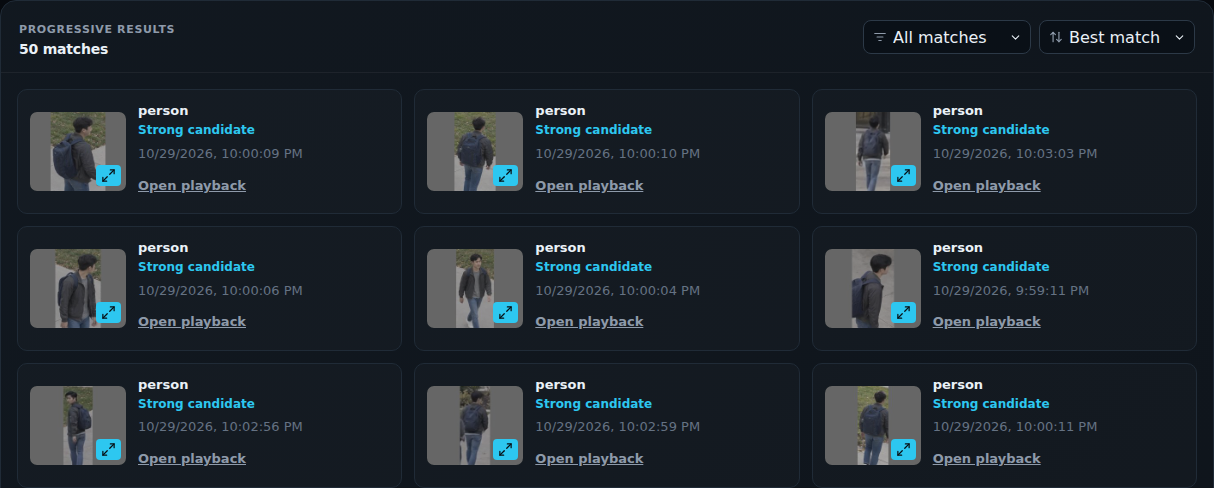
Use Archive searches to reopen a previous search. To refine the investigation, adjust the description, cameras, or time period and run another search.
3. Watch for new appearances
Section titled “3. Watch for new appearances”- In Search, choose Live → Description.
- Enter the same Search description and select the campus cameras to watch. Have those video sources running during the search.
- Set Duration (seconds) for the watch period.
- Start with the displayed Alert threshold, then tune it using representative matches. Alert cooldown (seconds) controls repeat alerts for the same tracked object.
- Choose Start live search and check its status. Ready for matches means search processing is configured; matching uses the available camera video.
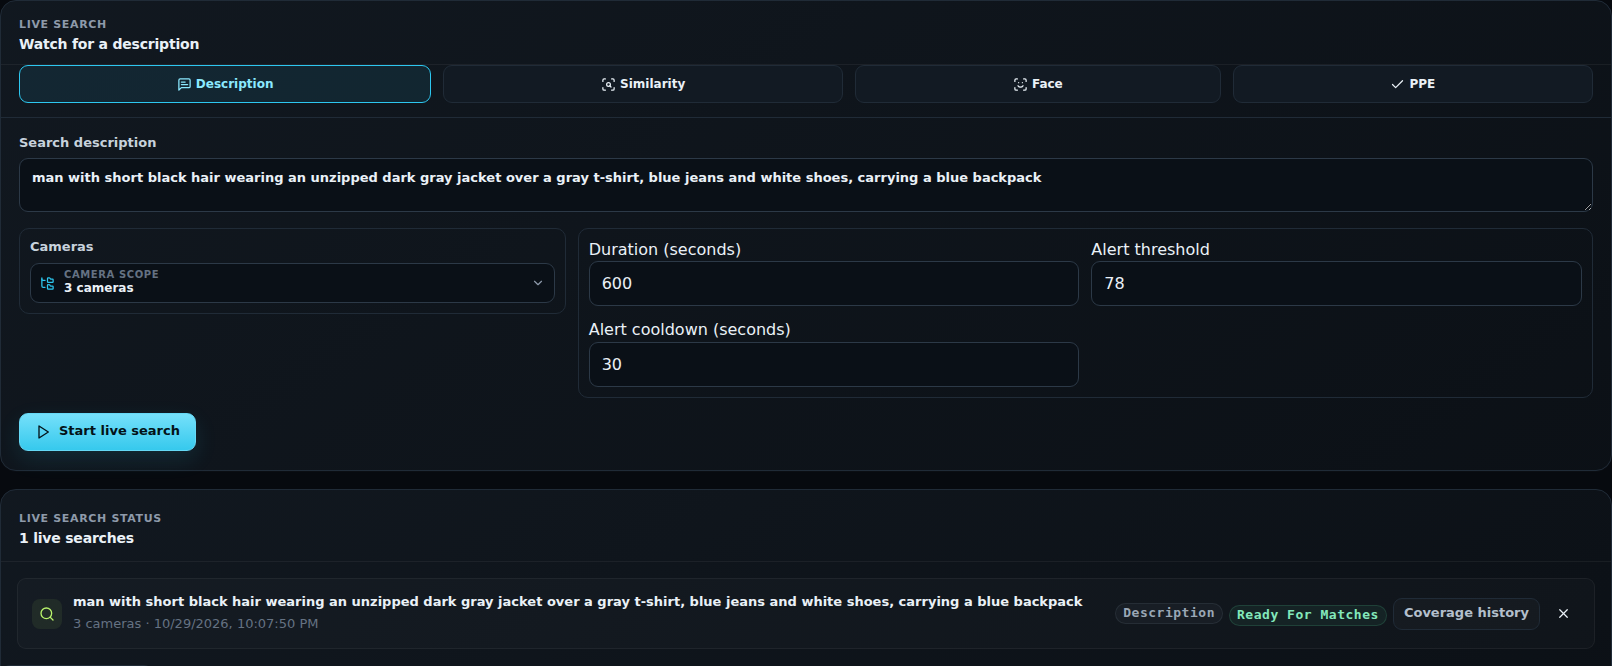
Open Overview → Live search results to review recent matches from active searches. The cards show the camera, capture time, image, and match score.
Return to Search → Live to check the session or use its X control to cancel it. Coverage history provides processing and monitoring history for the search, with Download CSV for the selected date range.
Choose another search method
Section titled “Choose another search method”The same search workspace also offers:
| Method | Starting point |
|---|---|
| Similarity | A JPEG or PNG reference for archive search; a previous archive result as the visual example for live search. |
| Face | An enrolled person or identity group. |
| PPE | Selected equipment and a wearing or missing condition. |
Use Description when a written description is your starting point. Use a saved detection rule when the task calls for a camera region, incident timing, and notification or evidence actions.